

.png)

RockJock4X4 Currectlync Heavy Duty Steering System
The Info:
This week we’ll be upgrading our 2000 TJ’s steering to Currie’s RockJock4X4 Currectlync system. The first thing you notice
when you take them out of the box is that they’re almost twice as thick as the stock components, heavy duty is a bit of an understatement.
The Currie system is already loved among the off-road
community, and we’re excited to add it to one of our
project vehicles.
Don’t want to read about the install? Skip to the review
Dirt Road was not paid in any way for this review, we
chose this upgrade for our Jeep based on our own needs
and wants, and bought the kit entirely ourselves.
Why Upgrade?
The Jeep’s steering system ball joints were shot, and our alignment never stayed very aligned for long, so we decided to get our first “Bulletproofing” upgrade. Other than maintenance, if you do a lot of heavy rock crawling, it might be worth it for you to upgrade to a system that can take a few impacts. If you’re running a very over-sized wheel/tire combo, an upgraded steering system can help support that too. Well made steering upgrades can also help add a bit of rigidity to the feeling of the Jeep on and off road. Whatever your reason is, upgraded steering is a great addition to any Jeep. This upgrade is certainly nice to have, but it's not really needed unless you have quite large tires and are running some pretty difficult trails, it's admittedly overkill for our setup with 31" tires, but we have plans to upgrade in the future. If you're running a mostly stock setup with no plans to change and don't particularly care if your steering system is the strongest around, then you might consider saving a few bucks and getting something else.
What Upgrade?
While Currie offers our choice for best TJ steering kit,
swapping to a ZJ tie rod can be a great way to make your
steering a bit more rock resistant on the cheap. In this
case though, we decided to pay for quality and upgrade
the whole system at the same time.
We recommend staying away from crossover style steering
kits, they may seem like a cheap upgrade, but they offer
very few benefits compared to the stock style steering
system and can mess with your steering geometry. There are other great kit choices too, but this
was the best one for our TJ.
The Overview:
Your install might be different than ours, we have to do a little bit of extra swapping out to do, due to an unnecessary dropped pitman arm from our lift kit (Have a dropped pitman arm? Chances are unless your TJ is lifted more than normal you shouldn't! Lifts below ~5" should usually keep the stock pitman arm!), but in general we followed Currie’s instructions, which you can find here:
(Detailed Instructions From Currie)
(Basic Instructions From Quadratec)
This article is meant to show an overview of the
installation process, not to be used as a guide. Always
follow the manufacturer’s directions.
You are going to want to have the Jeep professionally
aligned after this upgrade has been completed.
This install was done without lifting the Jeep at all,
but we did chock both of the front tires before we began
to prevent them from rotating and throwing off our
alignment even more.
Let's get started.
The Tools We Used:
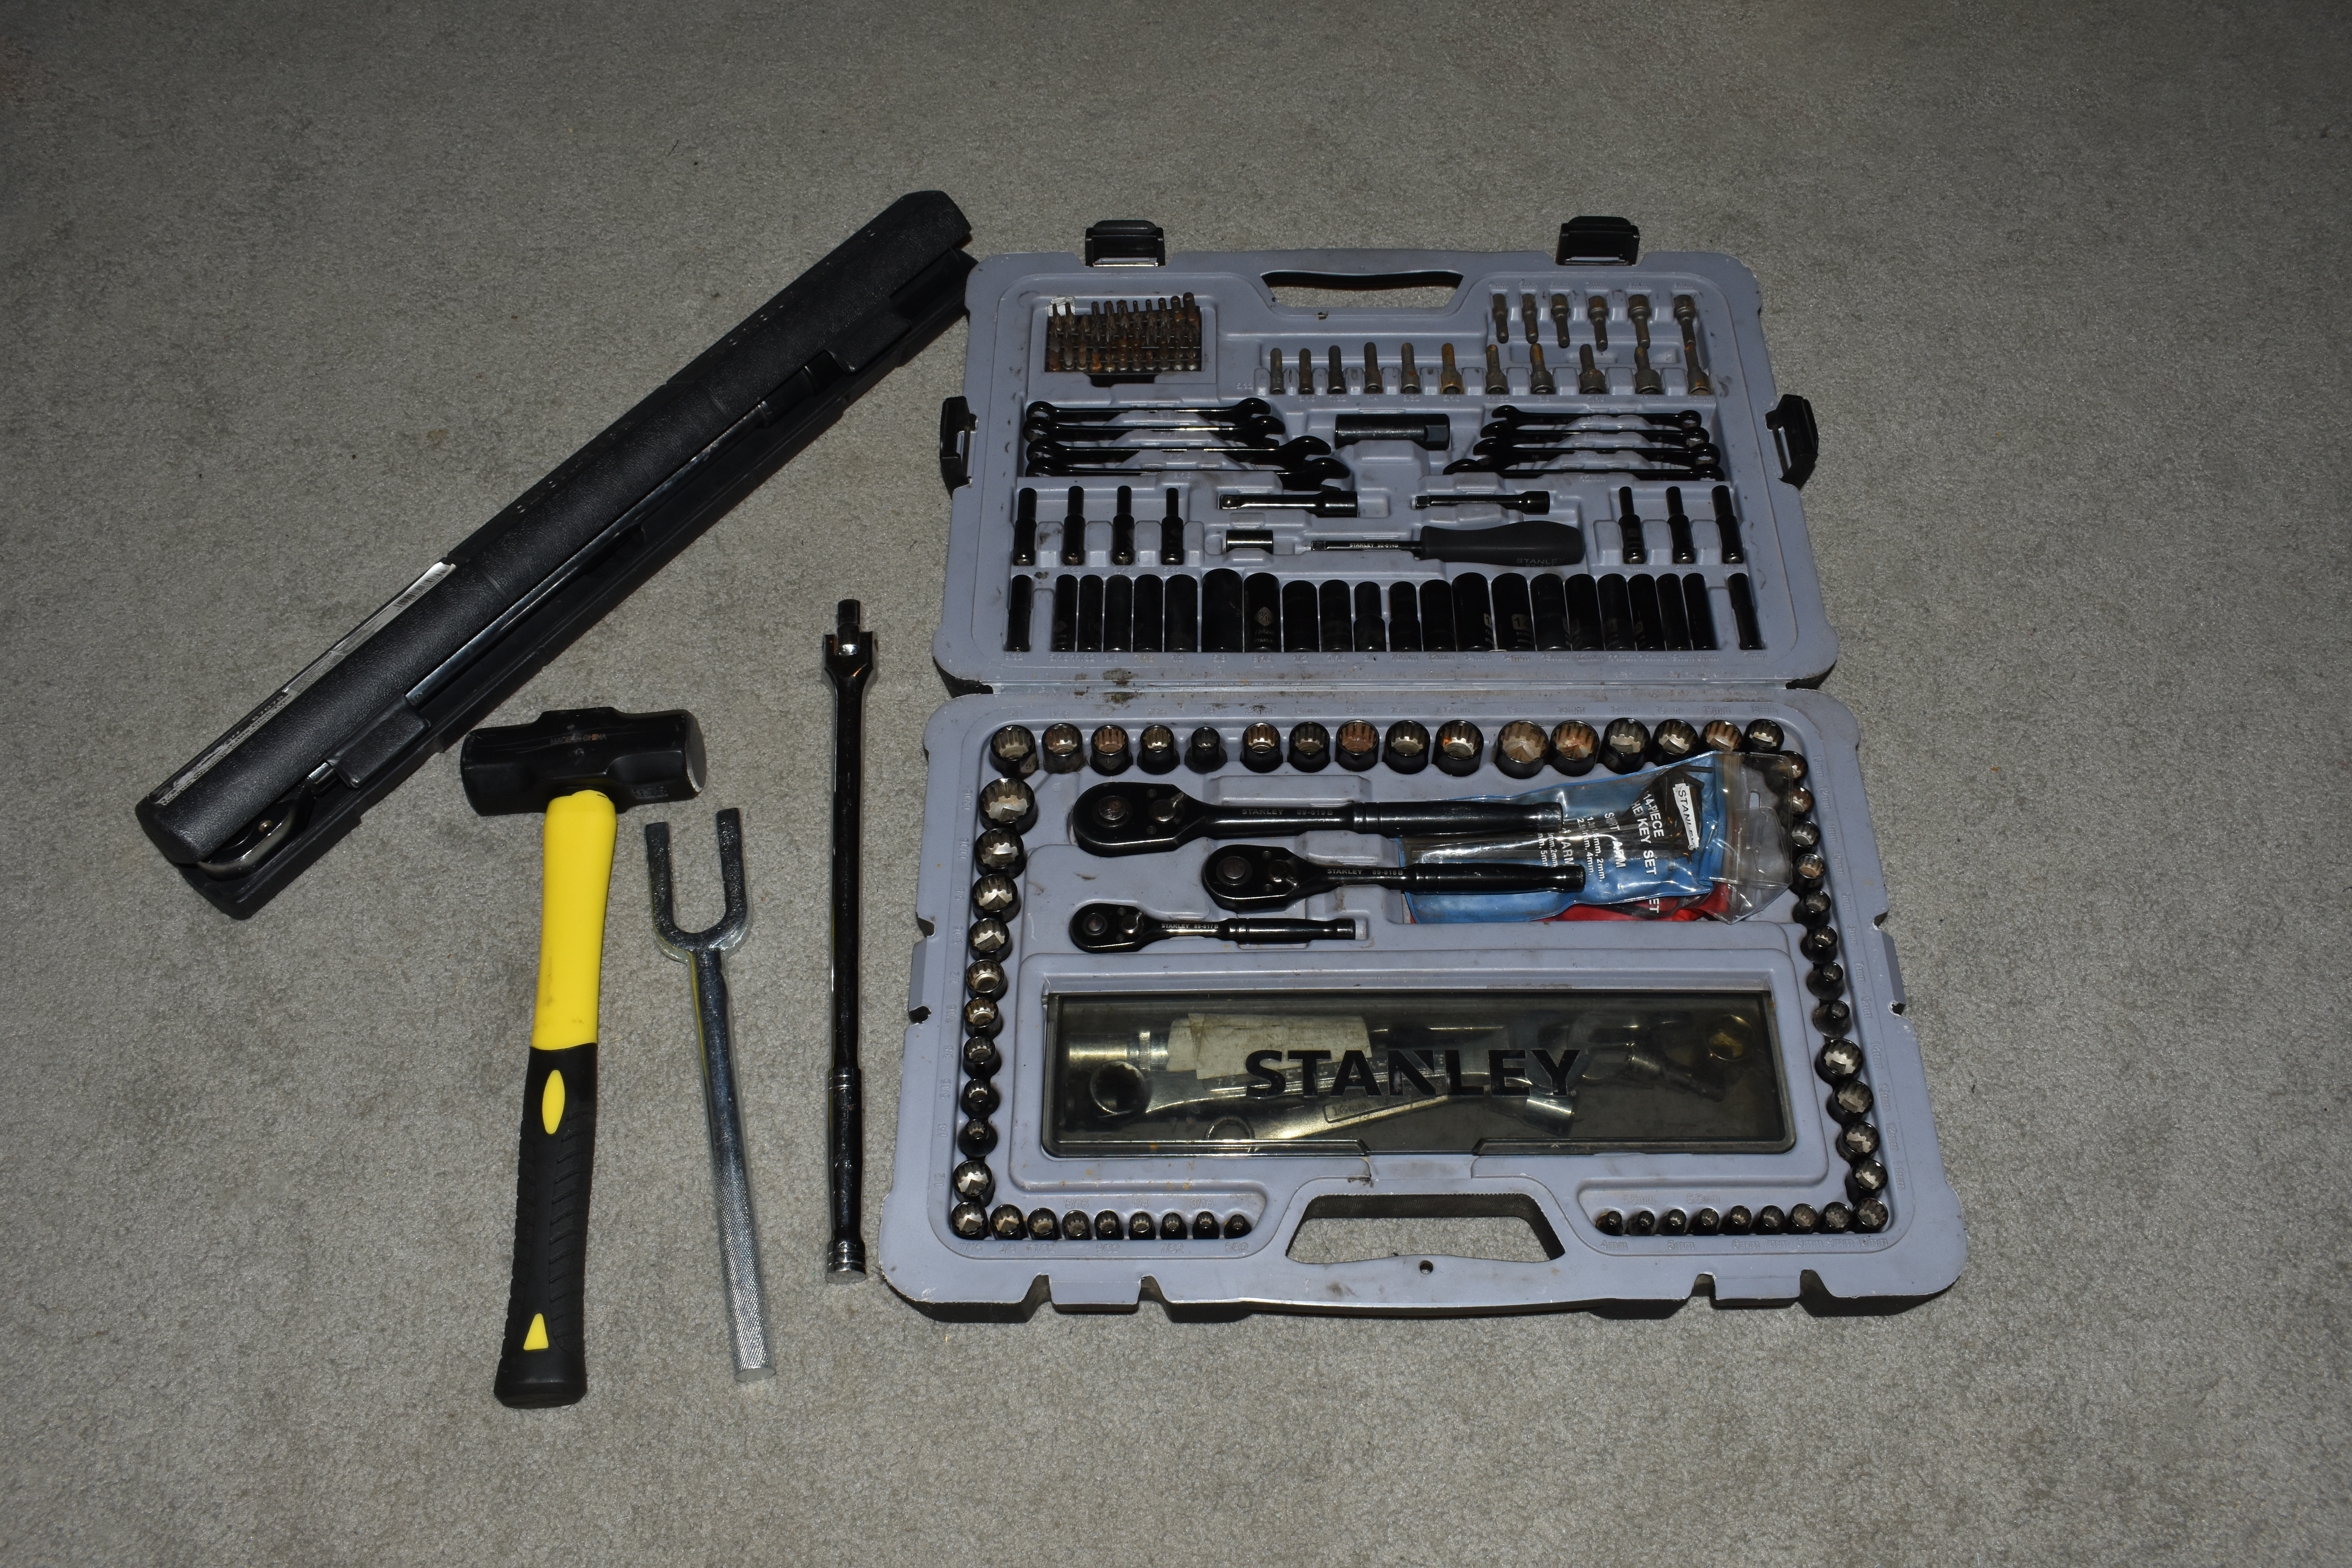
We didn’t need much more than our standard hand tools for this one. A ball joint separator of some kind and a torque wrench are
needed. You may need a low pressure hand pump grease gun as well. A pair of needle nose pliers, and a breaker bar are recommended,
especially if you’re swapping your pitman arm too. You can of course use power tools where applicable, we just like to do things by hand.
If you use a pickle fork like we did, take care not to
damage the surfaces or components.
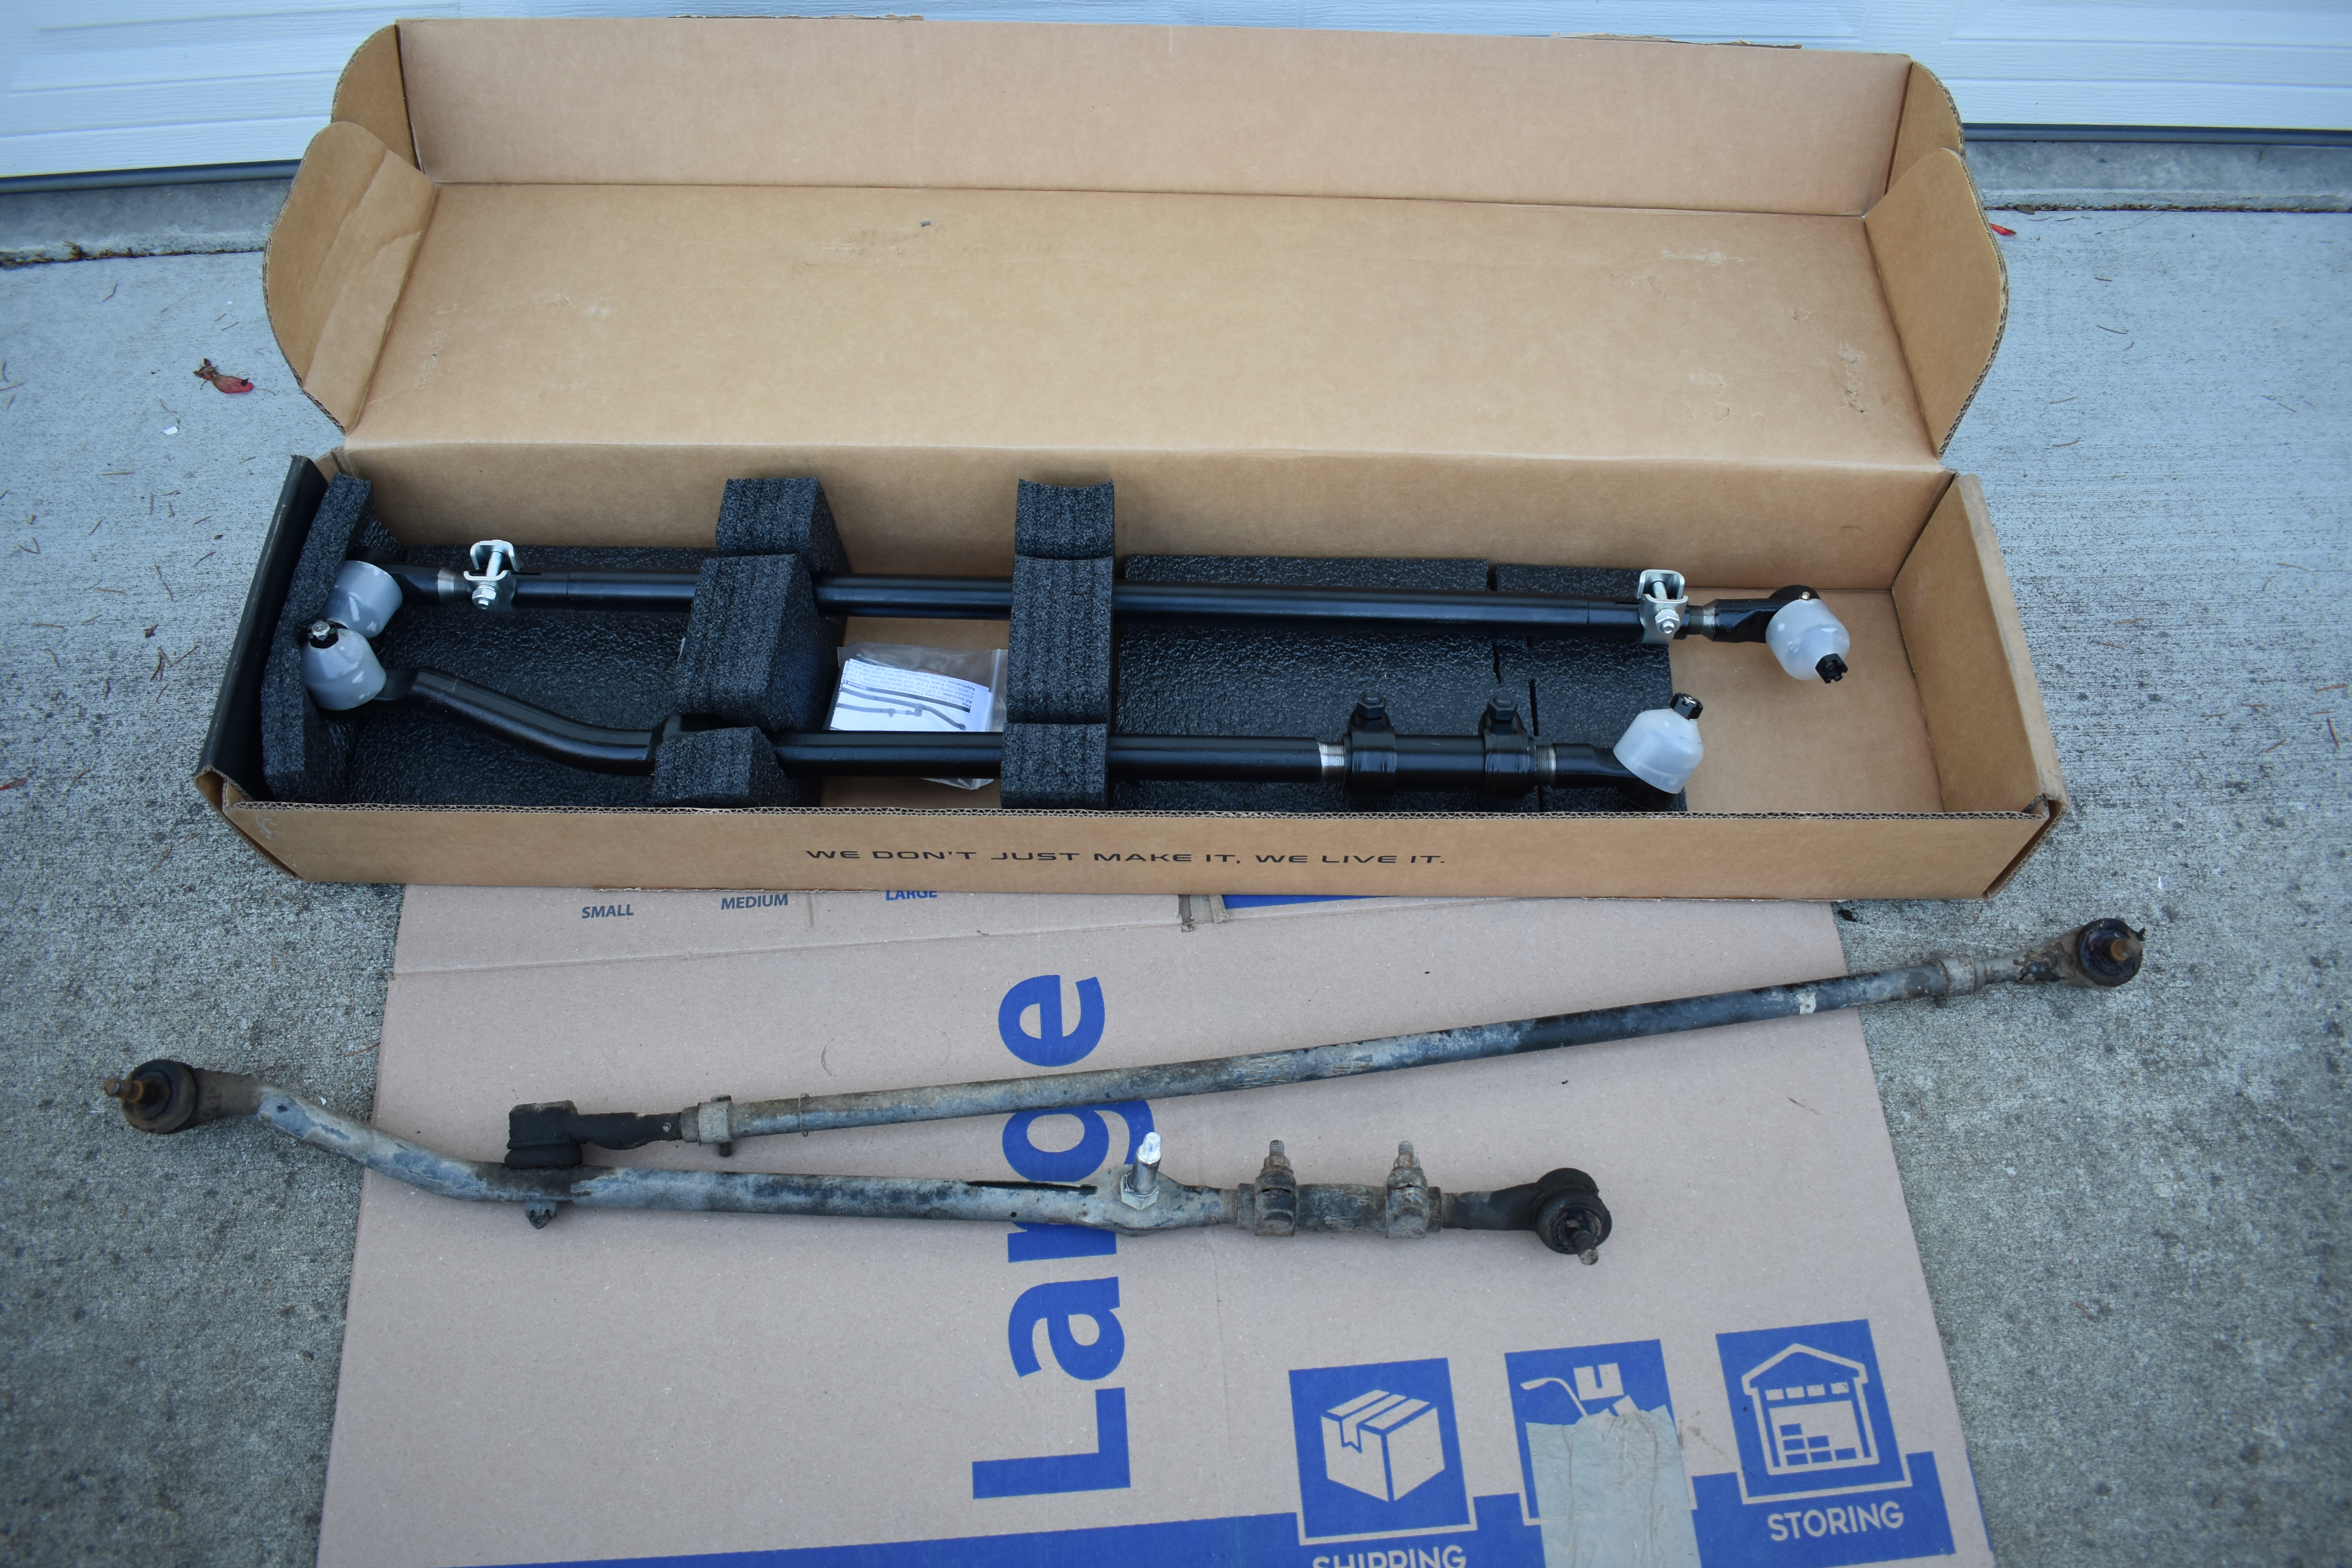
The Kit:
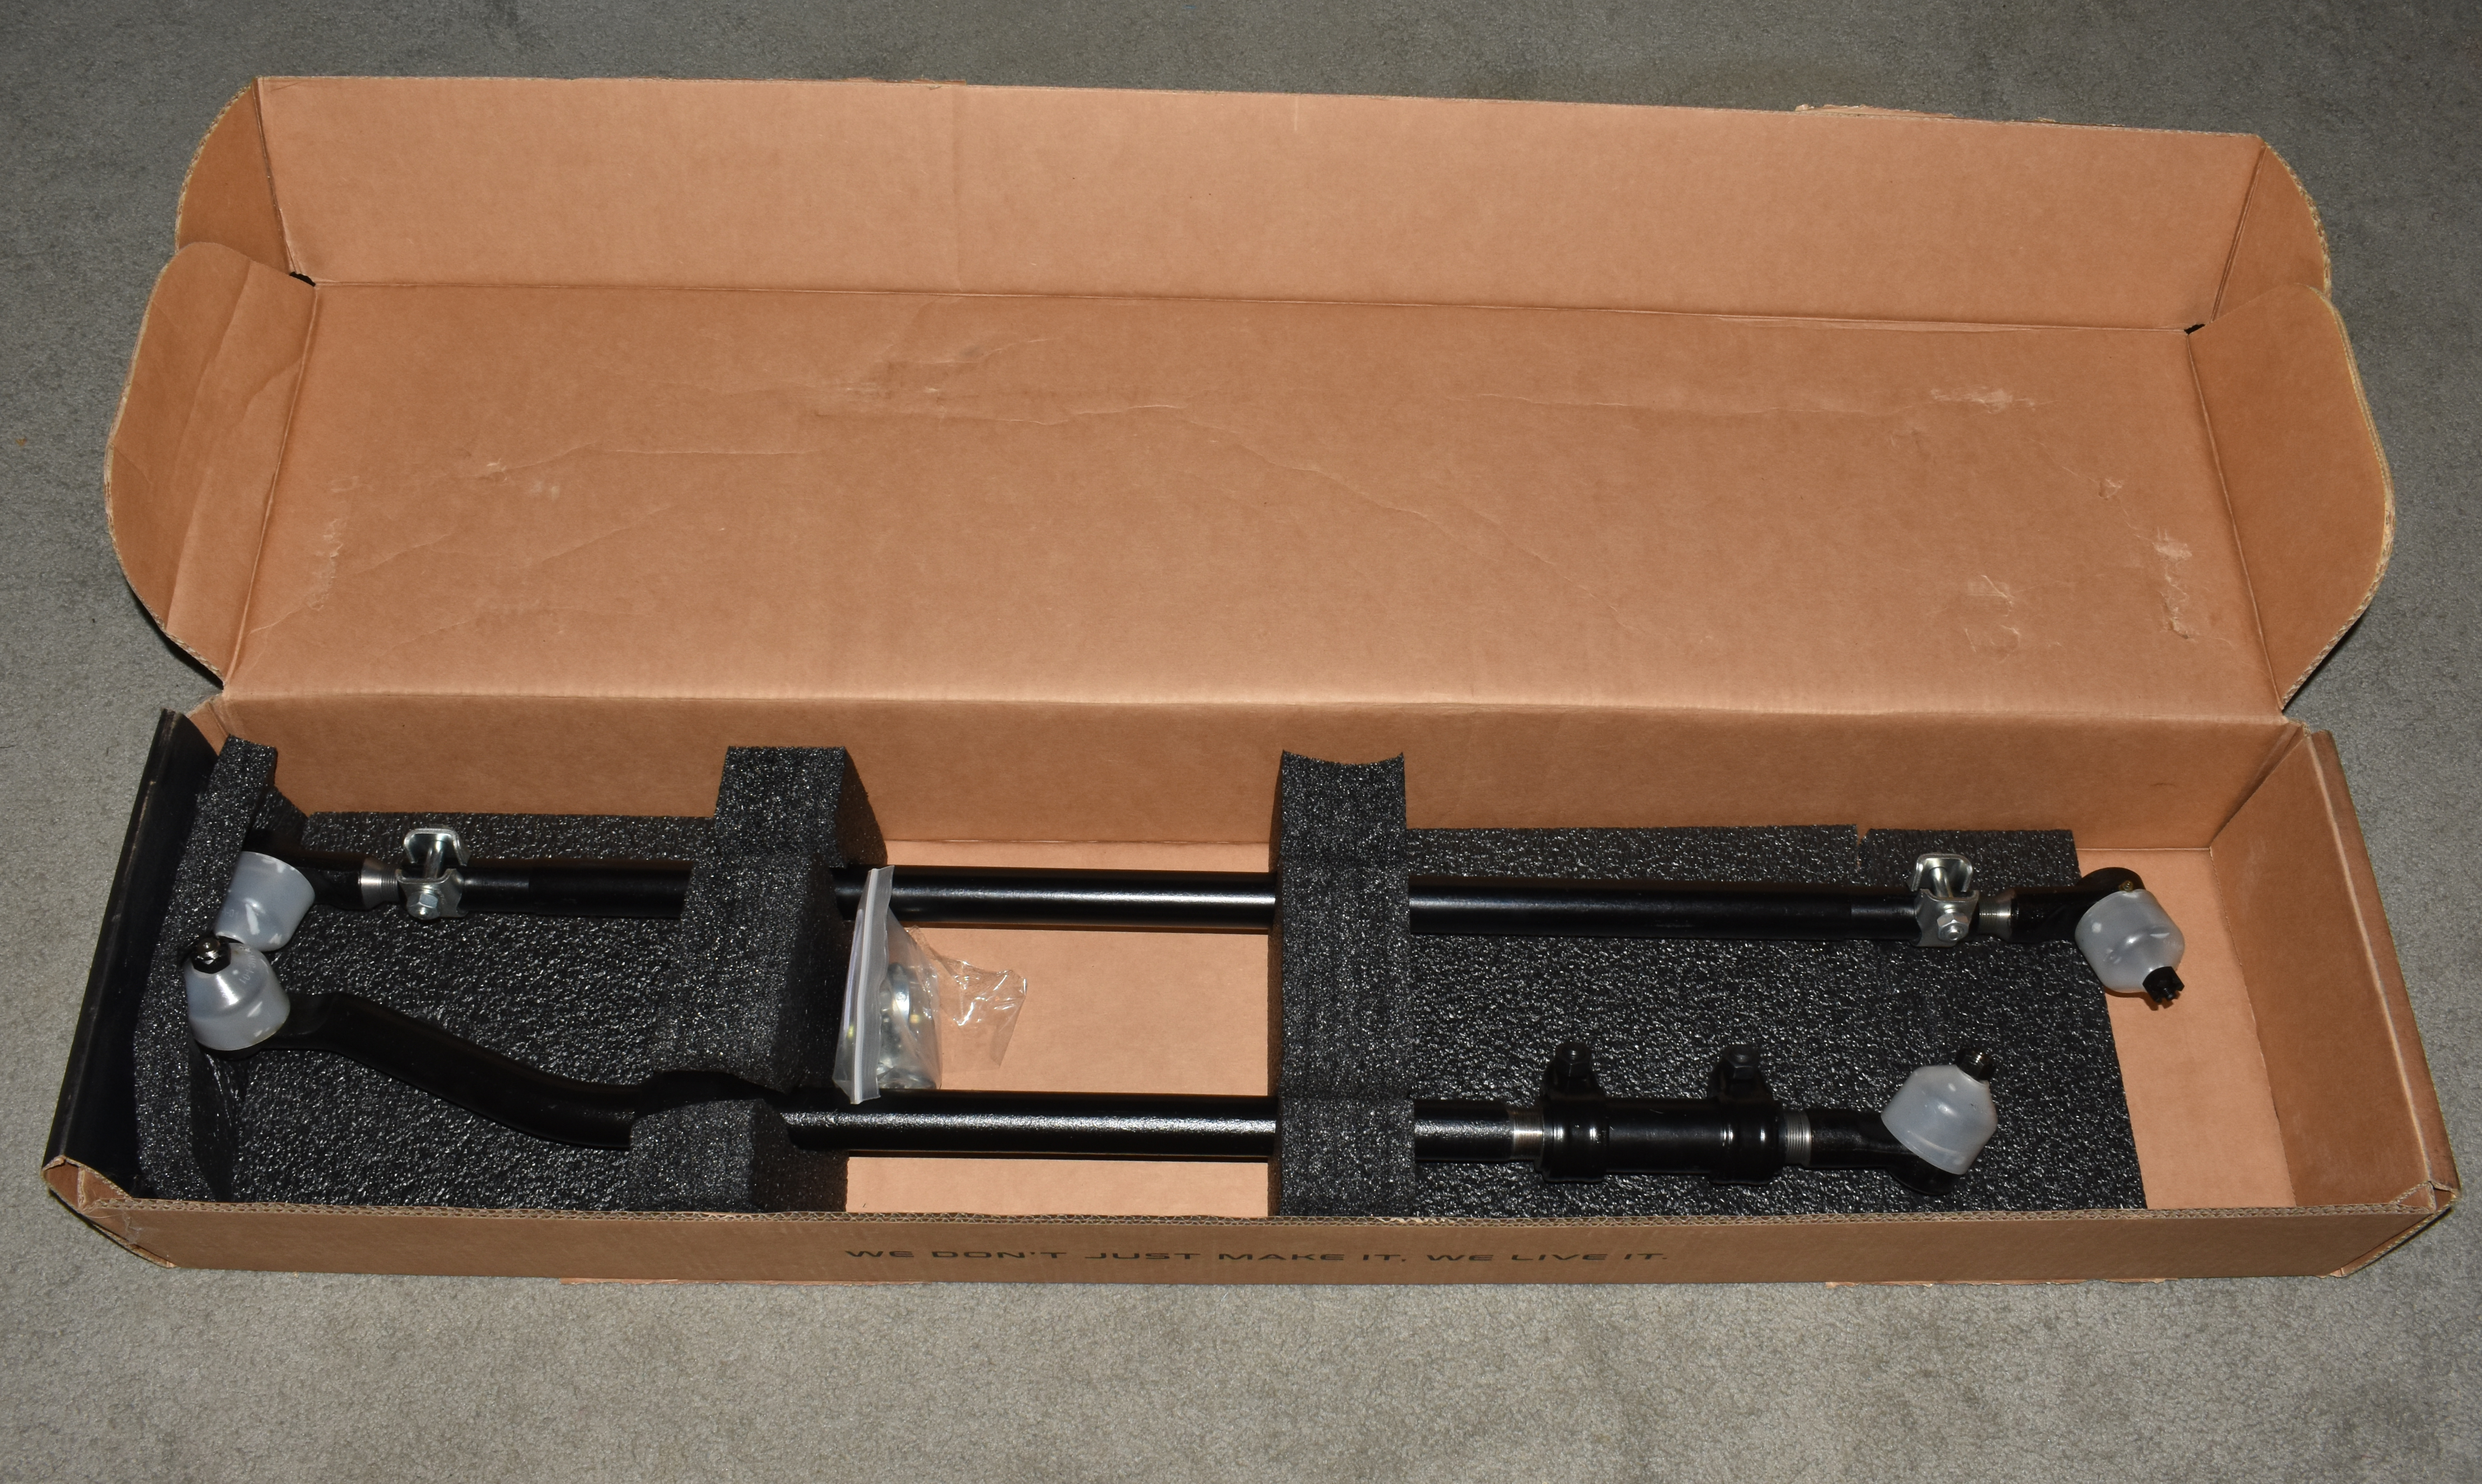
The kit comes nicely packed, and weighs in at a hefty 40lbs. Other than a steering stabilizer and tools, the kit comes with everything you need to upgrade your steering.
If you’re doing your pitman arm, you’ll need the stock pitman arm, and we recommend having a puller on hand, they can be rented at most part stores.
The Prep Work:
There’s not much you need to do to prep before starting disassembly and install, but you do need to grease the ball joints
at the end of each bar, we recommend following either of the instructions we linked to earlier for this very important step.
You need to rotate the ball ends to align a groove and allow grease to flow into the joint, use a low pressure hand grease pump,
and do not use synthetic grease. You may need to install the zerk fittings into the arms, however ours came installed.
Some
people say their joints came pre-greased, however, the instructions do not mention this. Take care not to over grease the joints.
It has also been reported that the joints may need to wear in for a few days before they are able to take grease.
The Install:
Removal:
The first step of the installation is removing the stock steering components:
- Park the Jeep and apply the brake. Straighten the steering wheel, and firmly chock the front tires.
- Detach the steering stabilizer shock from the existing drag link:
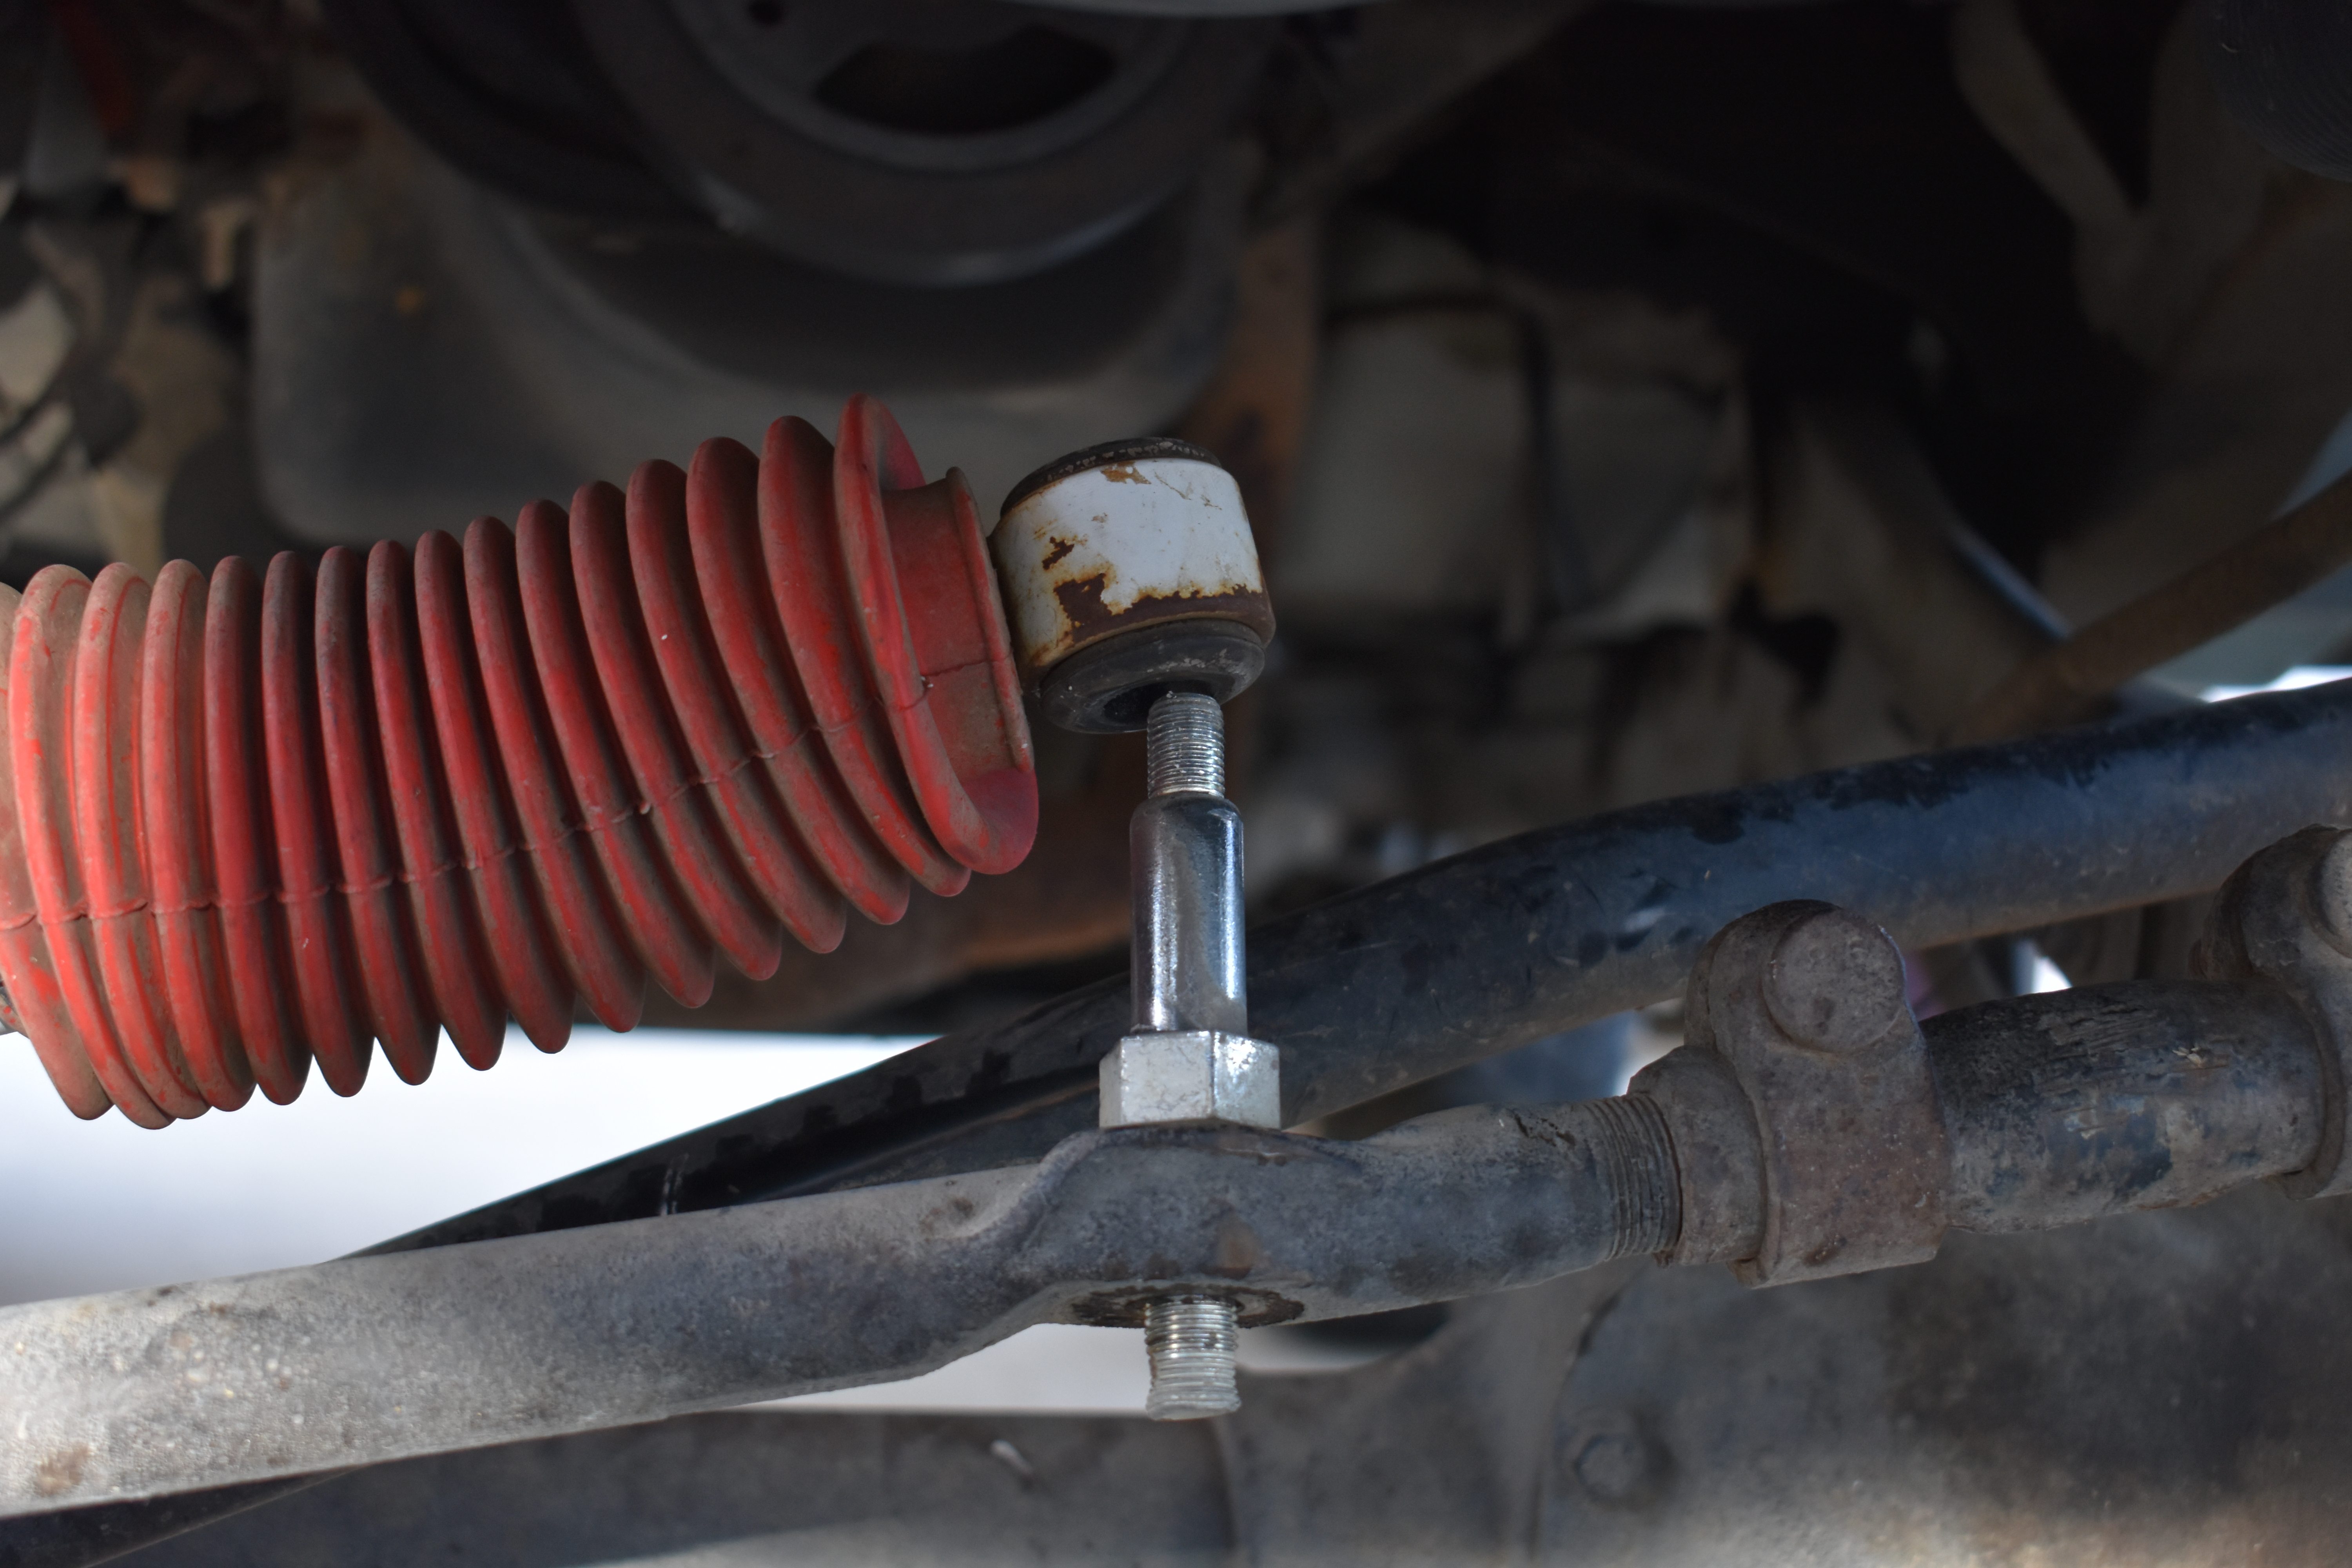
- Remove the cotter pins and nuts from the existing tie rod ends at both knuckle ends, and at the pitman arm, you can leave the pin connecting the tie rod and the drag link:
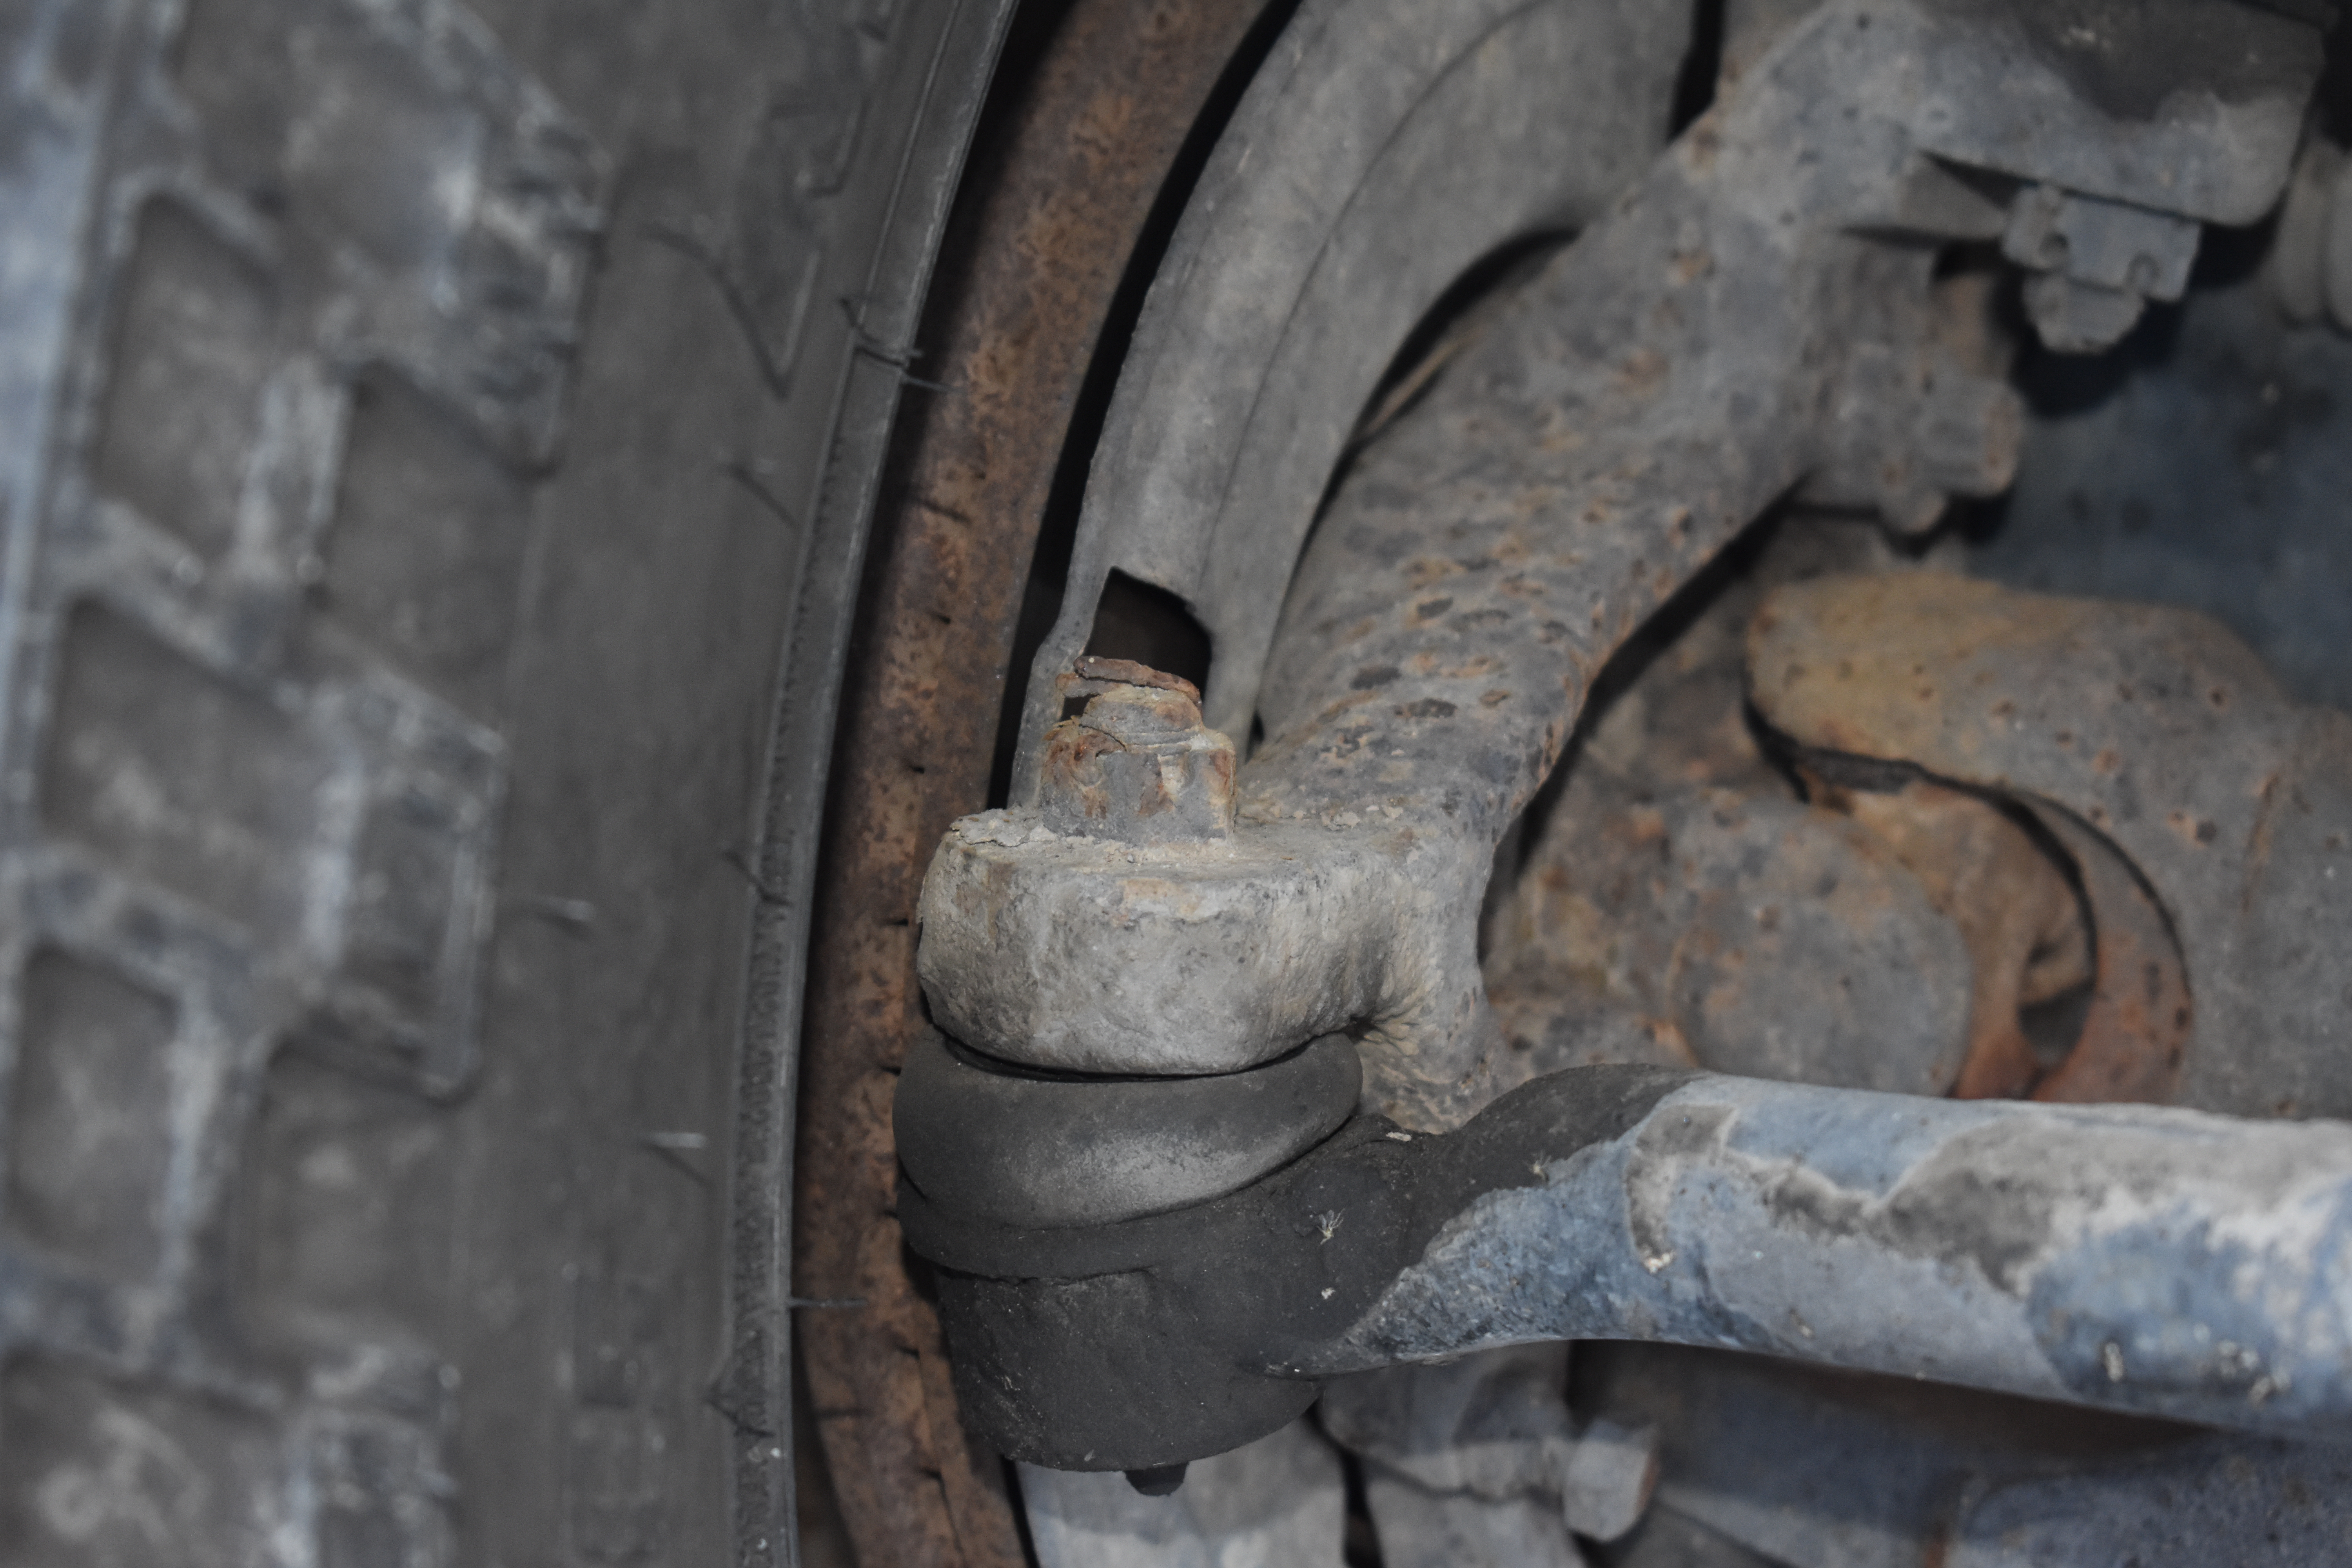
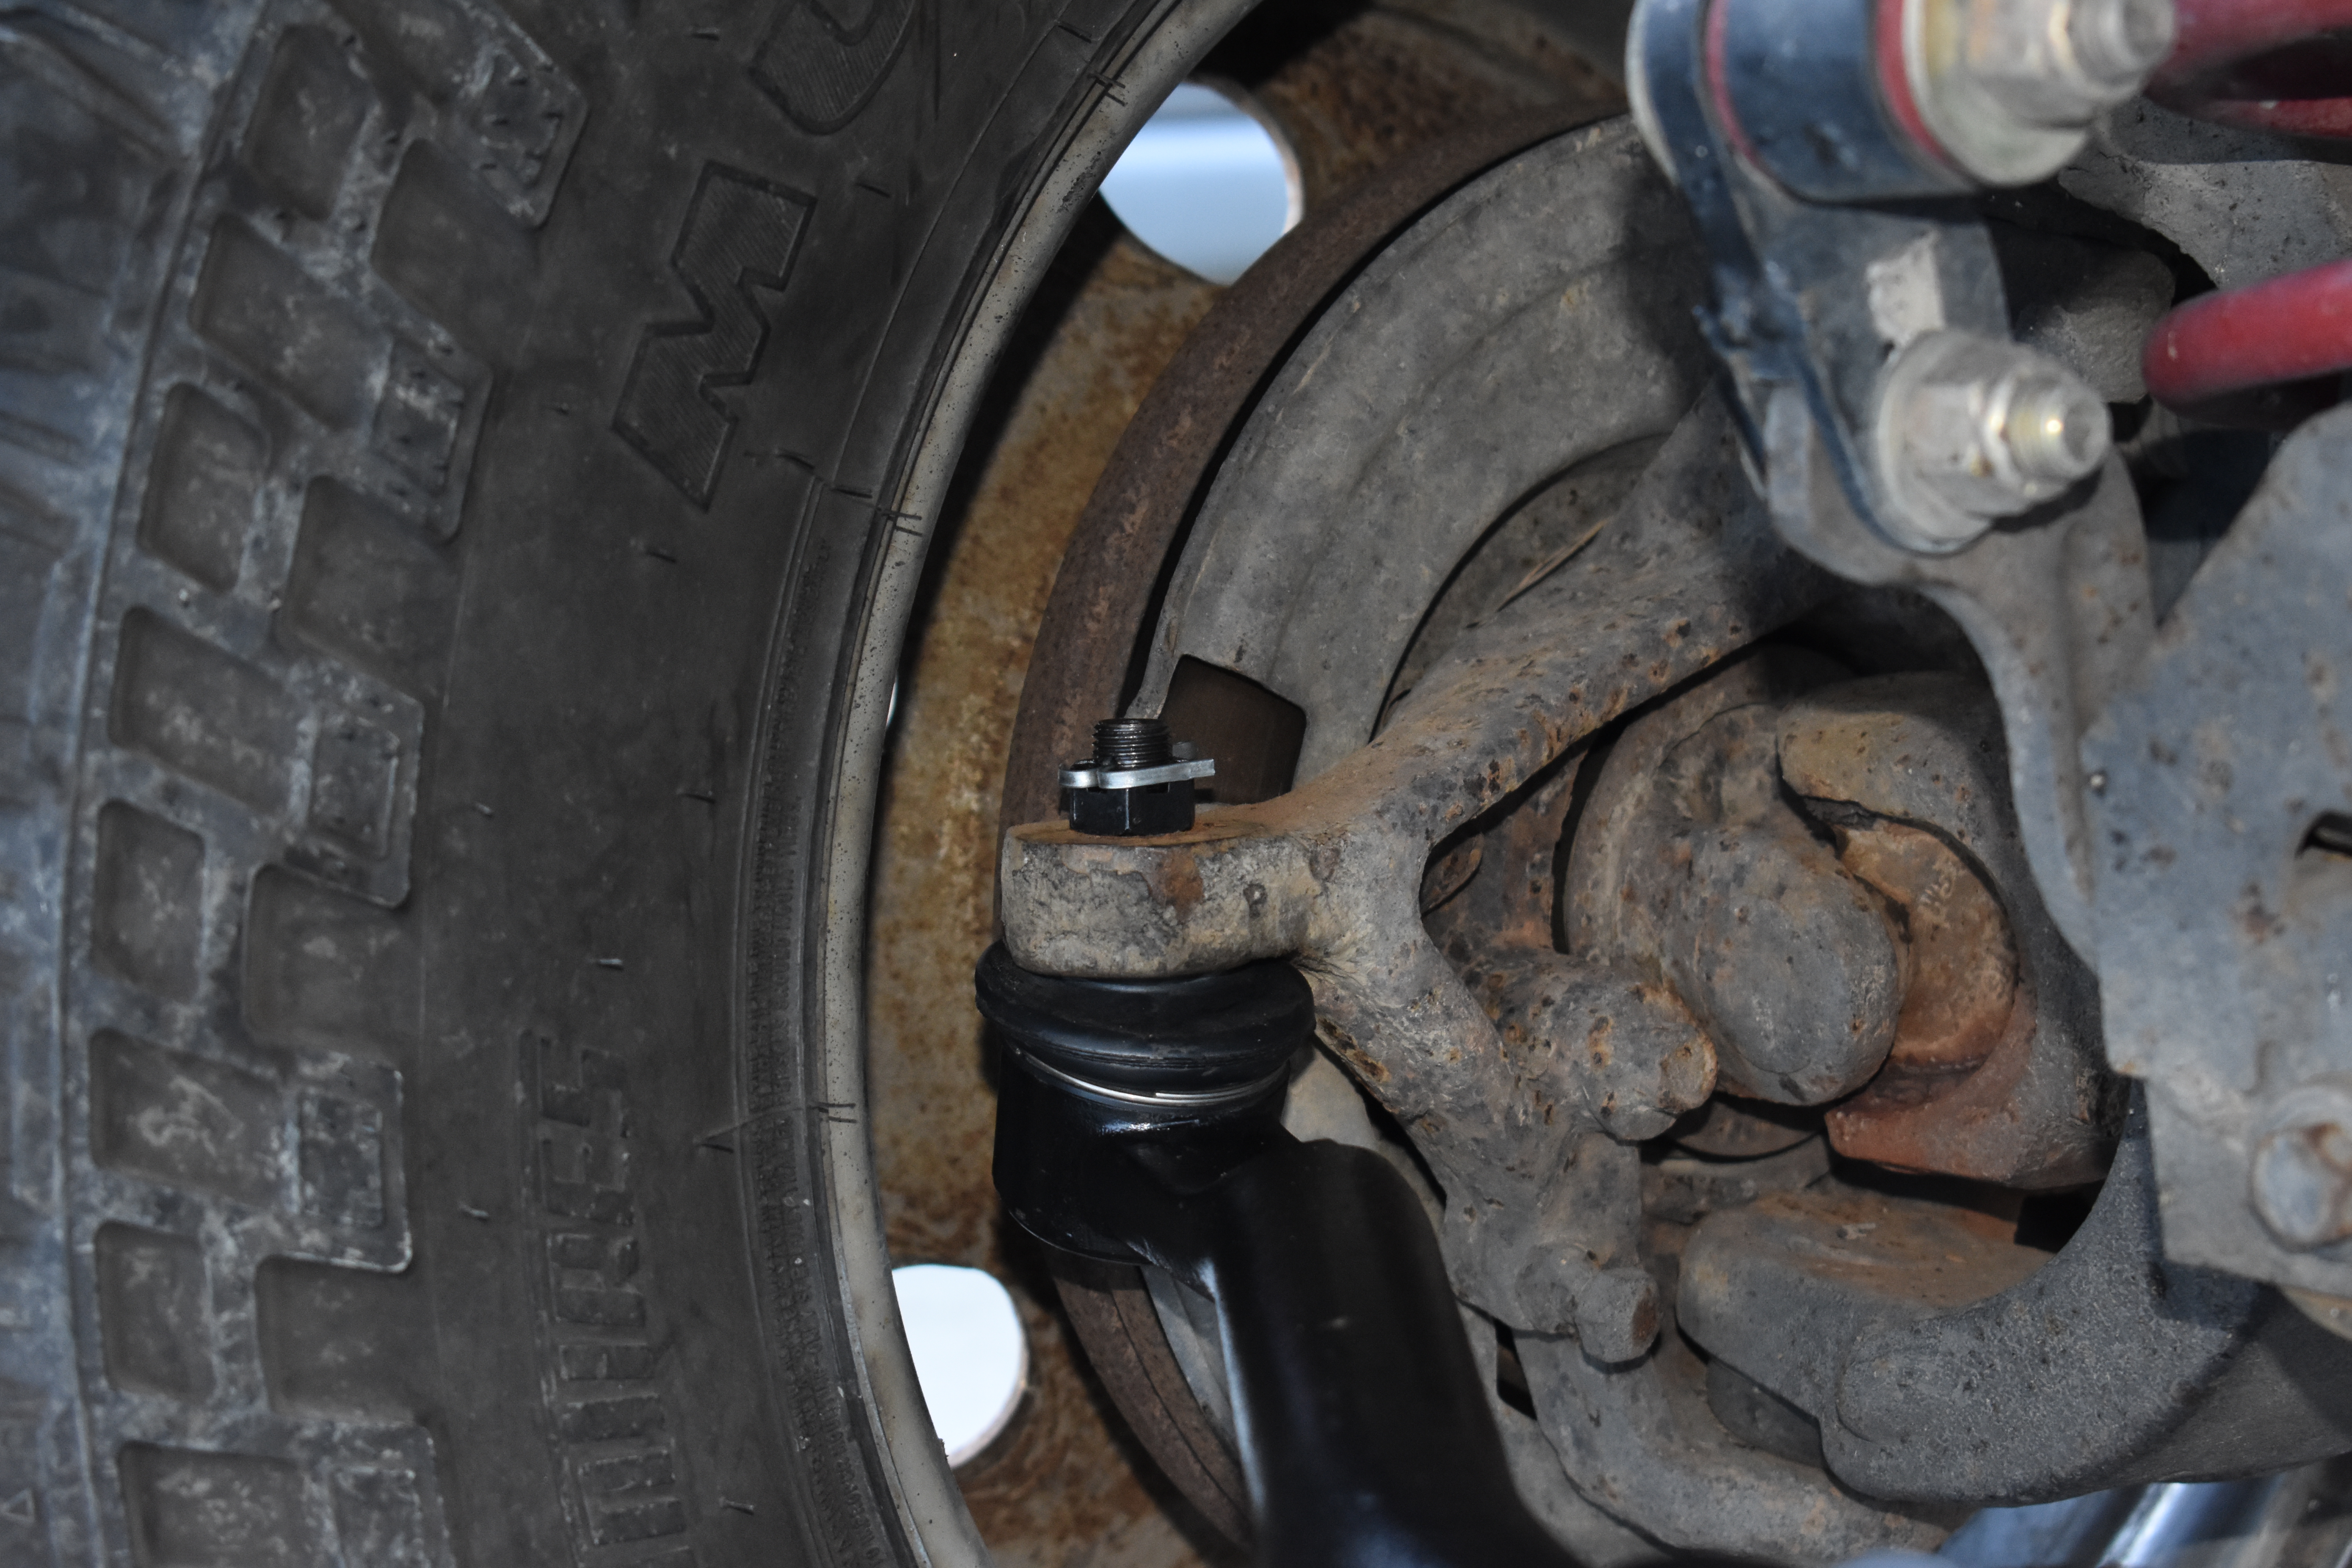
- Remove the tie rod end castle nuts and remove the tie rod end ball studs from their holes with a pickle fork or appropriate puller.
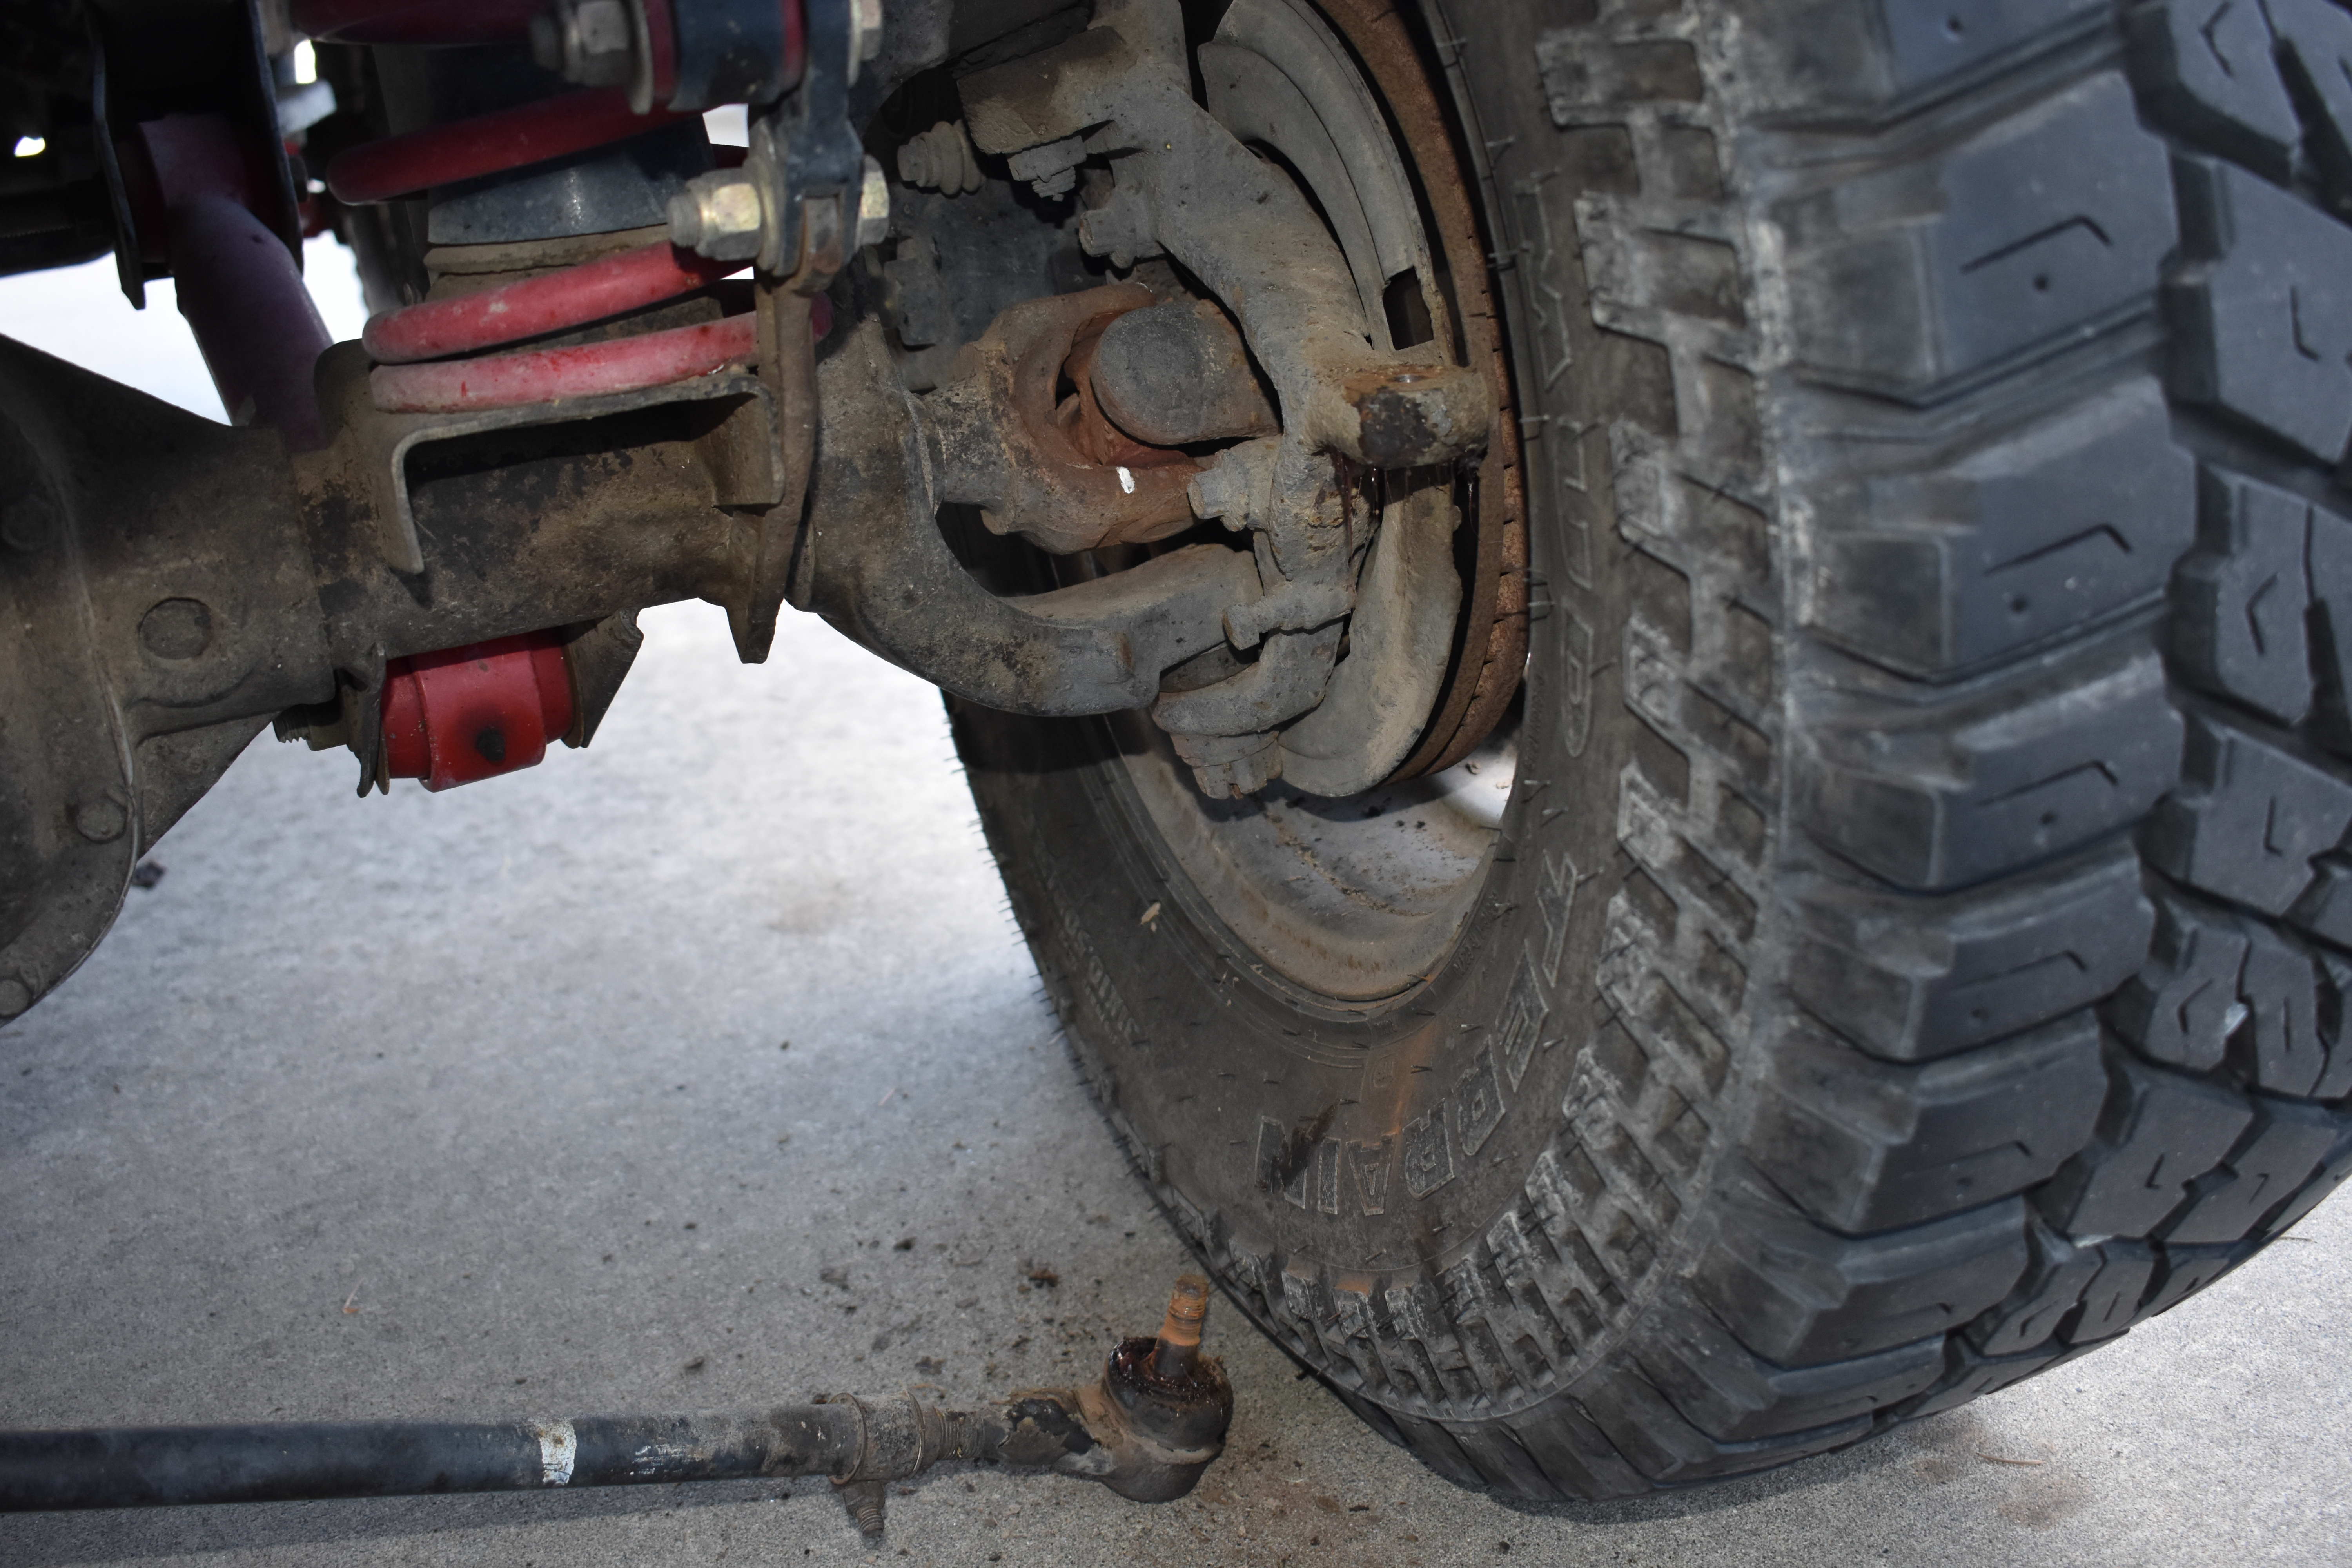
- Remove the castle nut and break the rod end loose at the pitman arm, being aware that this will likely be the last thing holding the steering system, so it may drop.
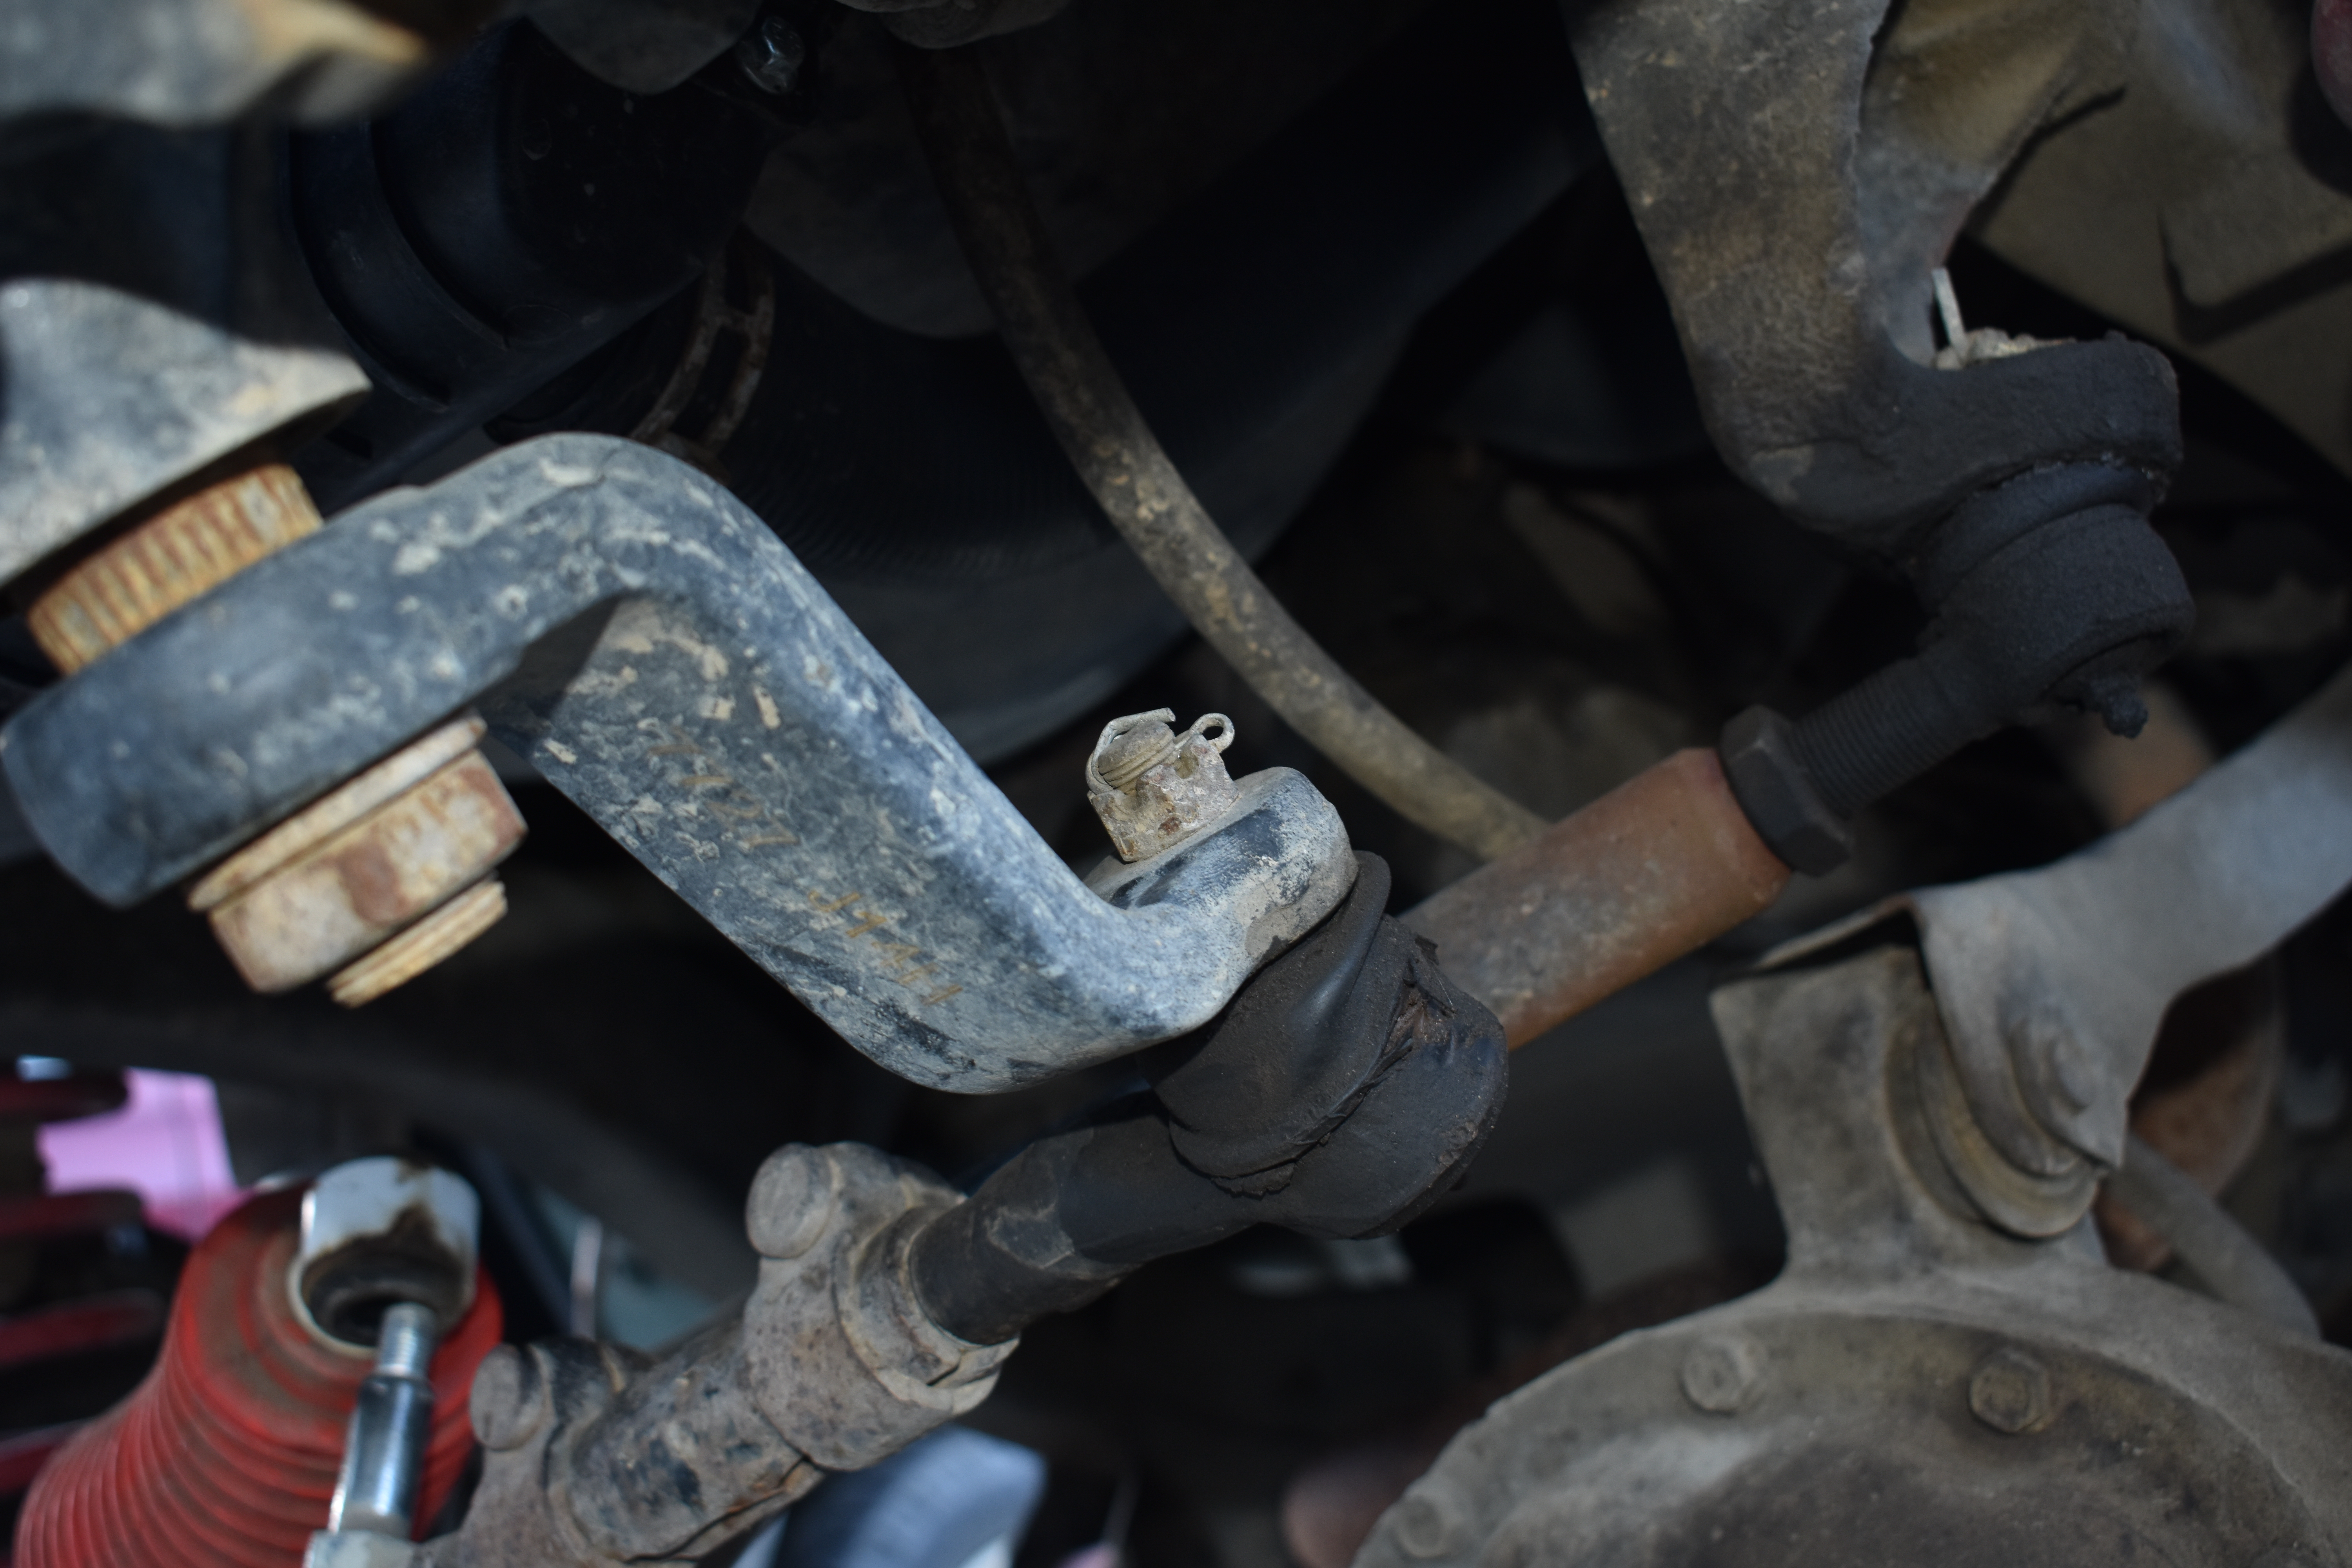
- Clean and inspect the tapered holes in the knuckle ends and pitman arm.
- Insert new tie rod ends in all of the tapered holes to check for oblong or worn holes. Replace any component that does not fit properly.
Now that we have the old parts out, we can compare them to the upgrade kit:
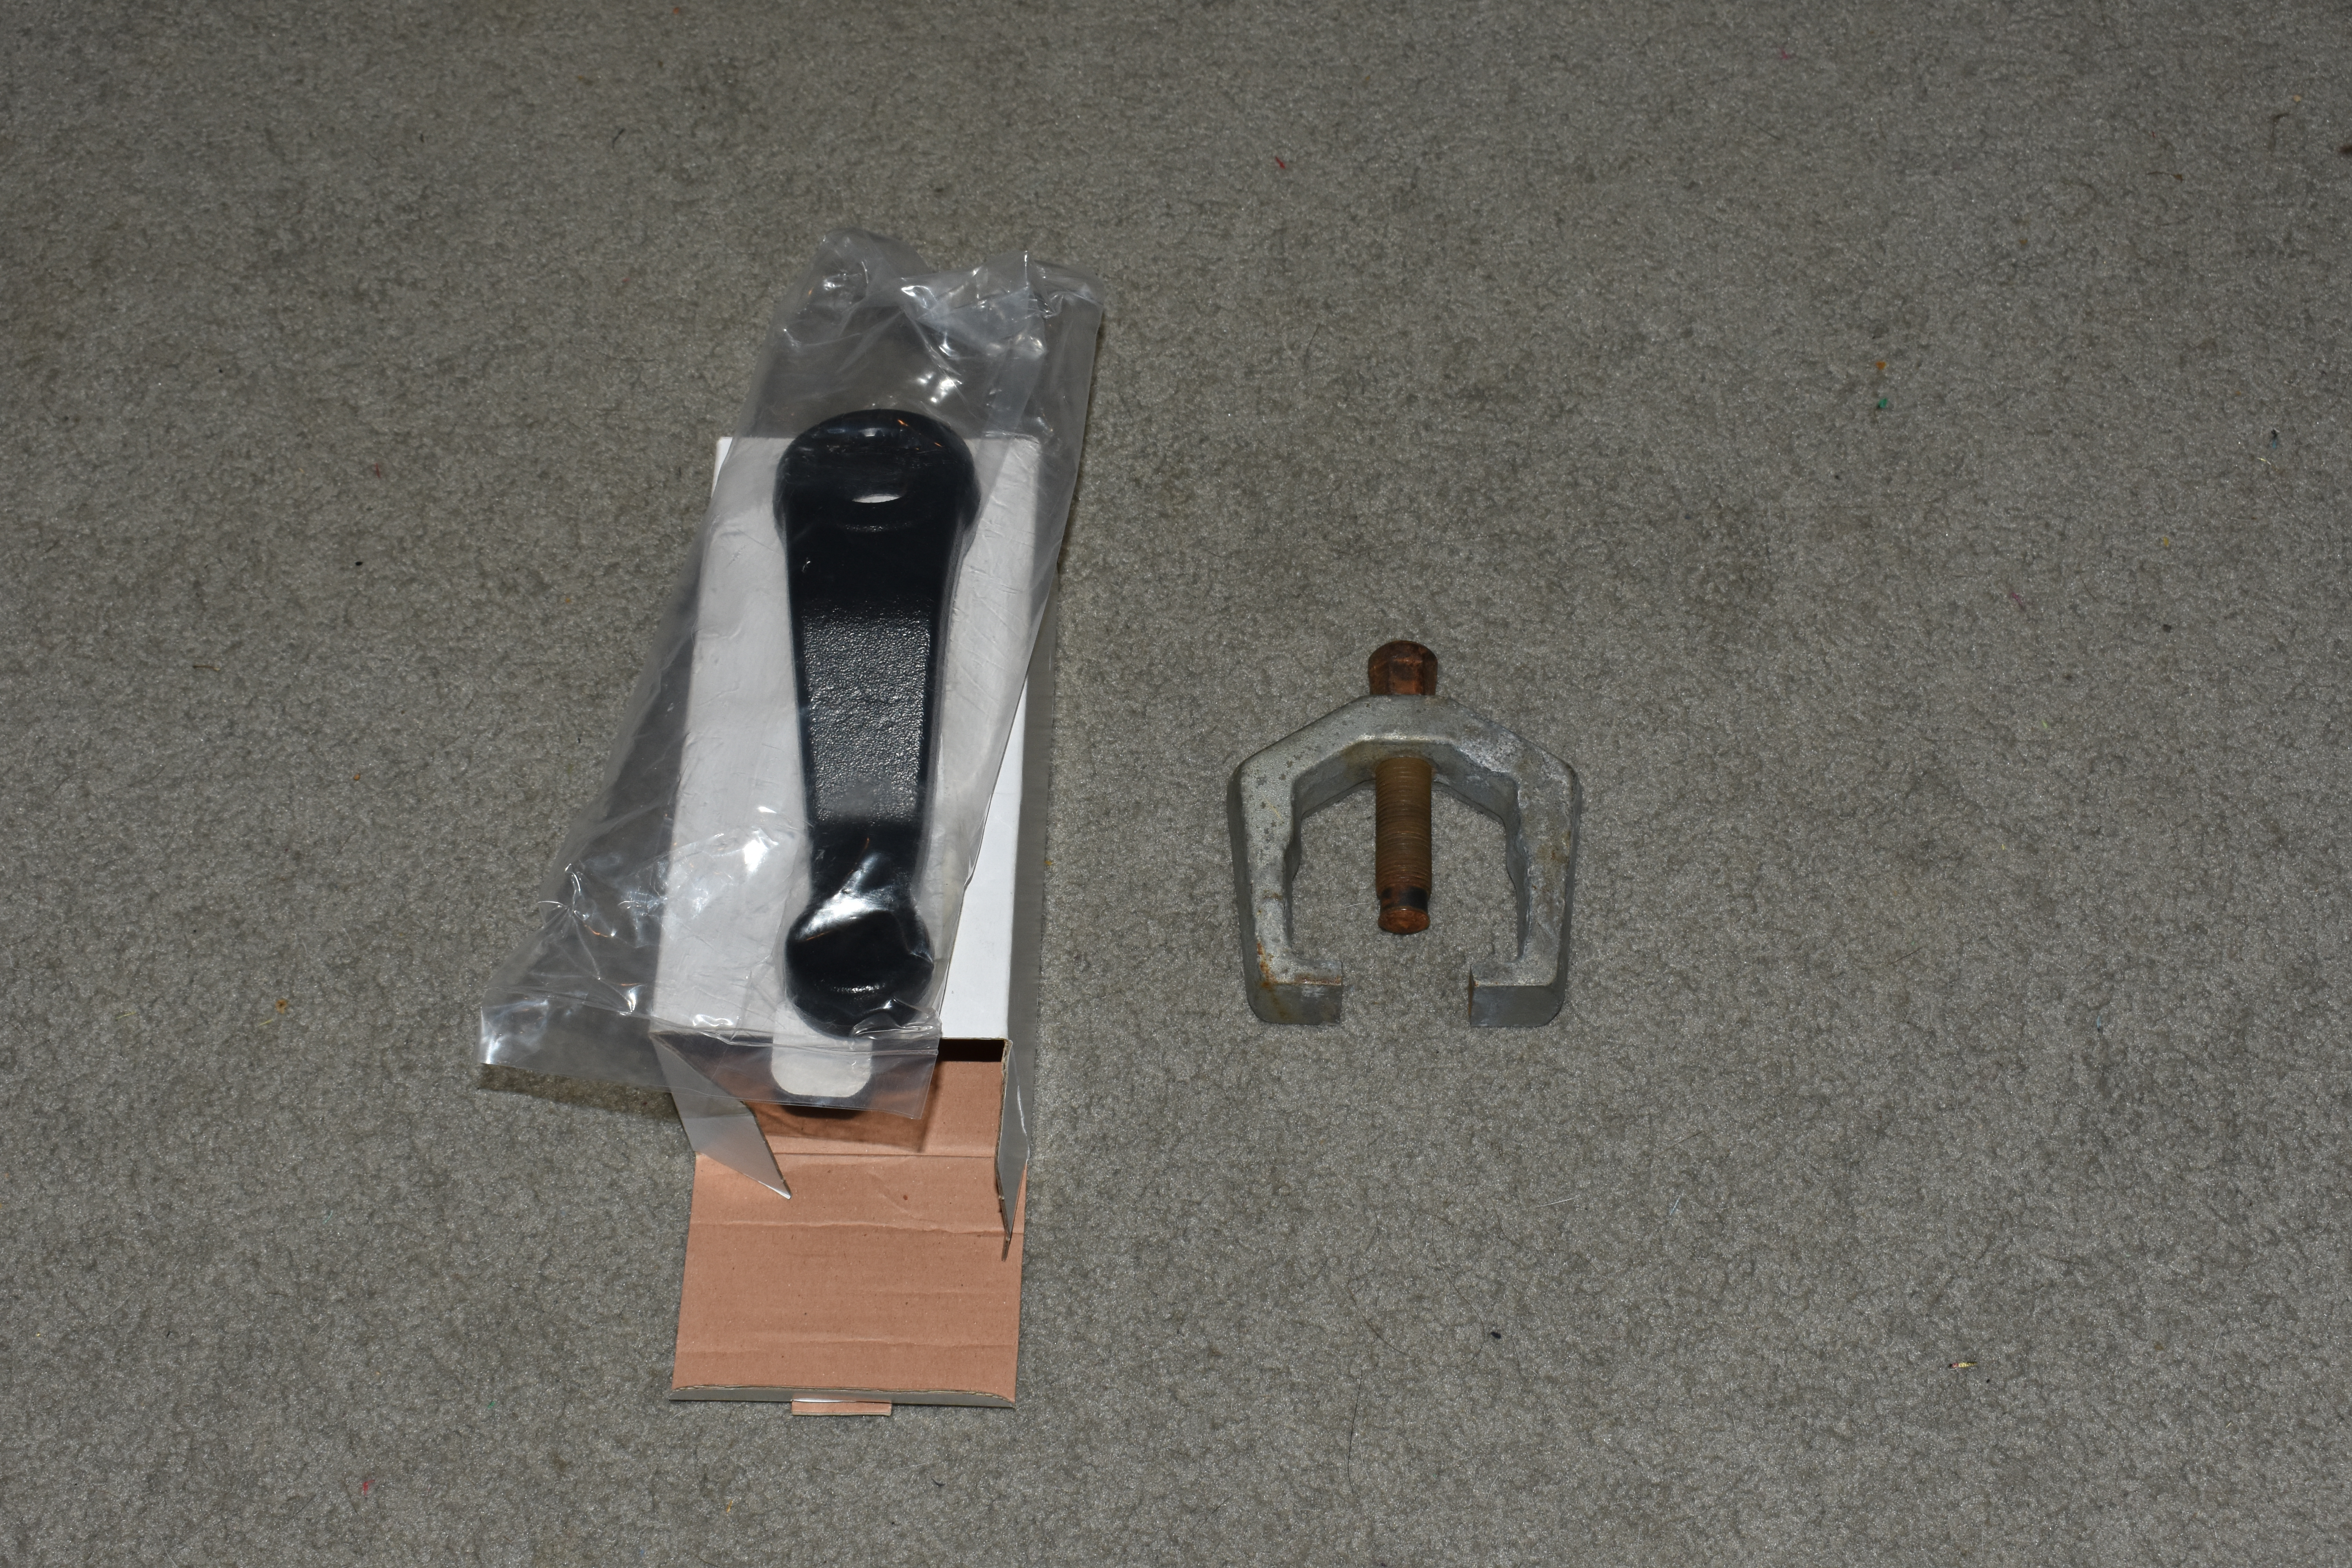
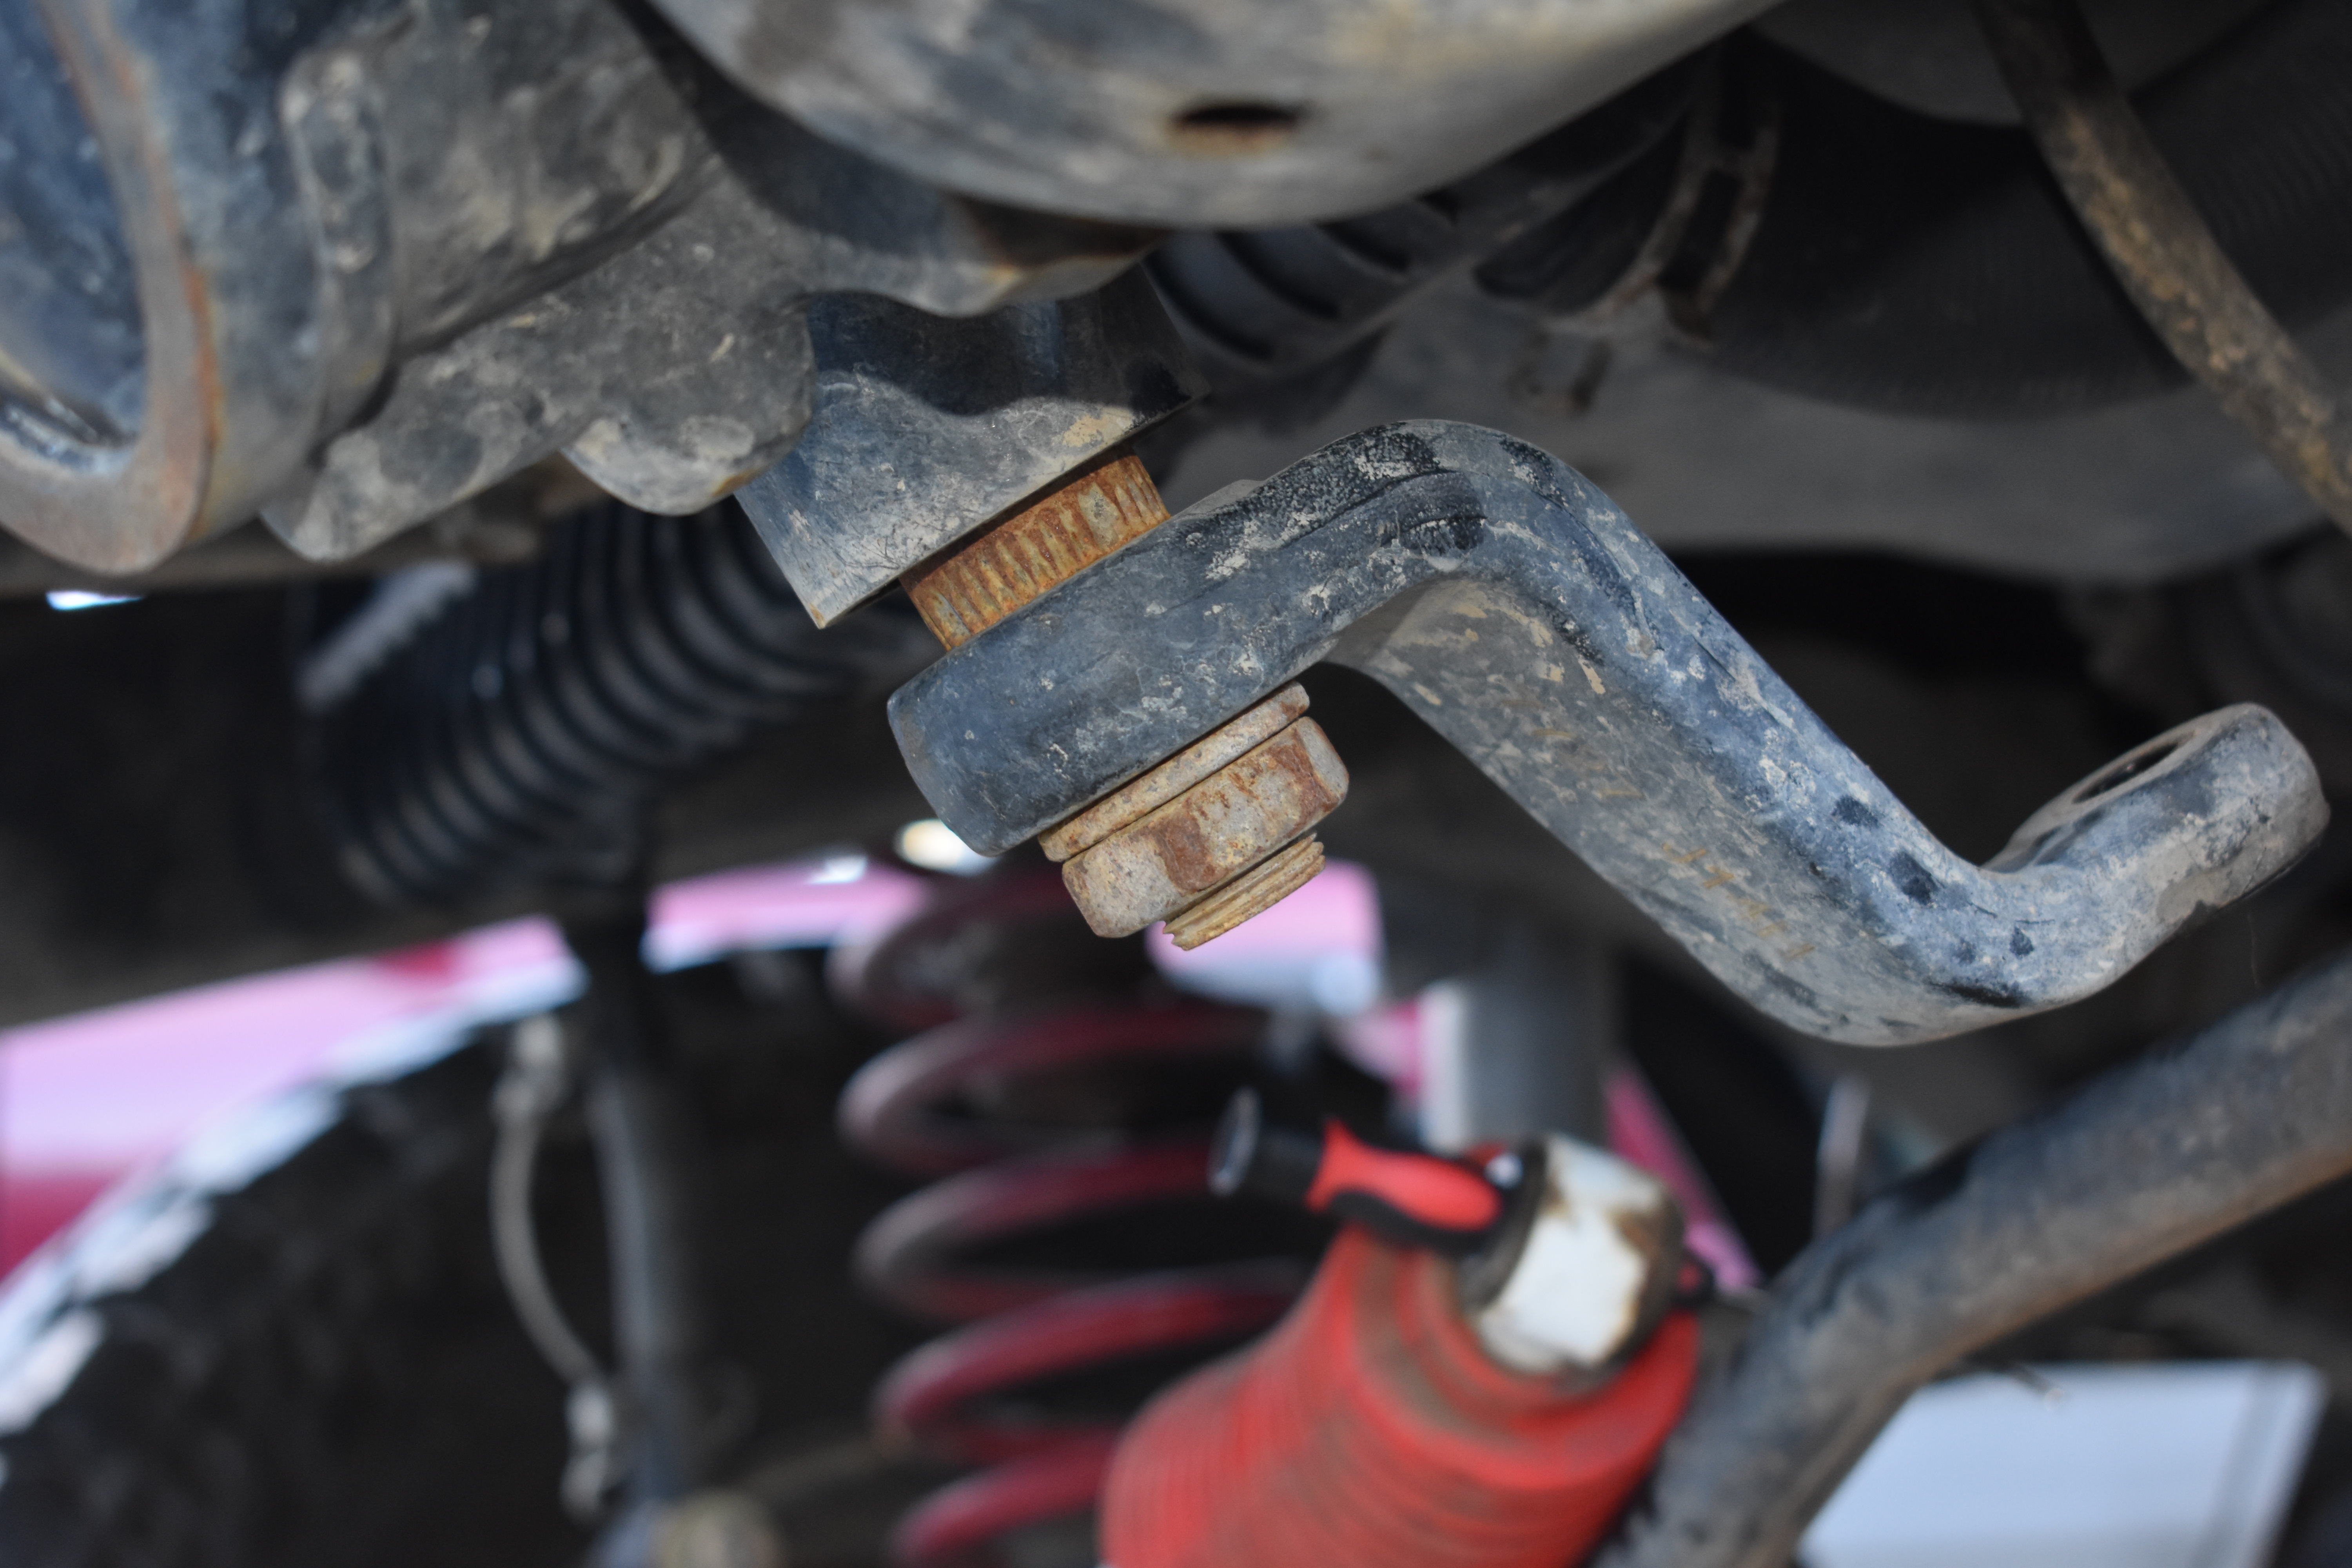
The Pitman arm:
We didn't know any better when we got our lift kit, and we installed the included dropped pitman arm, but after a lot of research,
turns out that can actually lead to increased bump-steer and some other issues in lower lifts! If you want to read more about it, check out this forum here for more information and discussion.
Beyond messing with your geometry, Currie
recomends using the stock pitman arm with this upgrade kit unless you have 6" of lift, so if you have a dropped pitman arm, it might have
to go. No worries though, here's how you swap it:
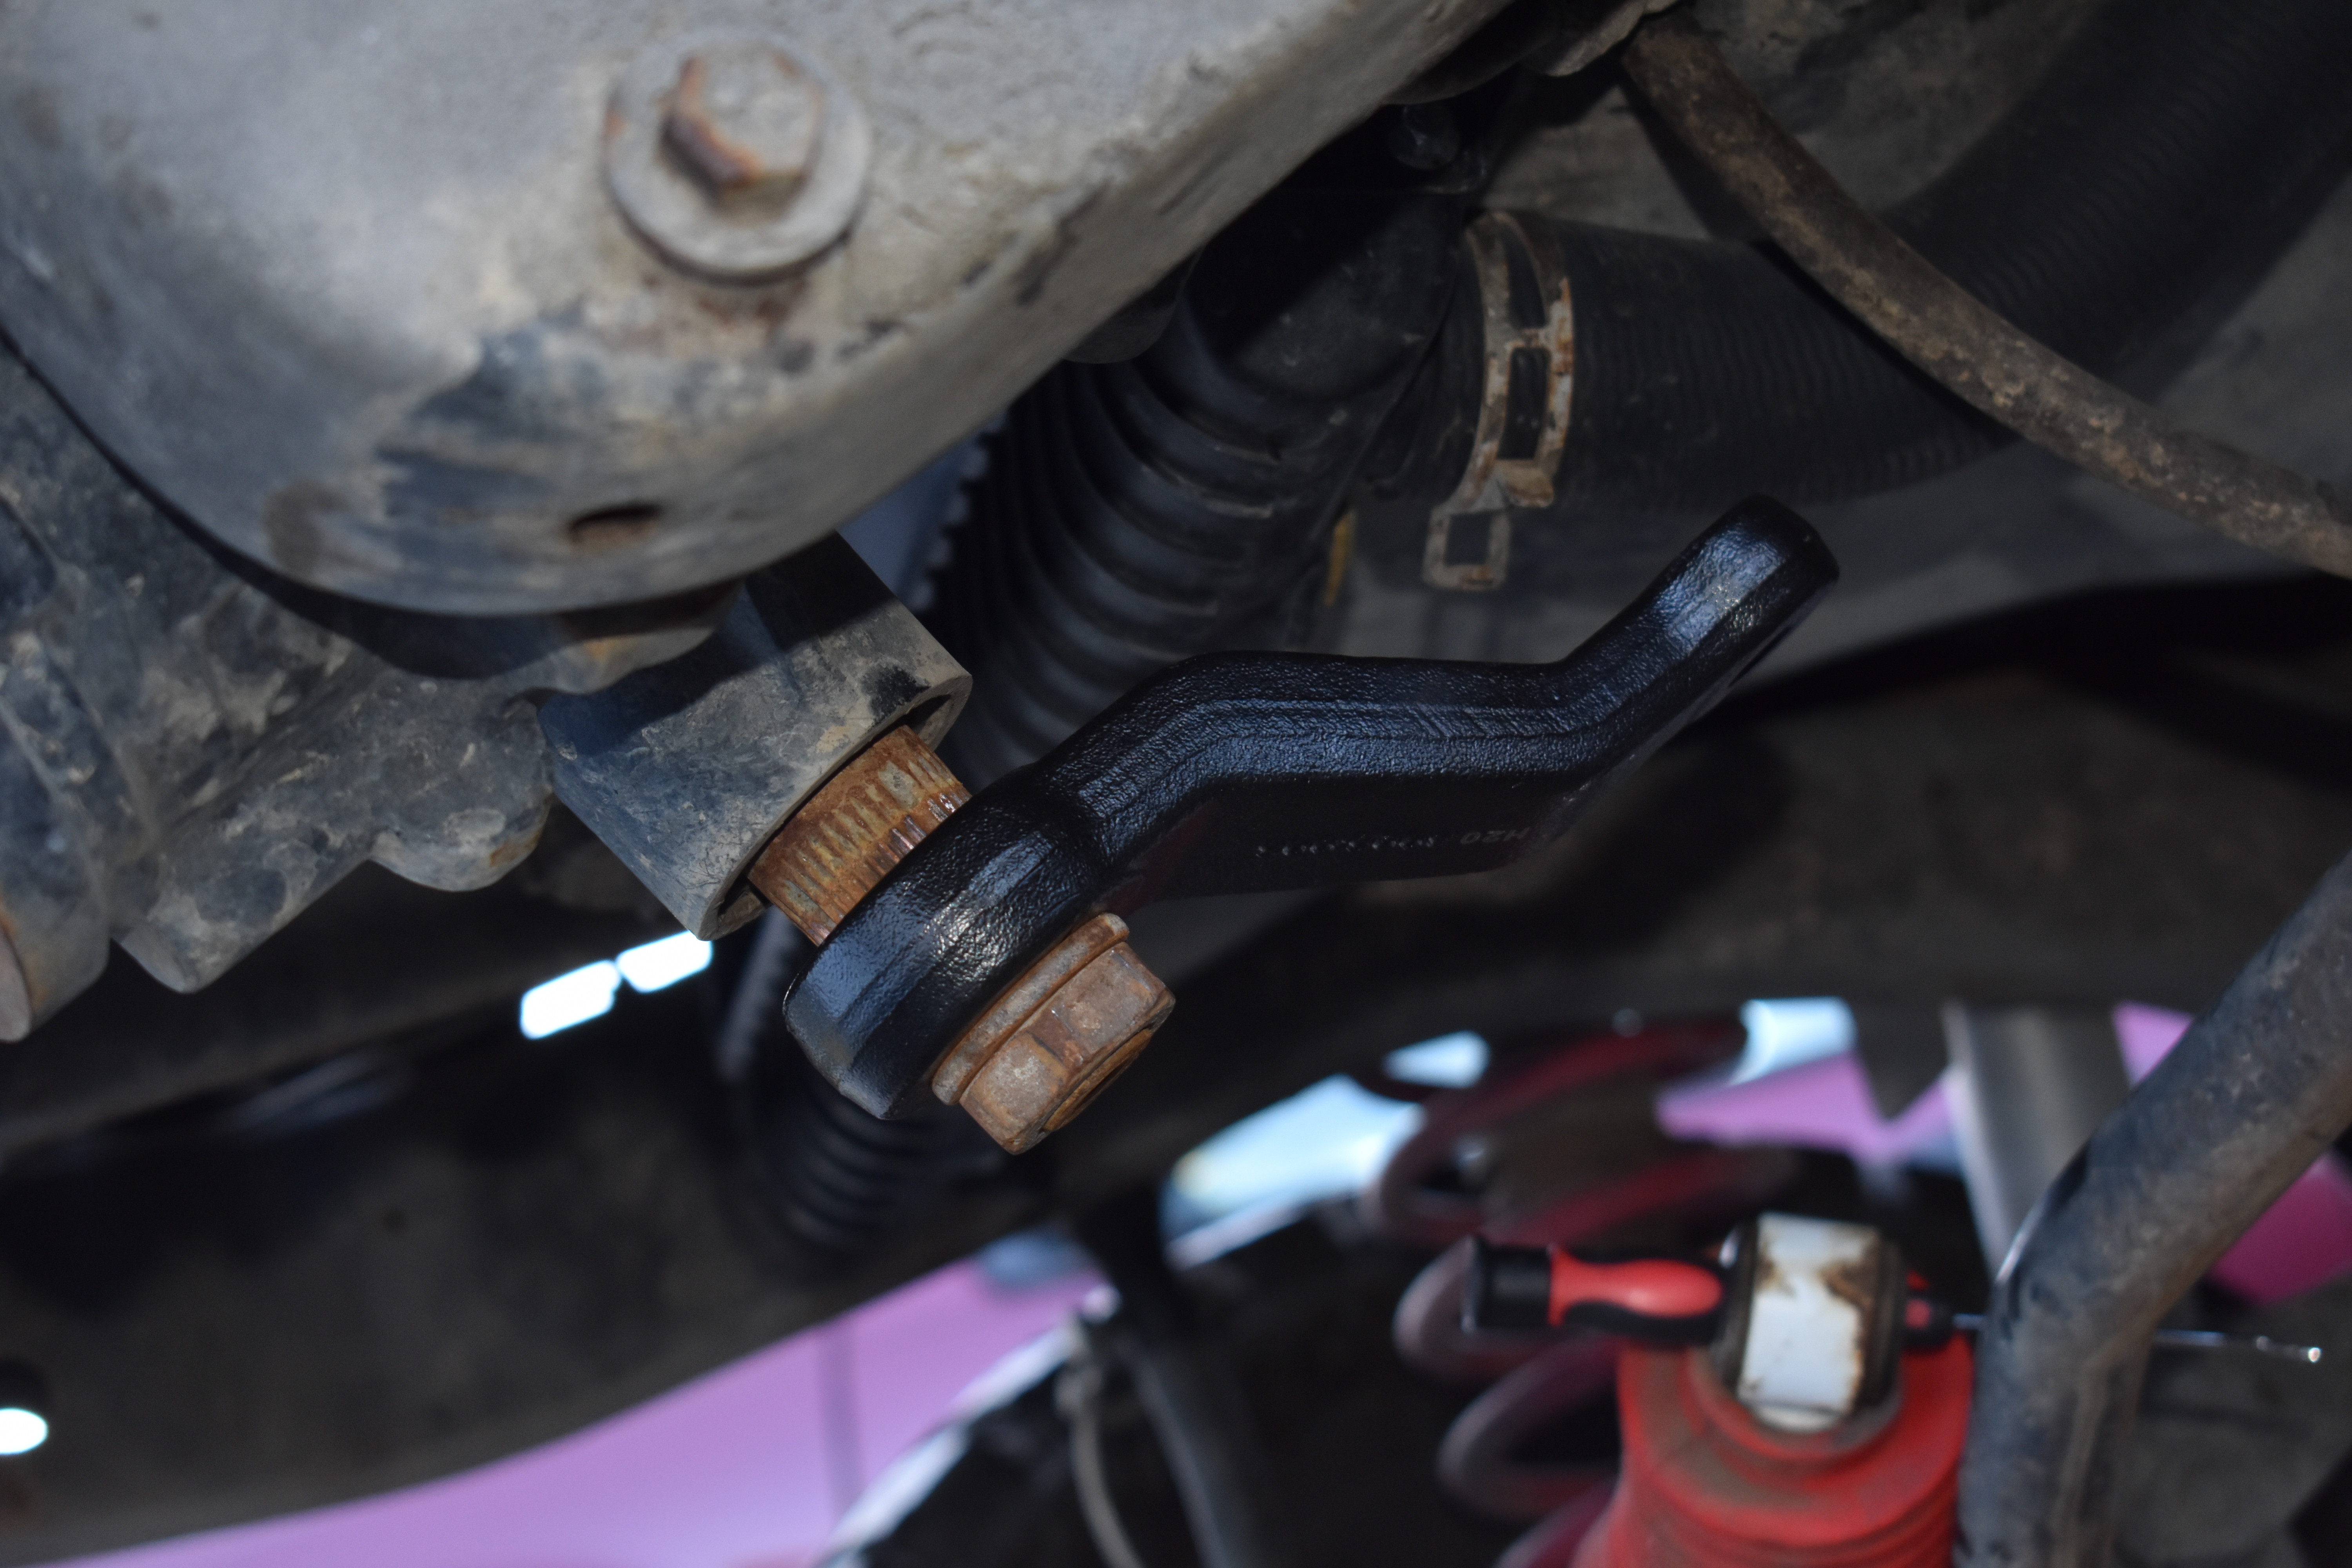
- Mark the position of the old pitman arm on the steering box spline.
- Grab your breaker bar and socket and break the large nut holding the pitman arm on, remove the nut and washer.
- Using the pitman arm puller, remove the pitman arm from the steering box.
- Align the new pitman arm onto the spline. Install the washer and nut loosely
- Tighten the nut to 185 ft. lbs
The Steering Install:
Now we can begin the steering installation:
Note: One of the above guides mentions using anti-seize on
many of the threads, the other instructions don’t mention it
at all, as such we don’t mention it in our guide and leave it
to you to read and understand whether you want to use anti-seize or not on your parts.
- Remove the packaging from the new components and prepare them for the first adjustments
- Take measurements of the old tie rod and drag link to aid with initial adjustments. You might also be able to lay the old parts next to the new components and adjust them by eye. You will want to have your Jeep professionally aligned after this install.
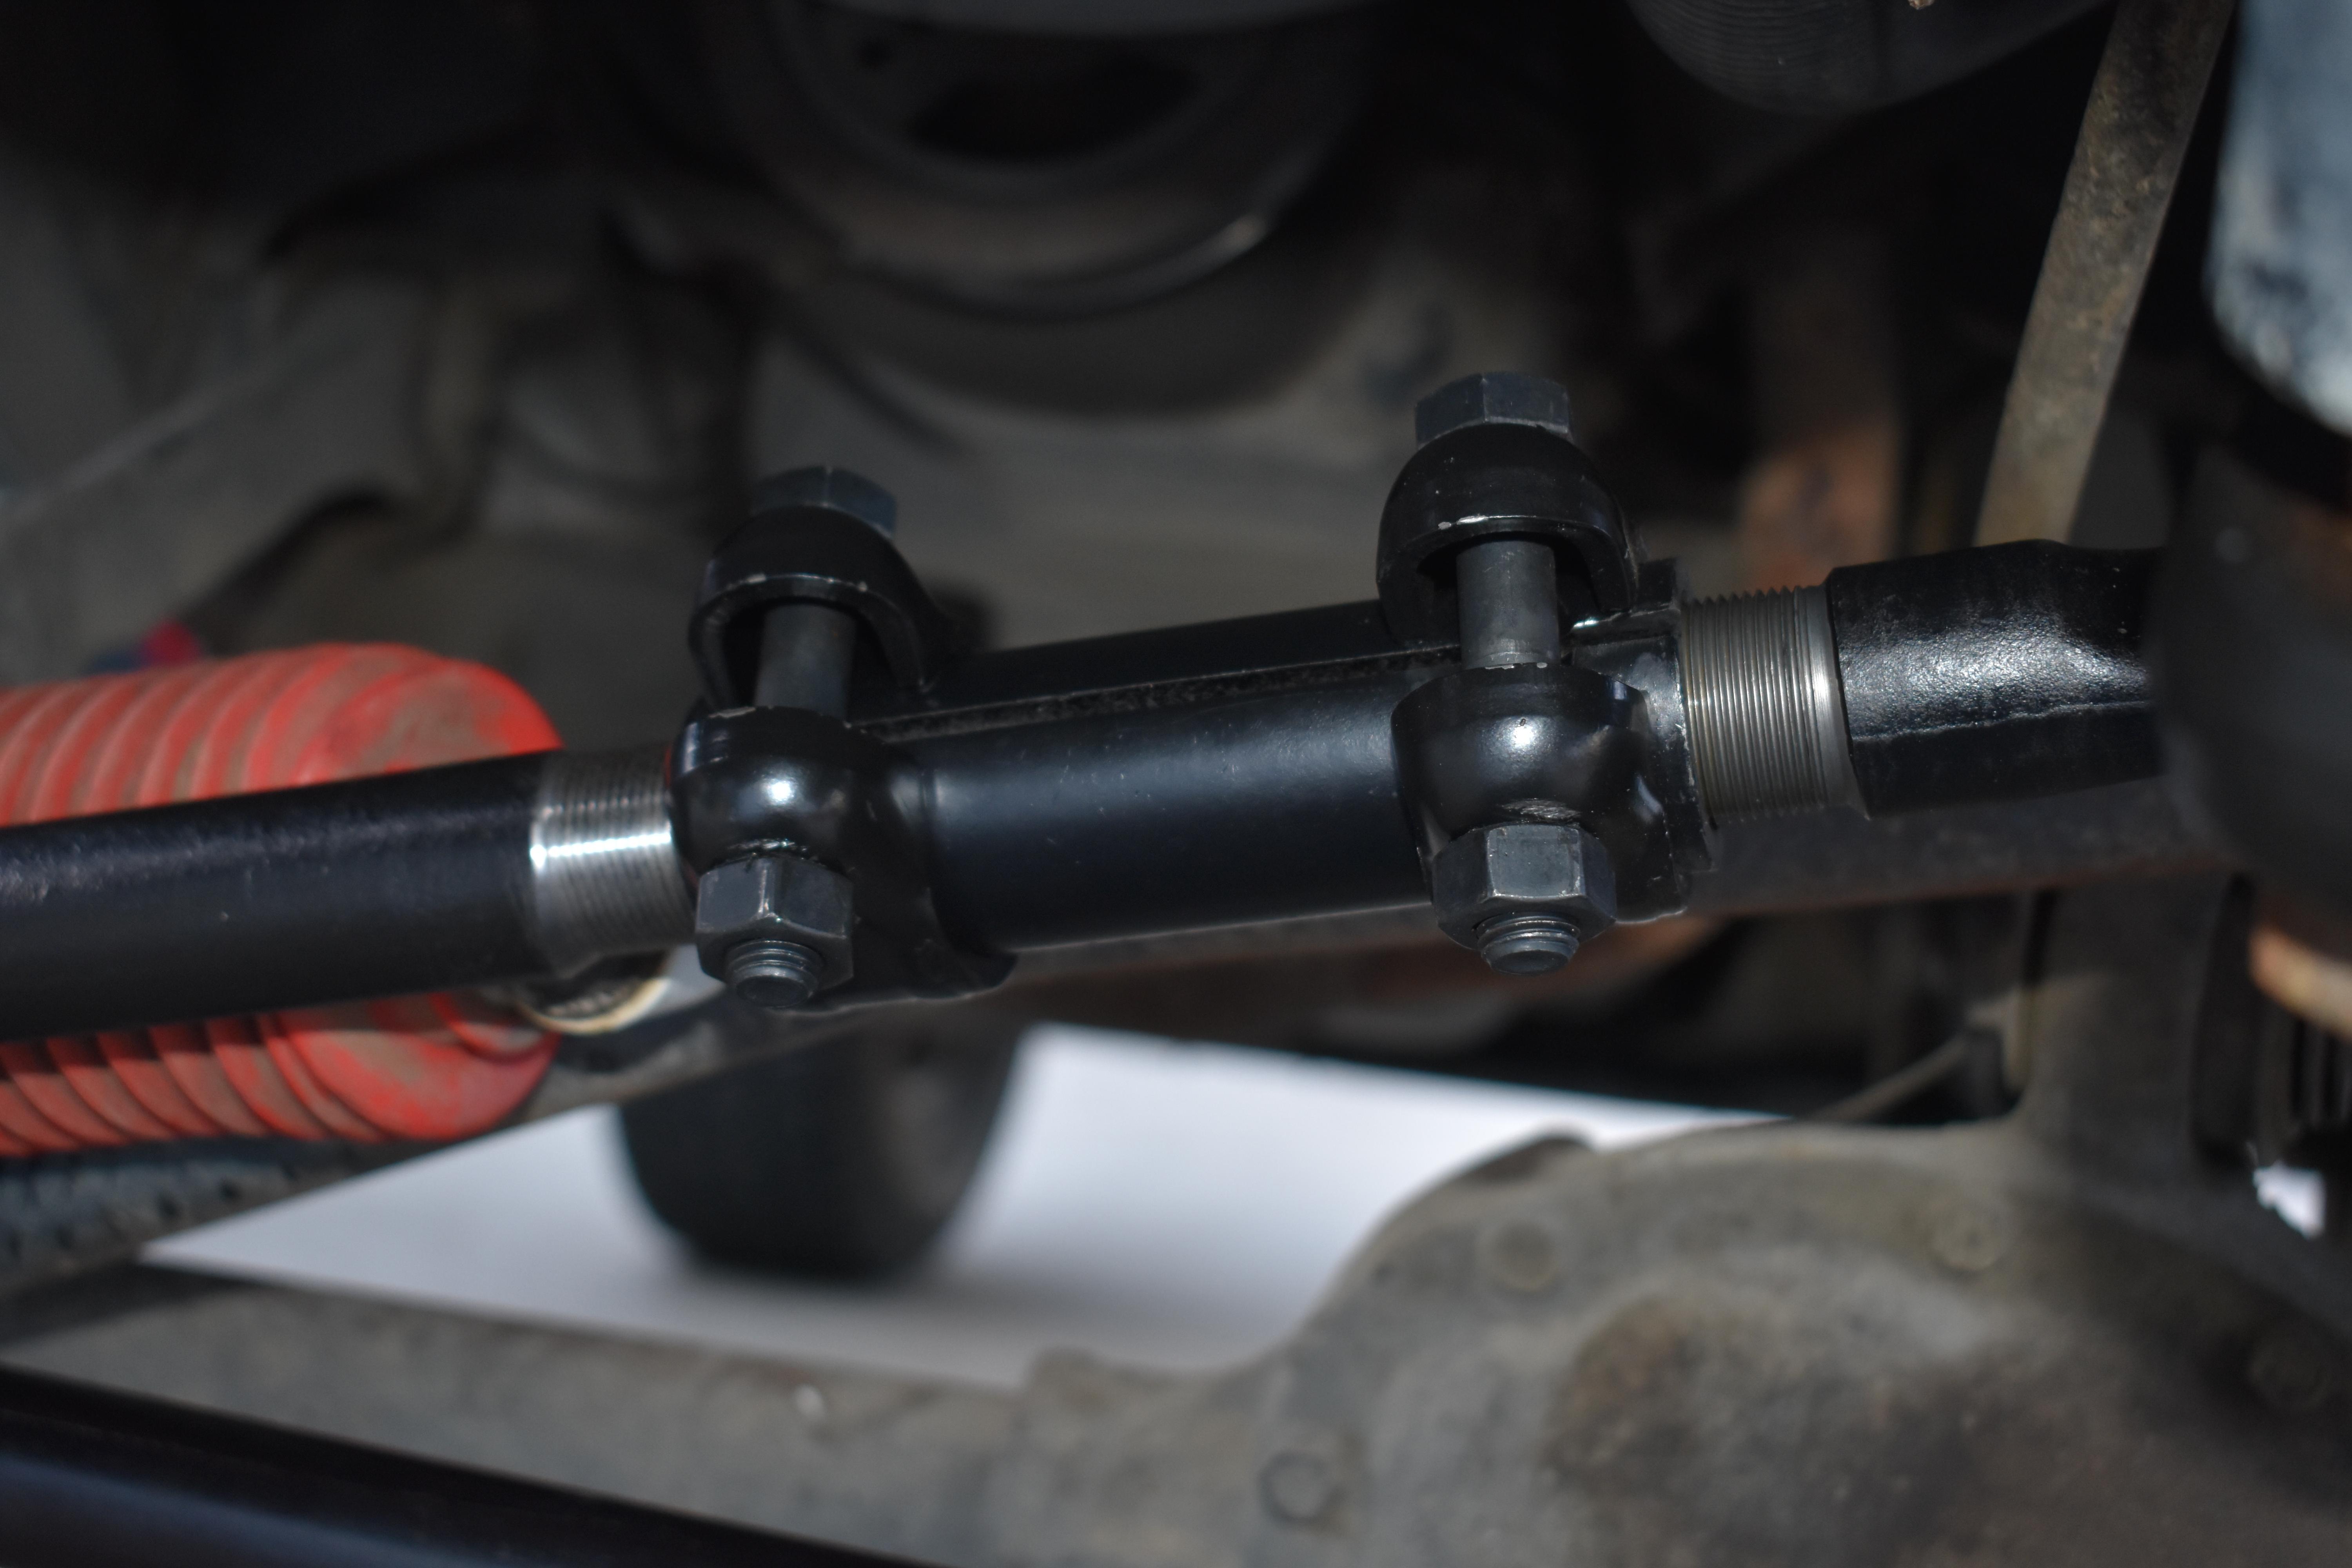
- Install the new tie rod into the back of the new drag link. The tie rod end with the zerk fitting on the side of it’s head goes in this junction location, zerk fitting pointing down. Install the castle nut just snug enough to hold the two bars together, do not tighten.
- Adjust the new components to match the measurements you took from the stock parts.

- Ensure the ball joints at the ends of the tie rod and drag link have been properly greased according to the instructions.
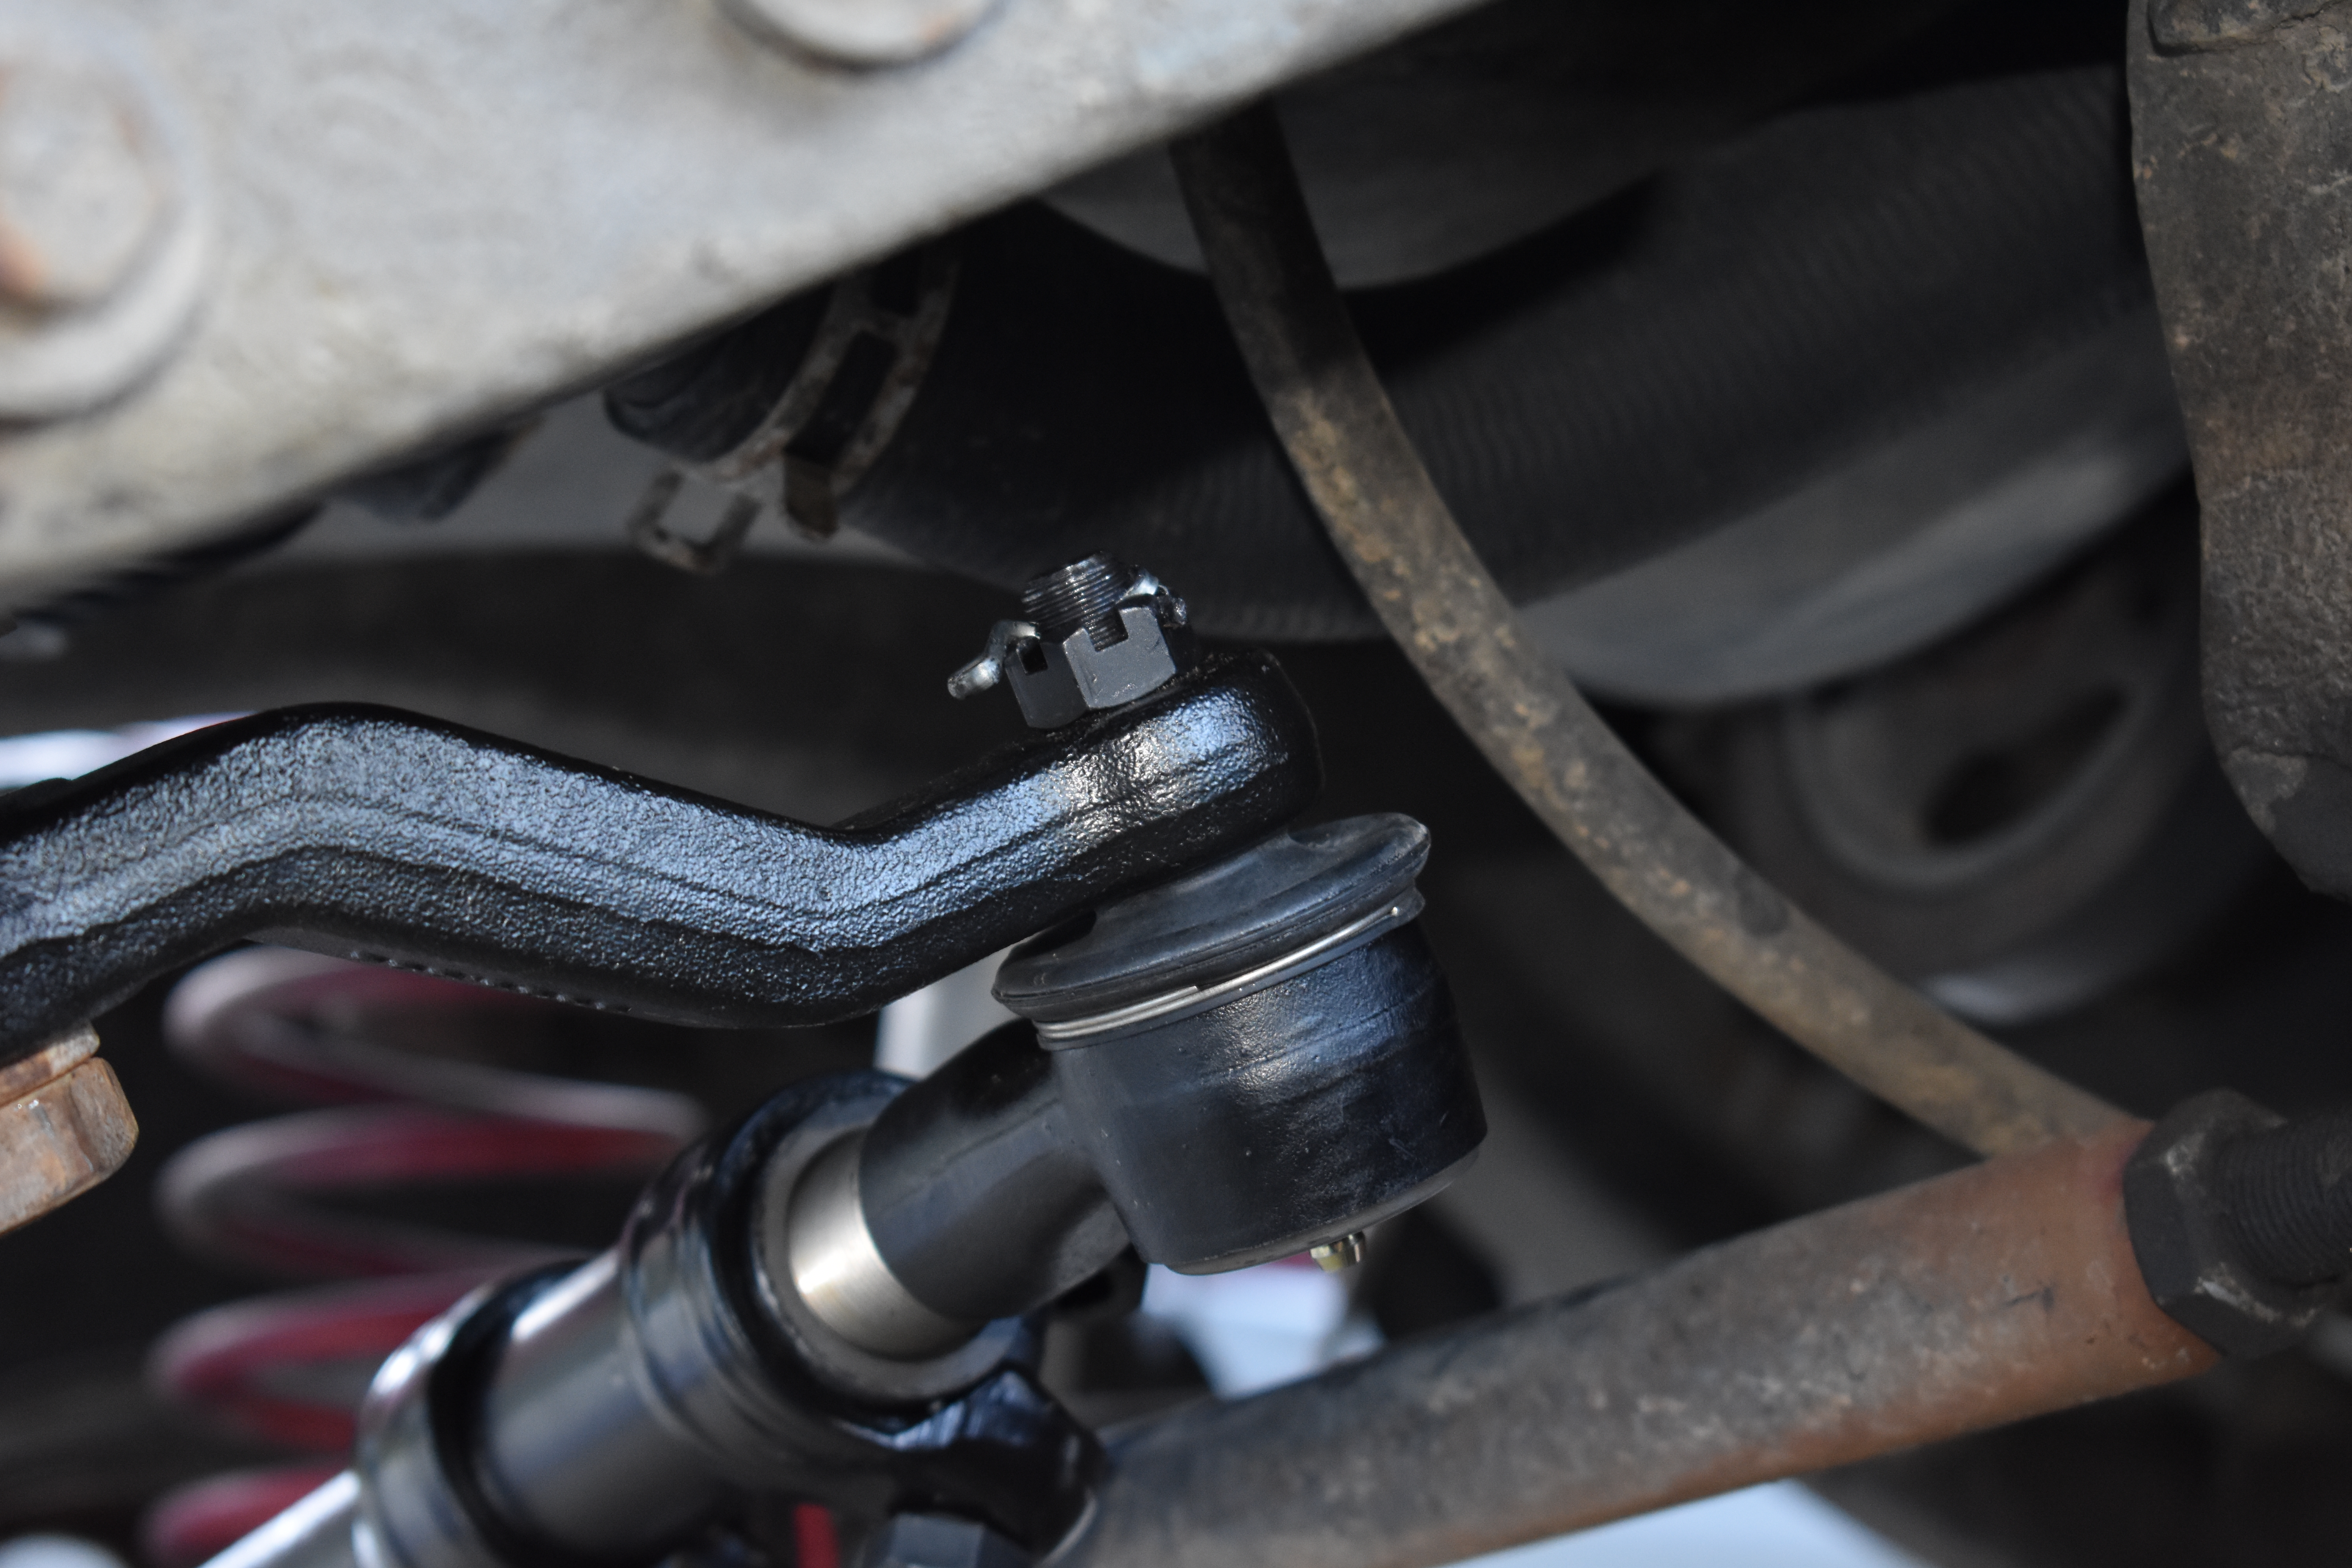
- Install the rod ends at the wheels first, starting with the passenger side. Note the direction of the grease overflow nipples on the ball joint boots, and ensure that they are not pointing towards your brake rotors. You may need to gently rotate the boot to aim them away. You may need to loosen the boot retaining clip with a small screwdriver.
- Tighten both castle nuts at the steering arms.
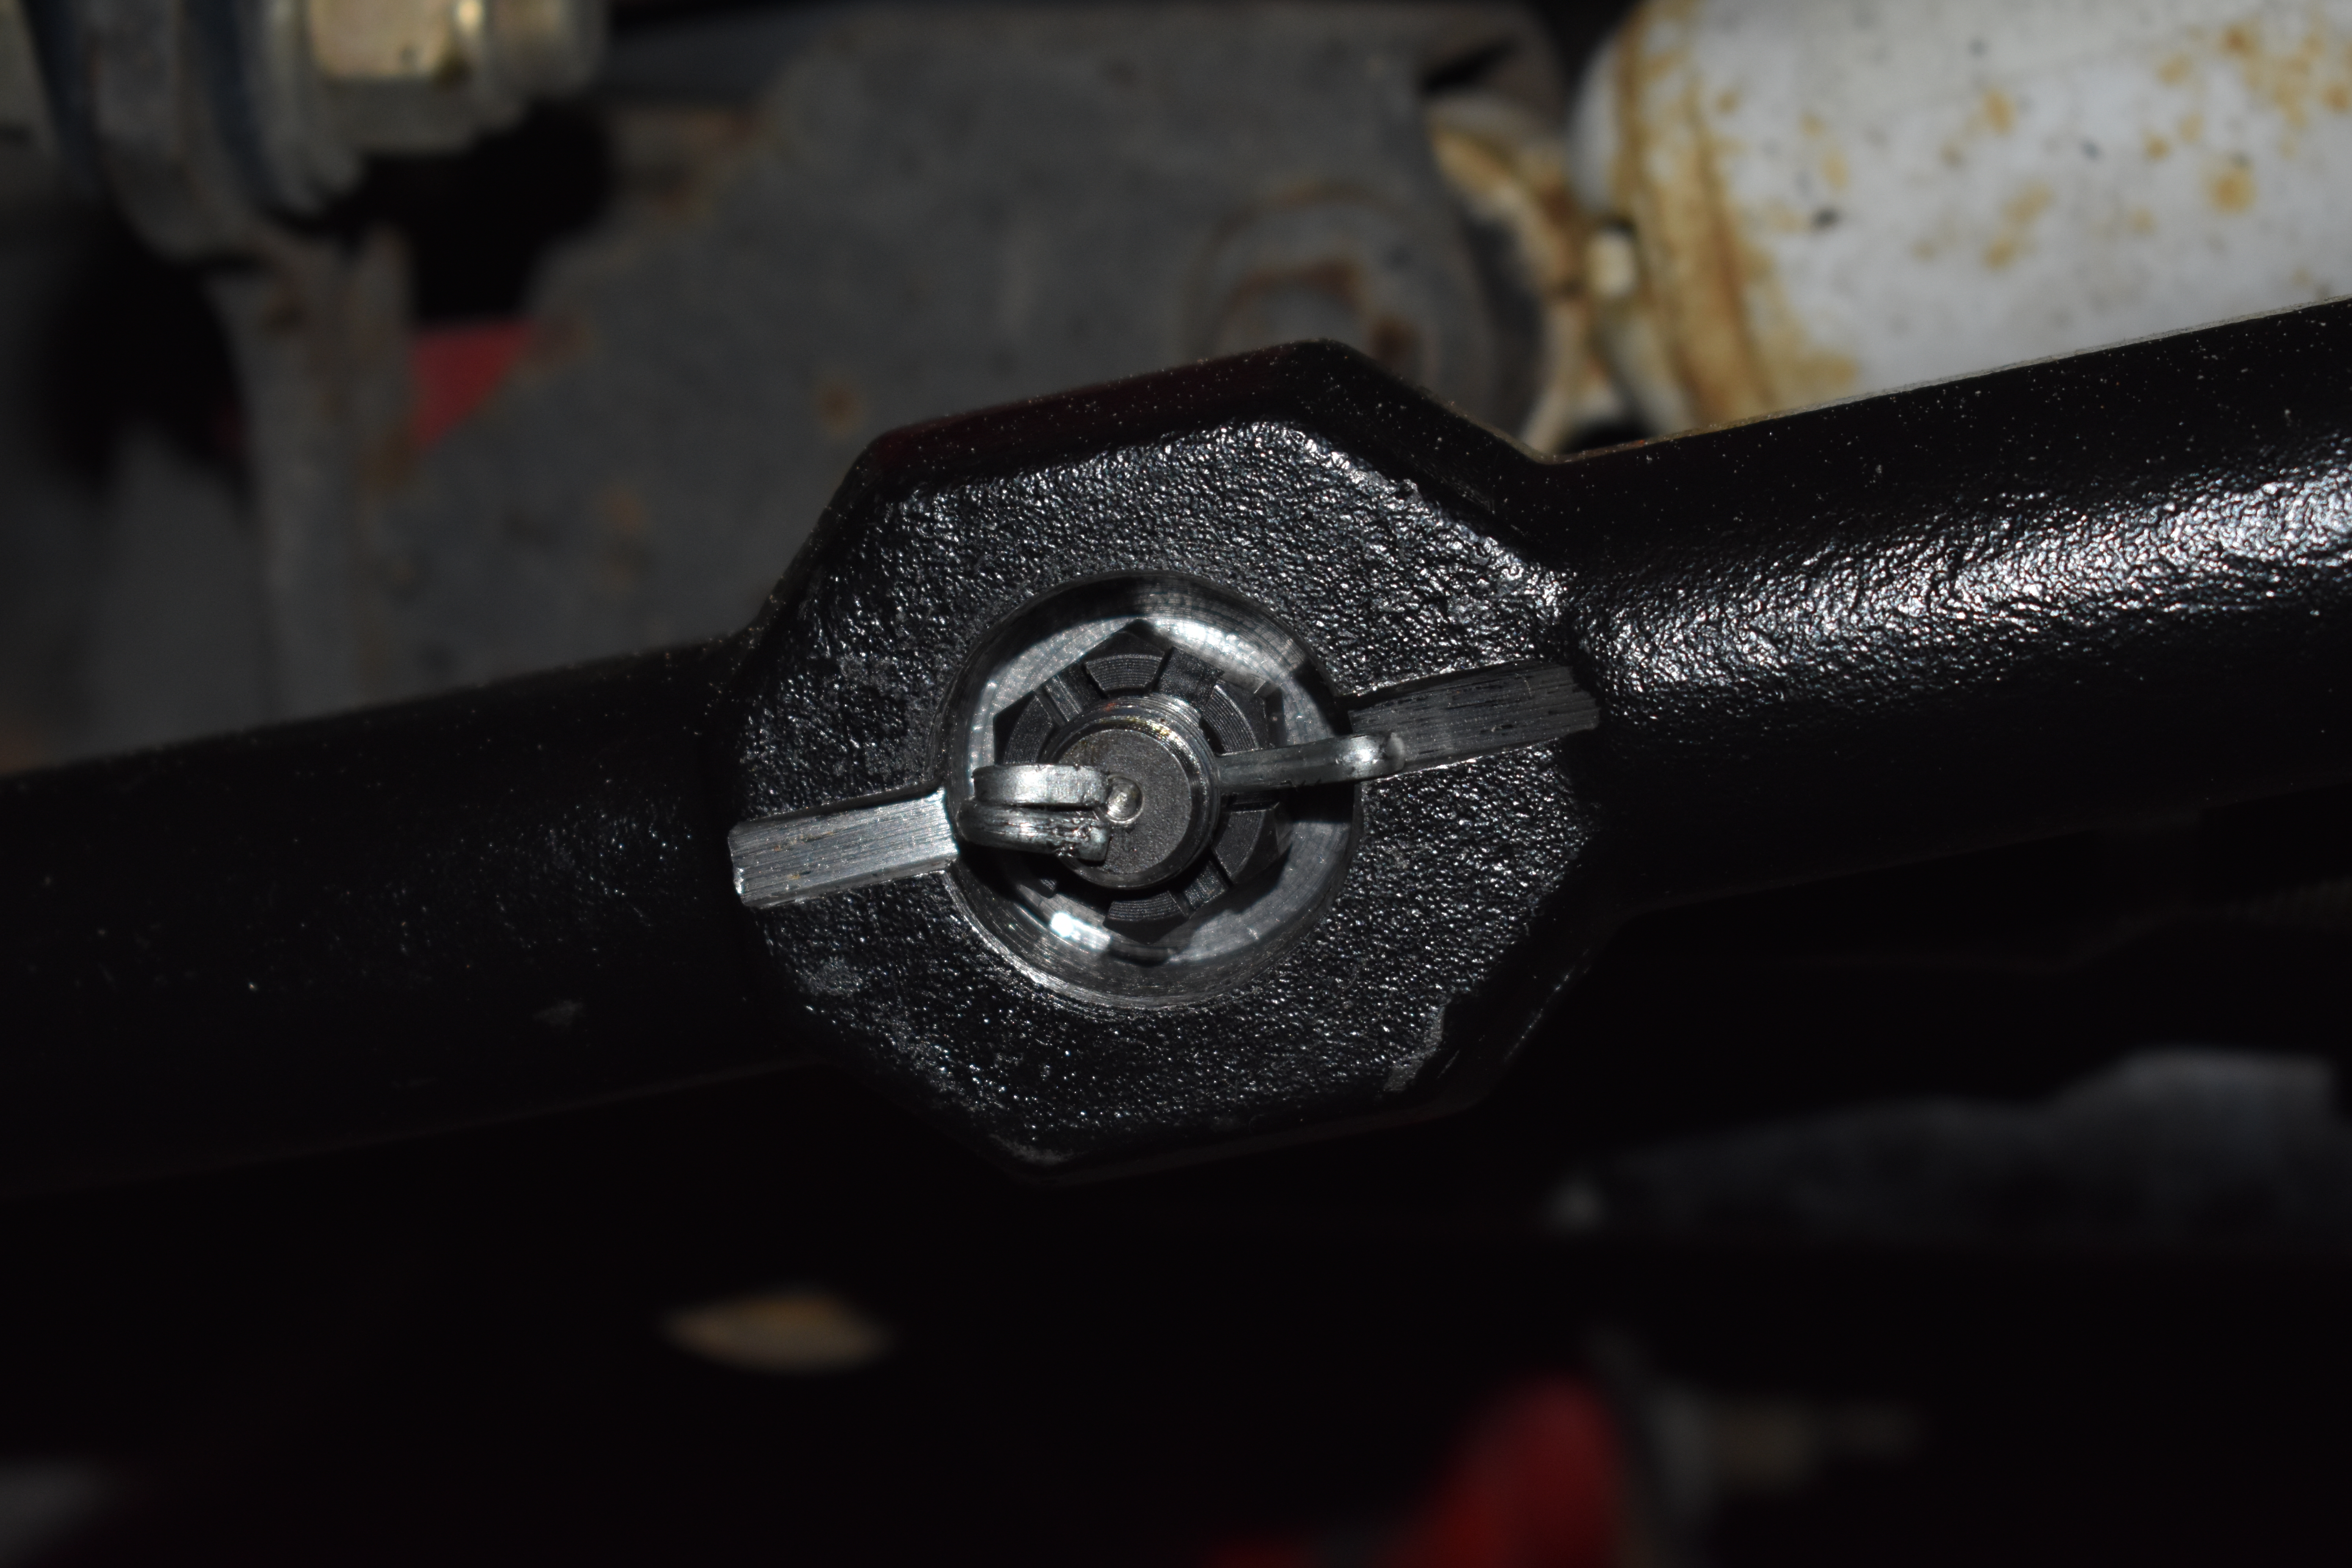
- Torque the castle nuts to 55 ft. lbs, keeping in mind that you will have to align the castle nut to allow you to install the cotter pin through its hole.
- Install the cotter pins into their holes, through the castle nuts. Bend the ends of the pins around the castle nuts such that they cannot be pulled out as shown in the instructions.
- Install the pitman arm end of the drag link
- Tighten the castle nut, torque to spec, and install the cotter pin at the pitman arm as you did at the steering knuckles previously.
- Remove the new tie rod from the new drag link, install the castle nut back on the rod end outside of the drag link, rotate the tie rod ball end such that the cotter pin lines up with the slot in the drag link
- Reinstall the tie rod end back into the drag link, install the castle nut and torque to 55 ft. lbs, making sure you end with the cotter pin hole open
- Install the cotter pin. You can bend a slight curve into the cotter pin to aid with the installation. Bend the cotter pin as before.
- Adjust the tie rod until the wheels are straight. Since you chocked the wheels, it should be close already, but be sure to measure. It doesn’t have to be perfect, as you will want to have your Jeep professionally aligned after this upgrade.
- When you are satisfied with your results, tighten both of the tie rod end clamps and torque to 40 ft. lbs.
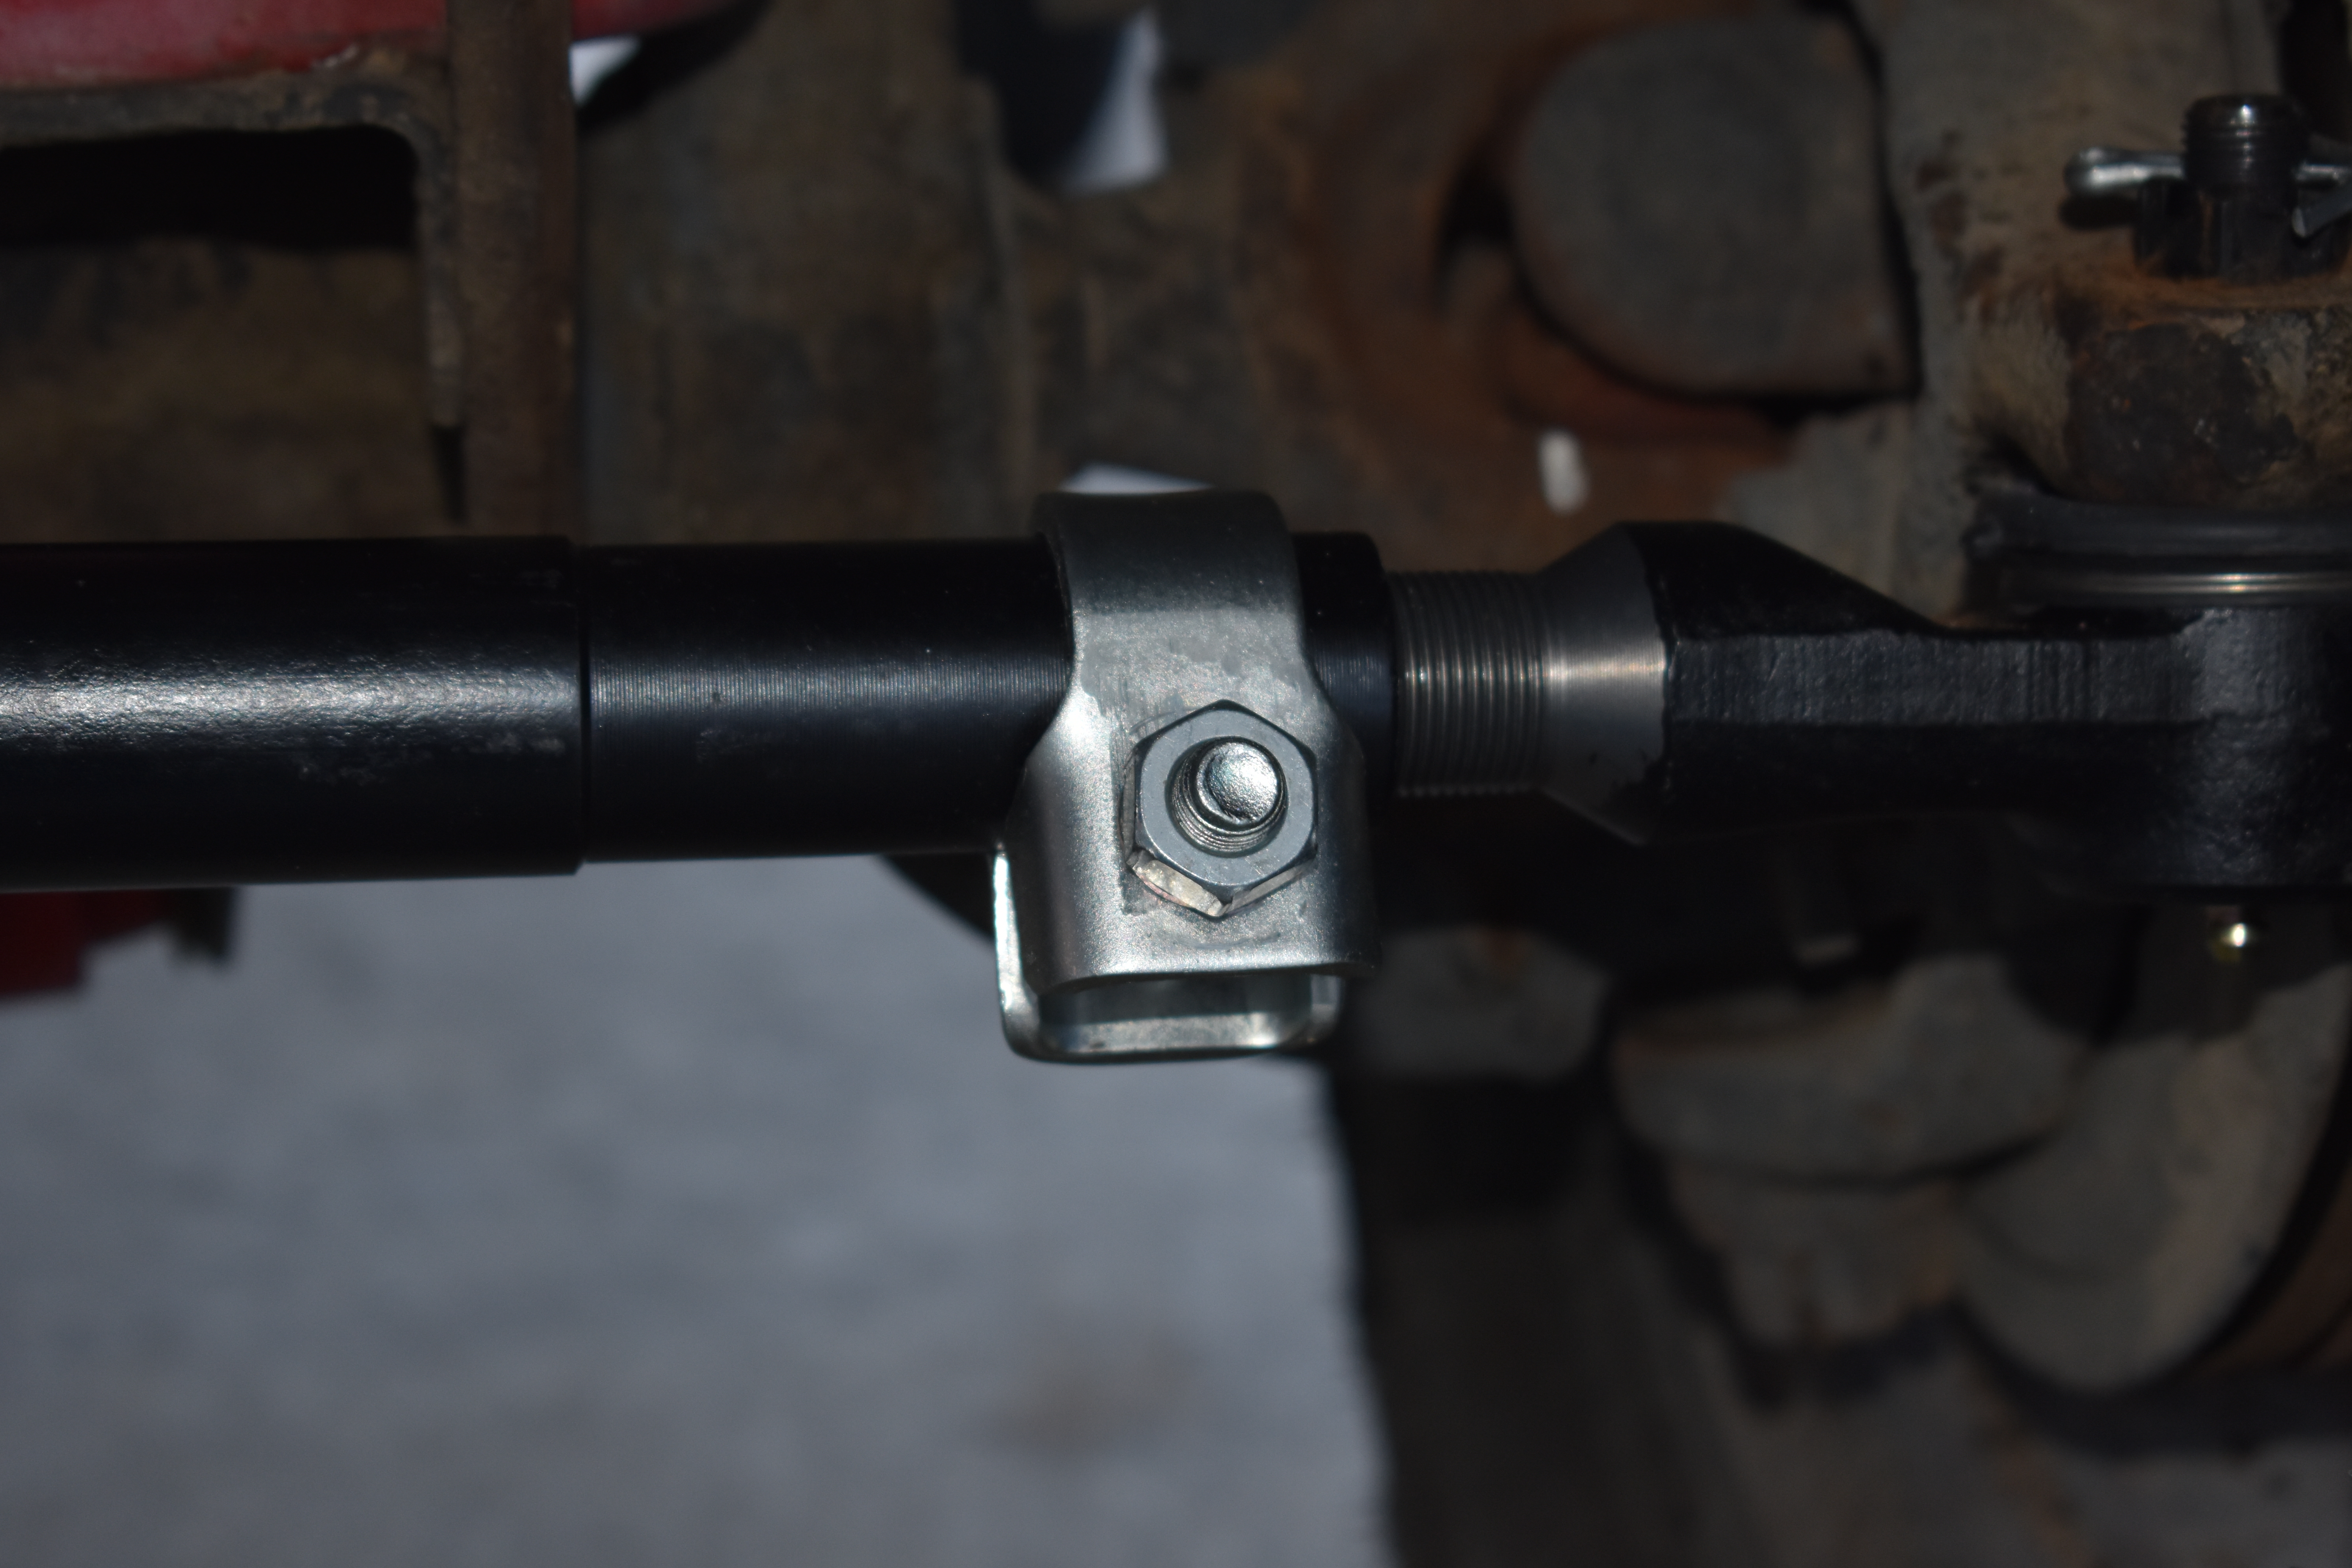
- With the wheels straight, adjust the drag link adjuster to center your steering wheel. This is just an initial setting, when you have your Jeep professionally aligned, they will check this.
- Once you have your steering wheel aligned, tighten the drag link adjuster clamp bolts and torque to 40 ft. lbs.
- Reinstall your steering stabilizer shock at the axle if you removed it, reuse the stock bolt and nut and torque to 55 ft. lbs.
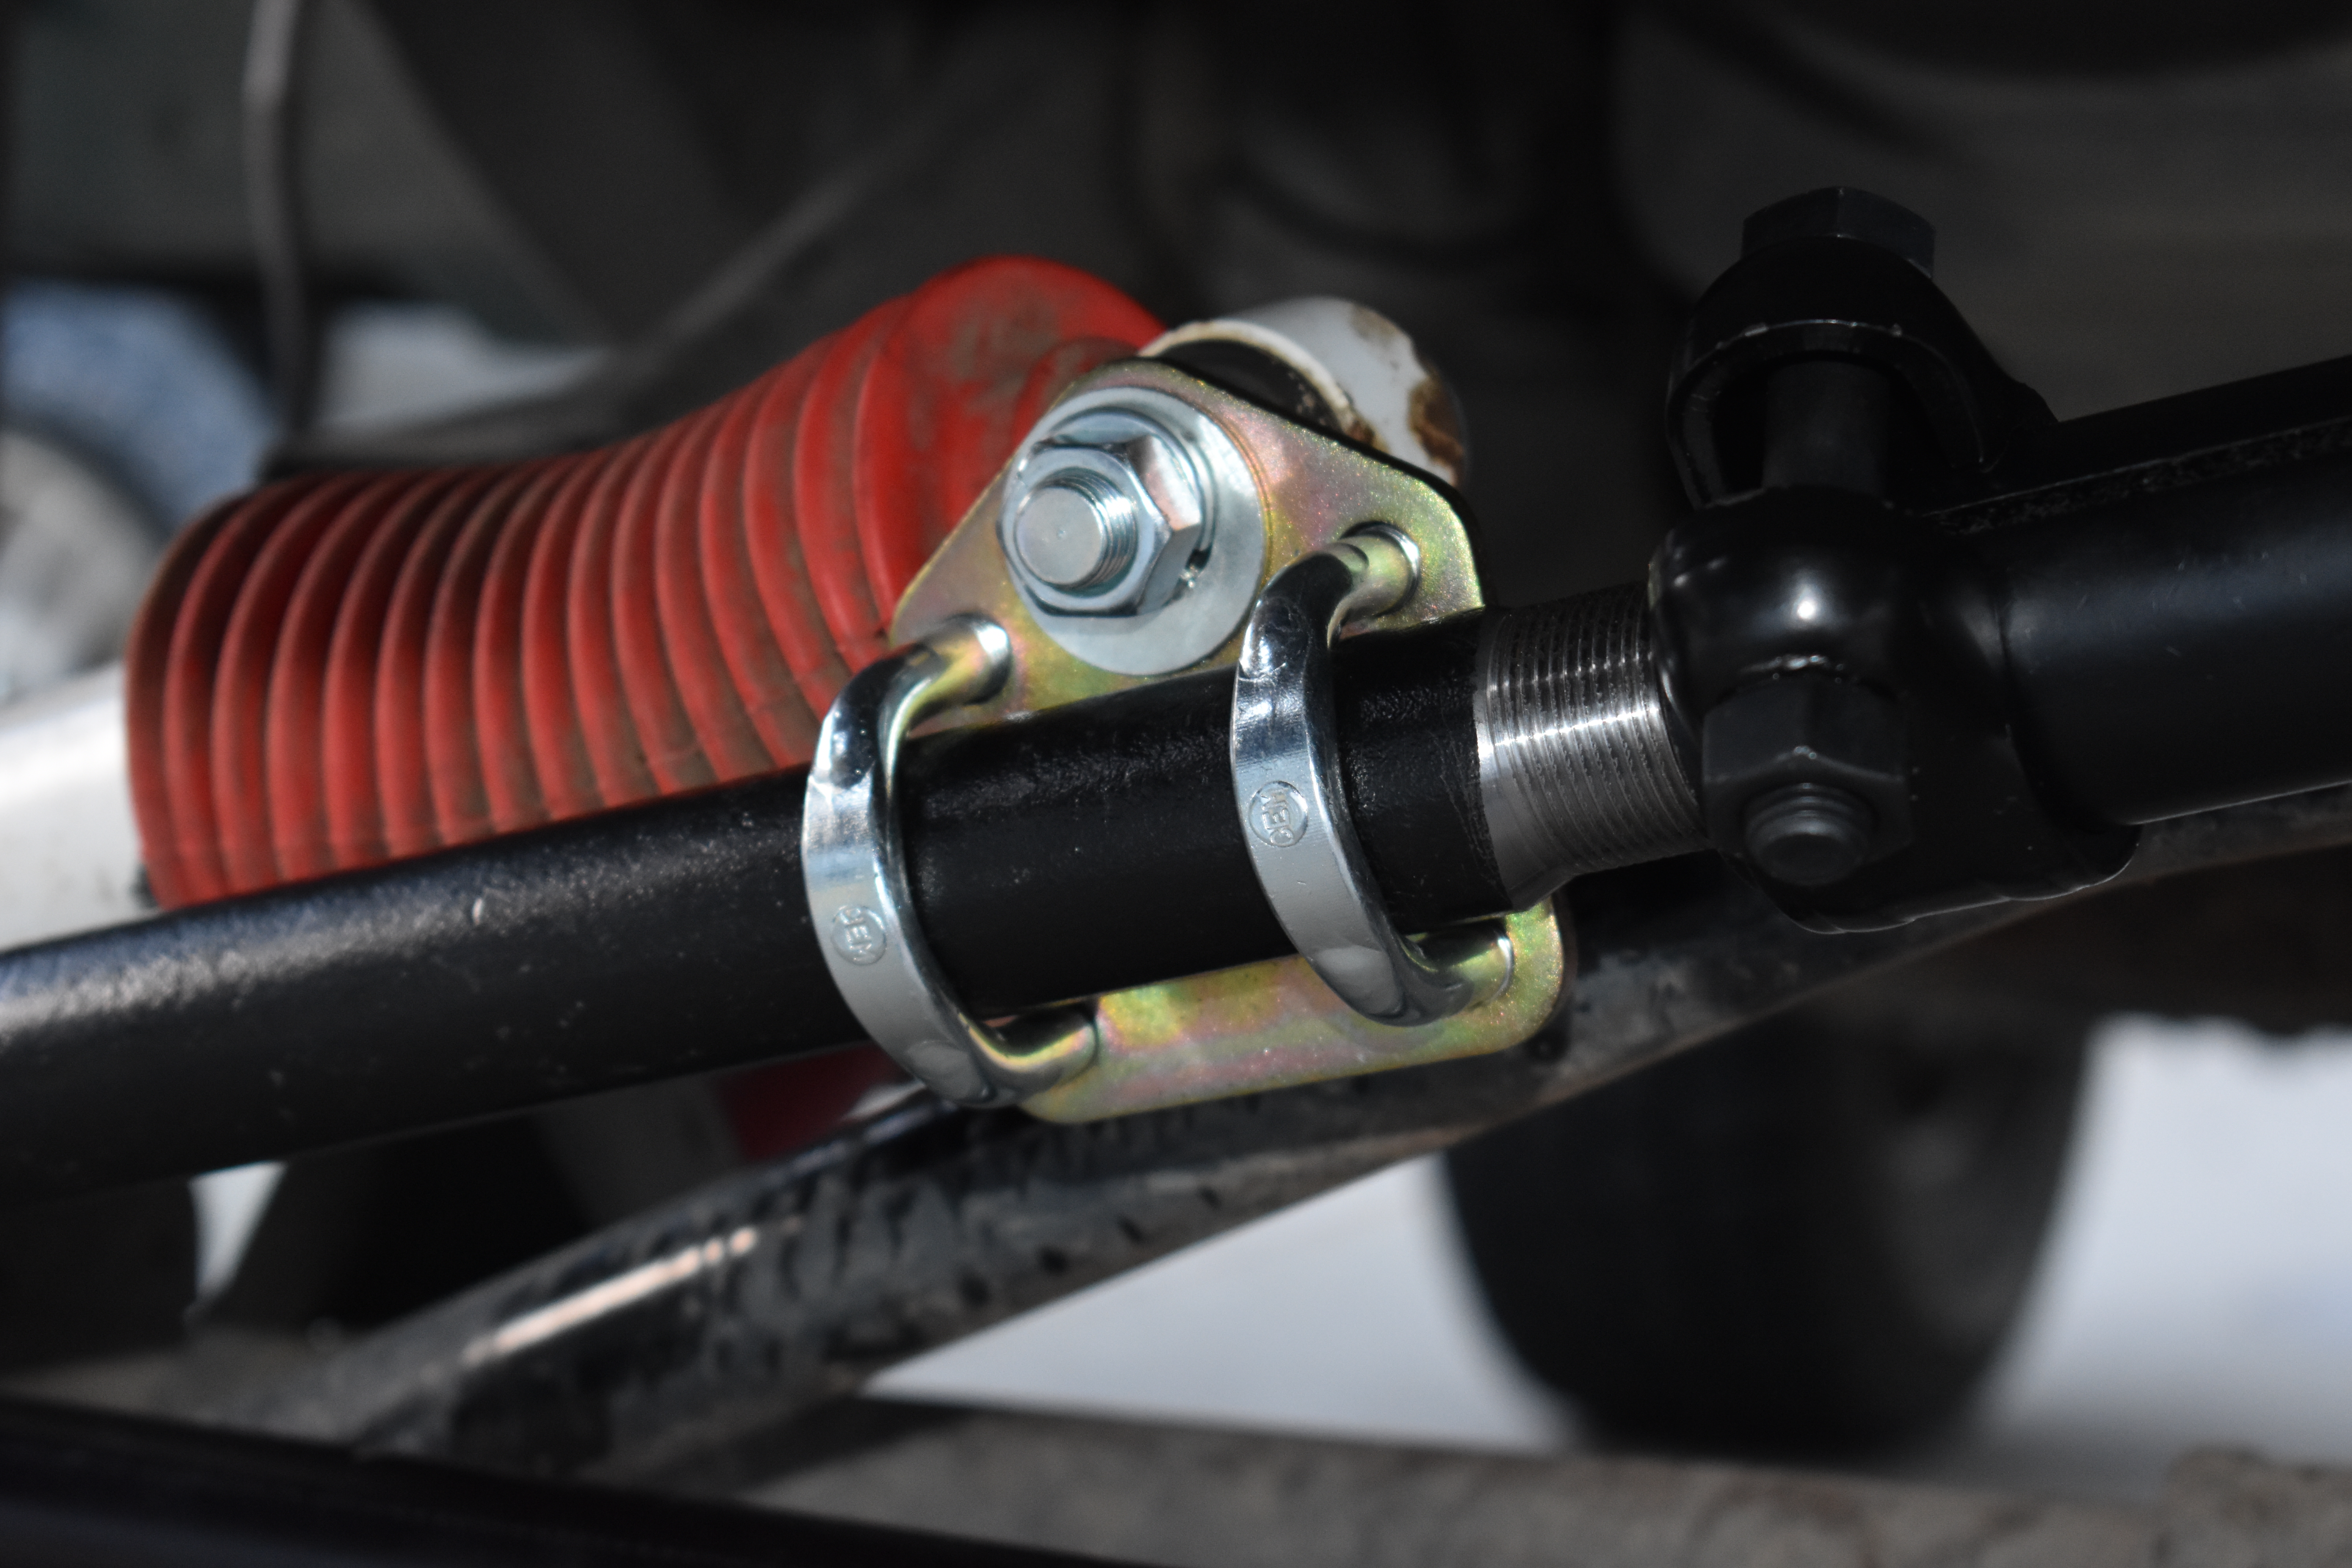
- Assemble the new steering stabilizer shock bracket kit onto the drag link below the adjuster. Snug the nuts, but do not tighten as you will need to adjust the bracket in the next few steps.
- Slip the stabilizer shock onto the stud and install the supplied flat washer, lock washer, and nut, but do not tighten
- To set up and adjust the stabilizer shock properly, turn the wheels all the way to the right to the lock, and hold them there. This should completely compress the stabilizer shock, if it does not, compress the stabilizer all the way, pull it back out 1/8” and adjust the stabilizer bracket on the drag link to accommodate the length of the stabilizer. Install the stabilizer onto the stud. Snug the 4 bracket nuts further down so the bracket cannot move on the drag link. Reinstall the stabilizer mounting hardware onto the stud, tighten and torque to 45 ft. lbs:
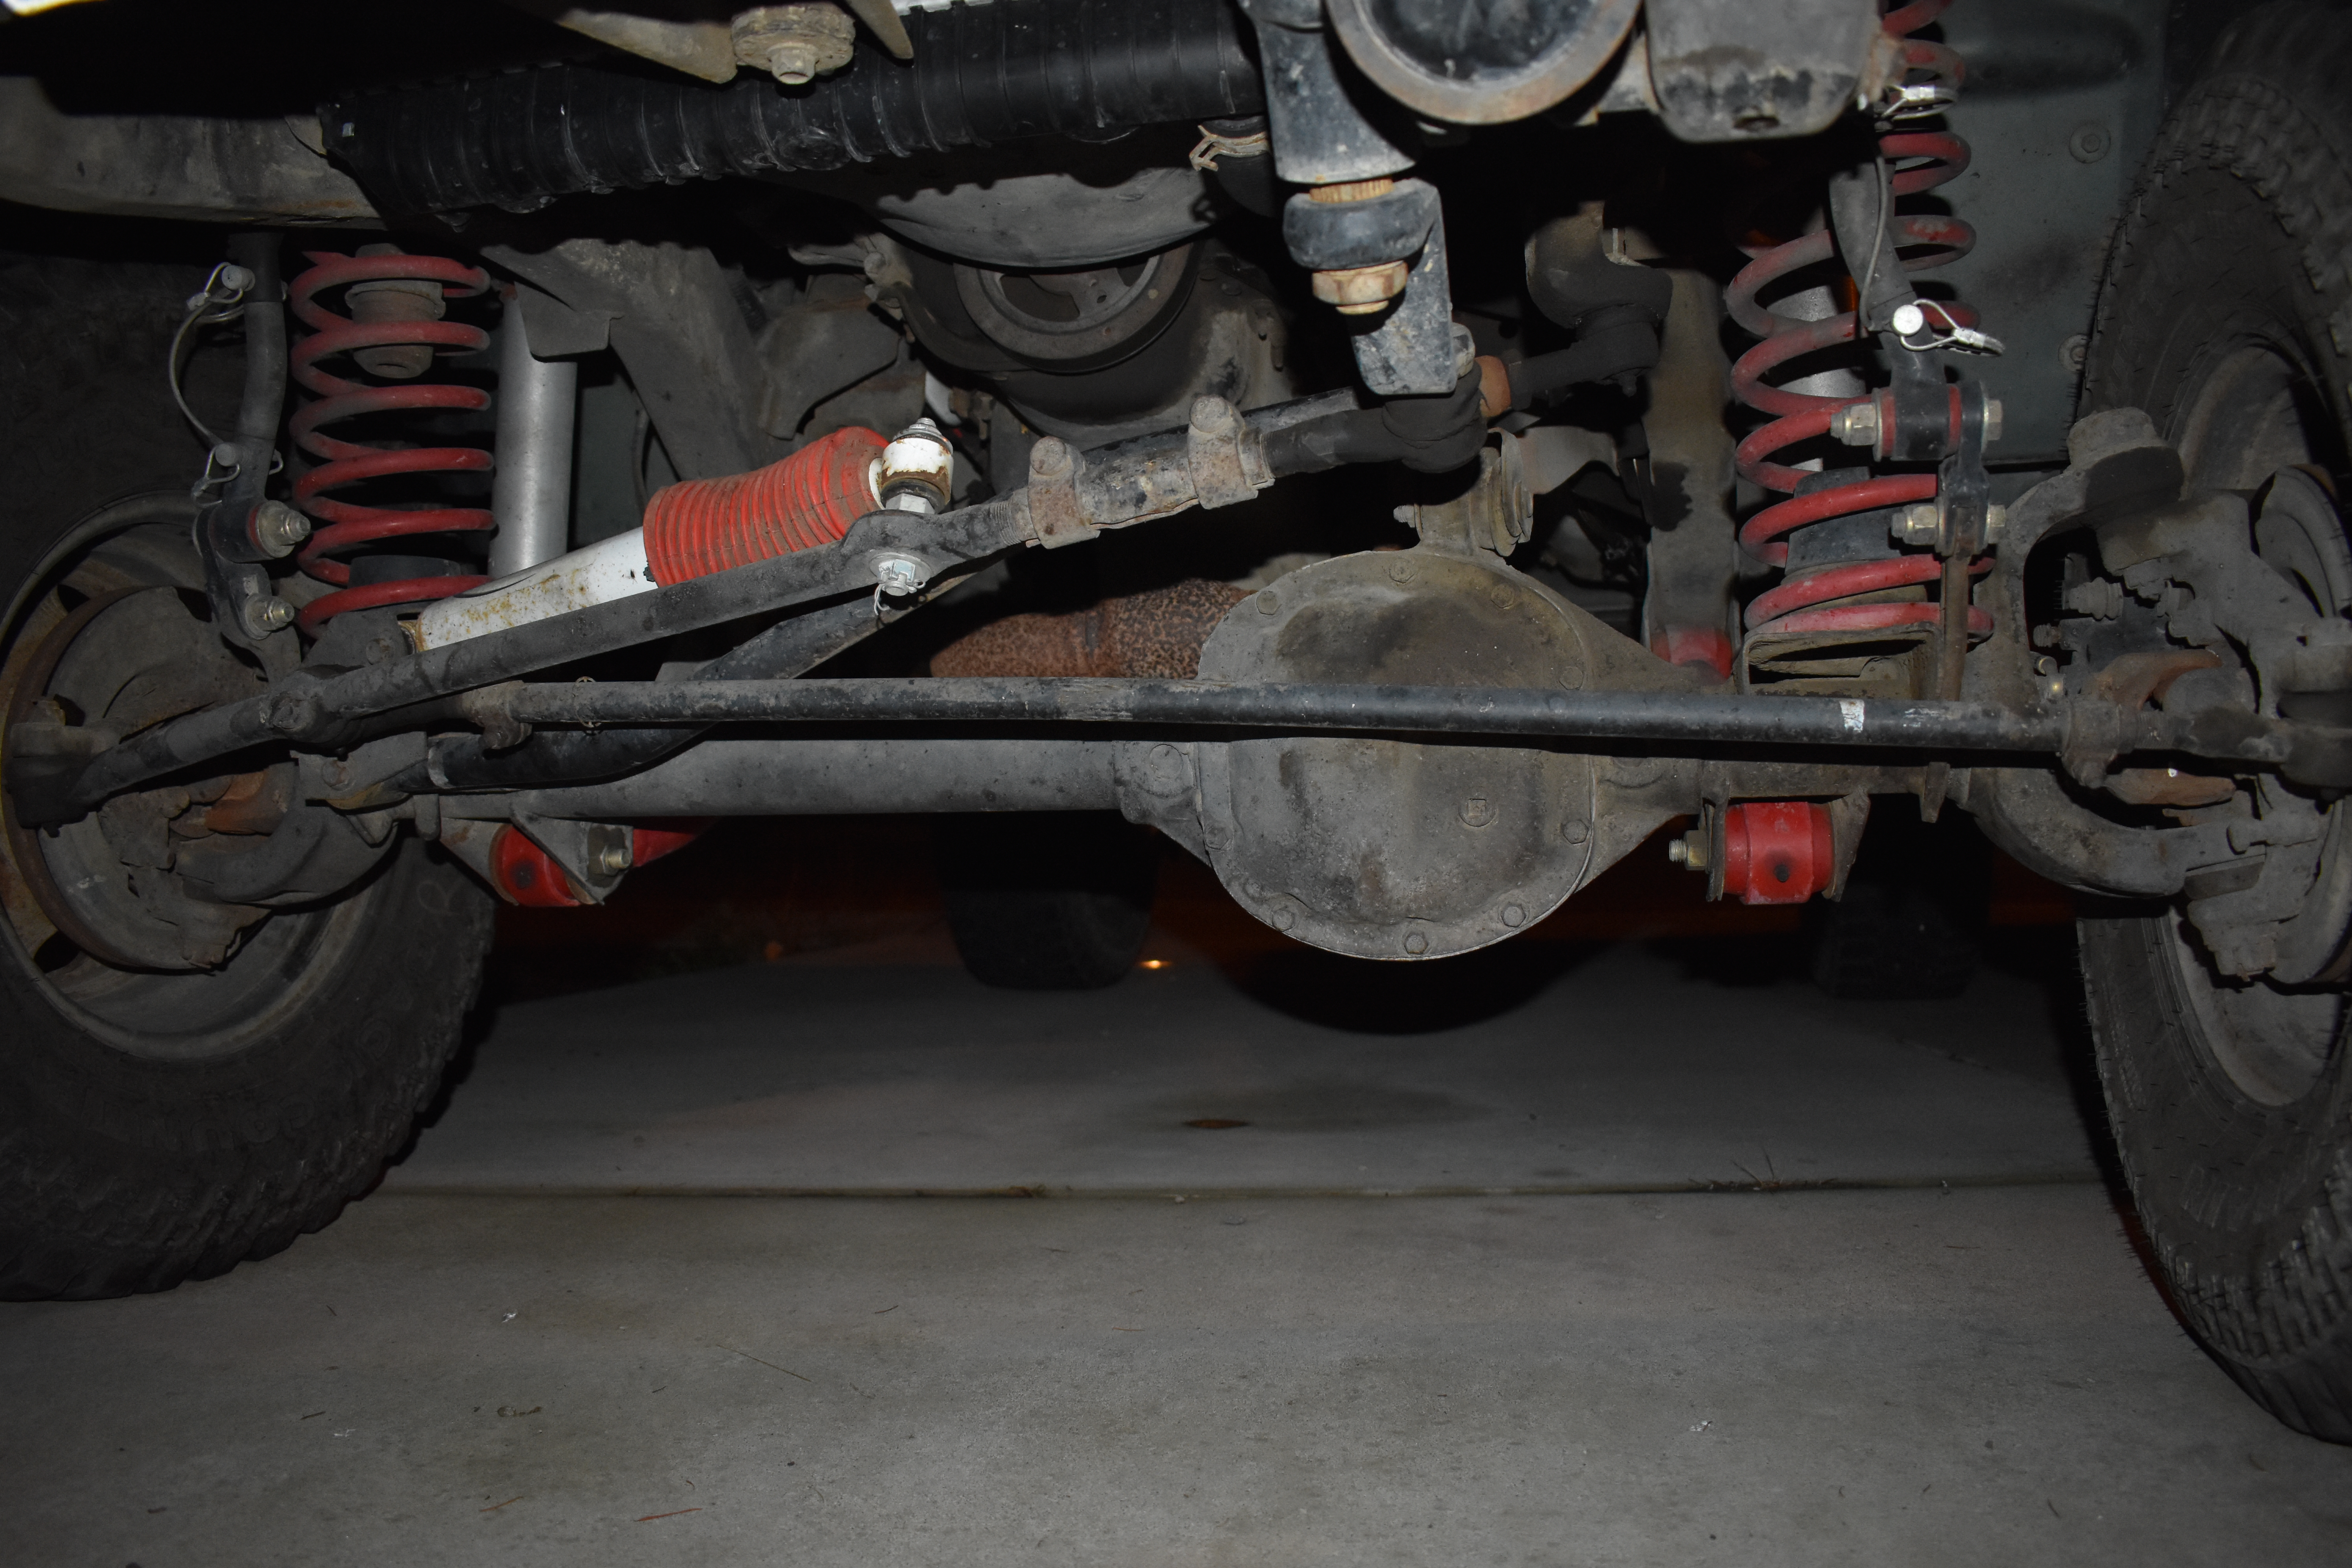
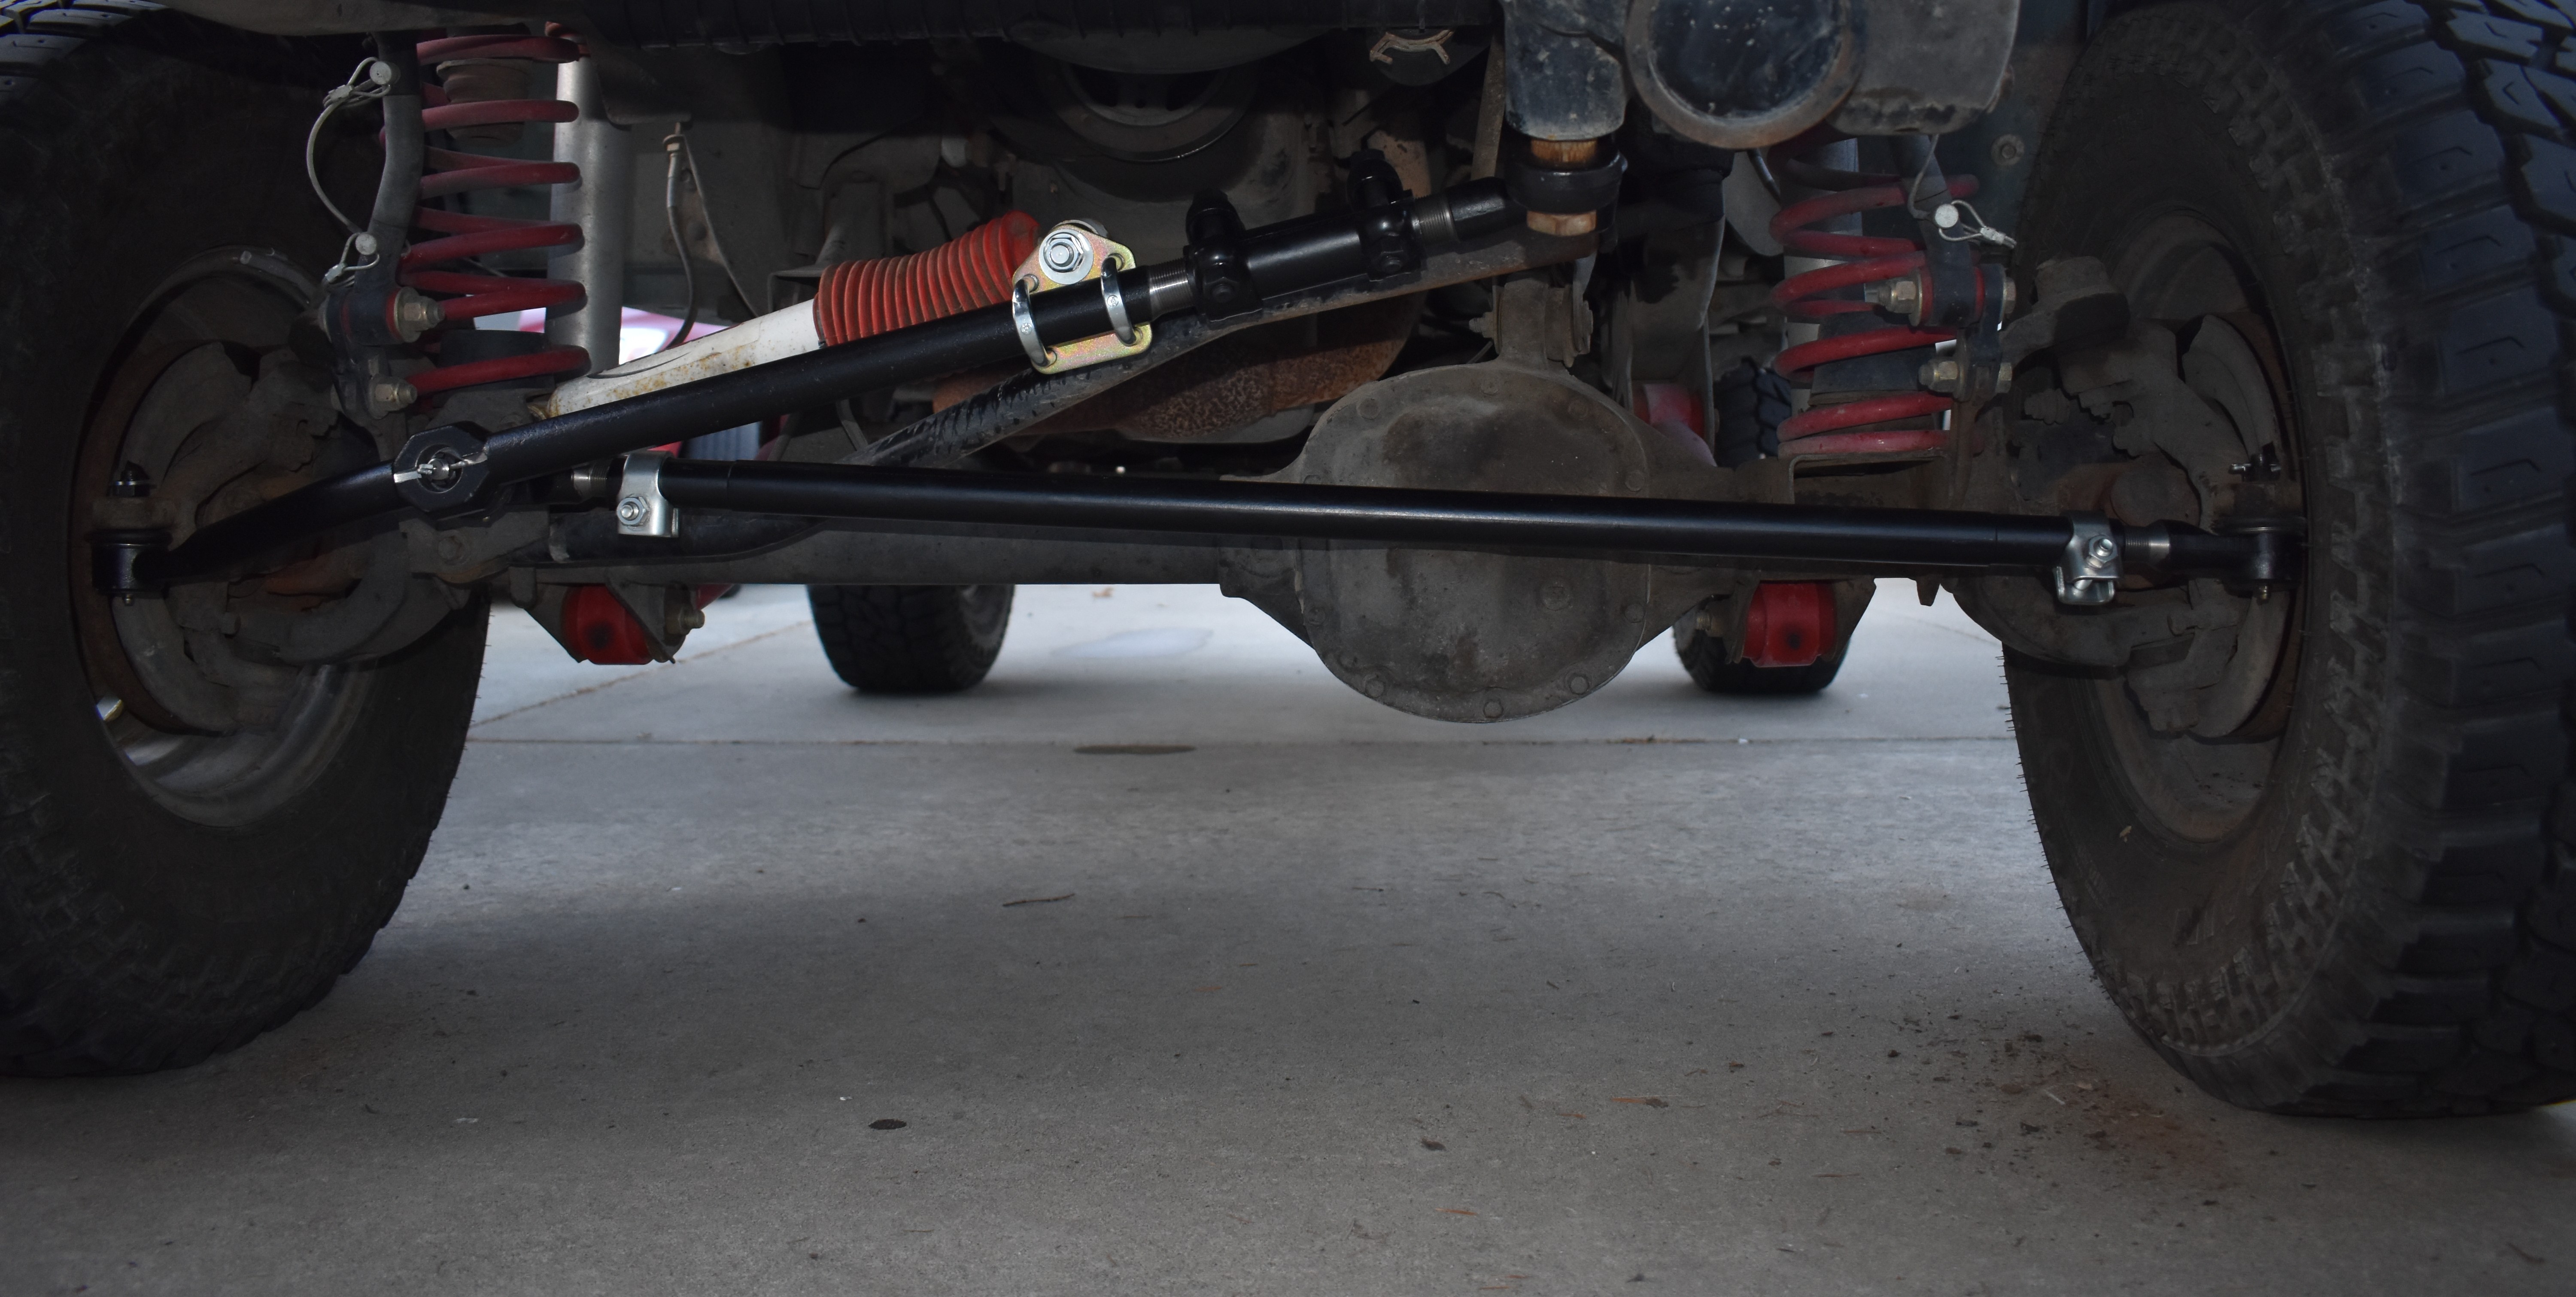
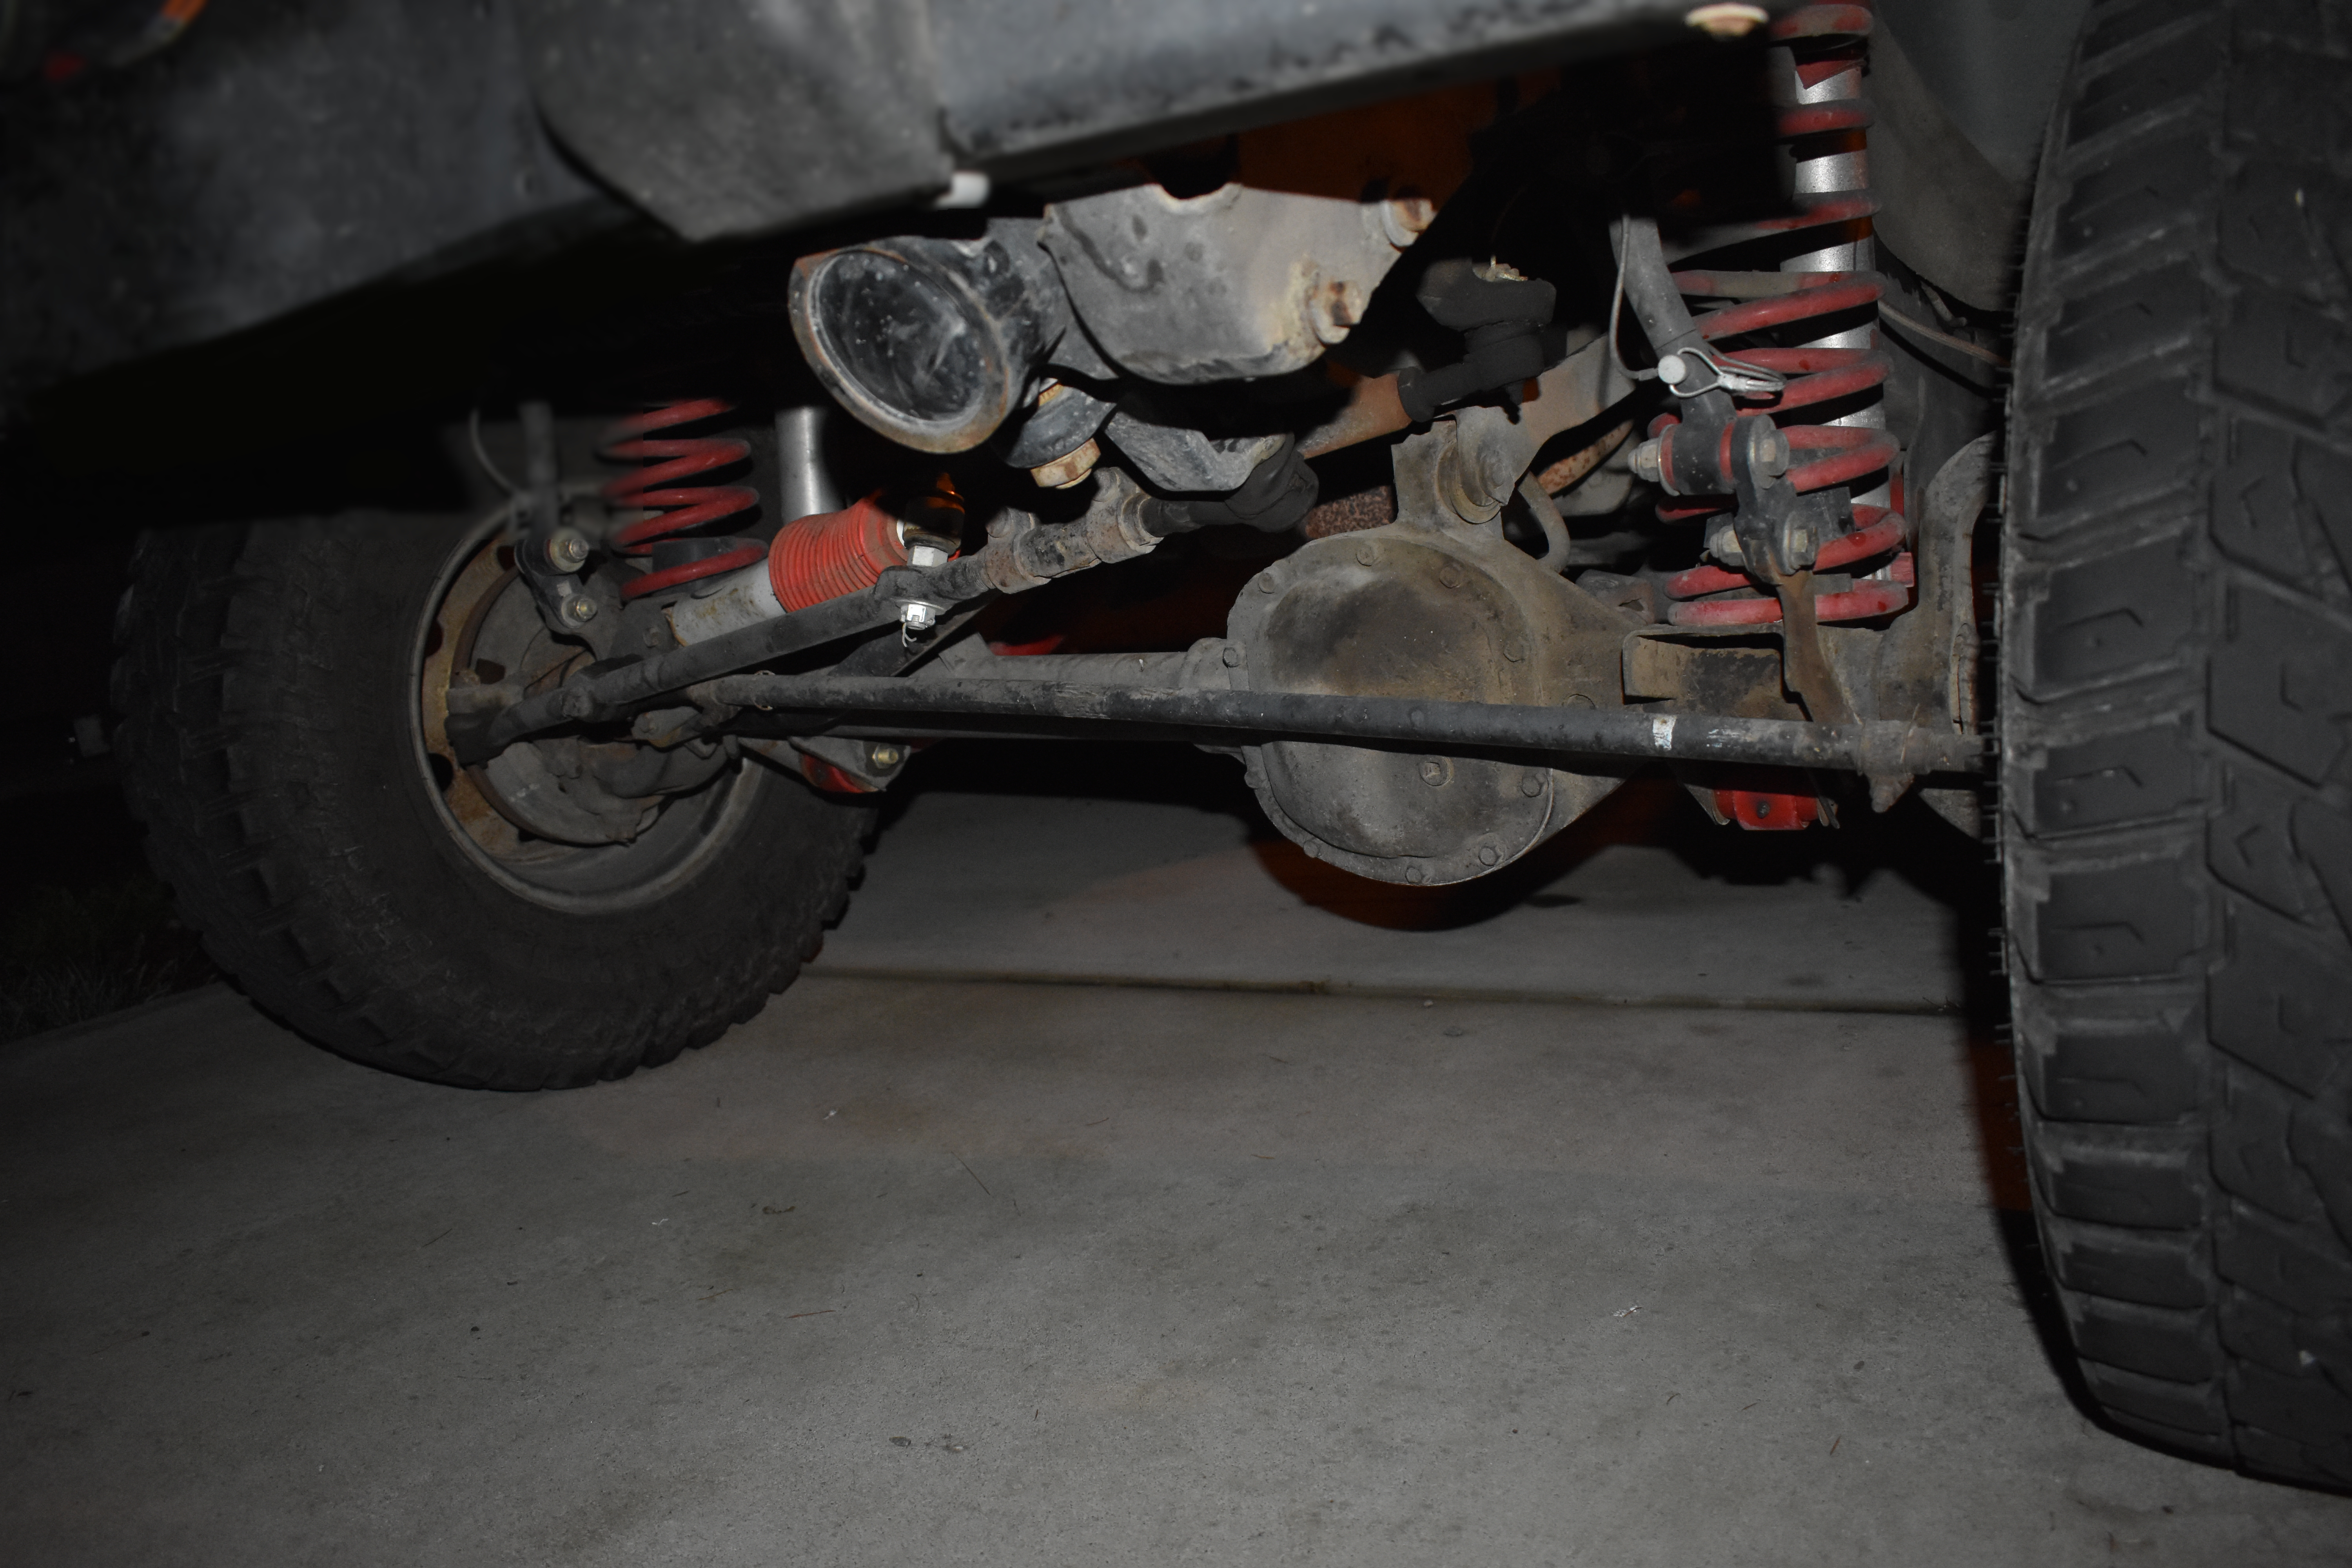
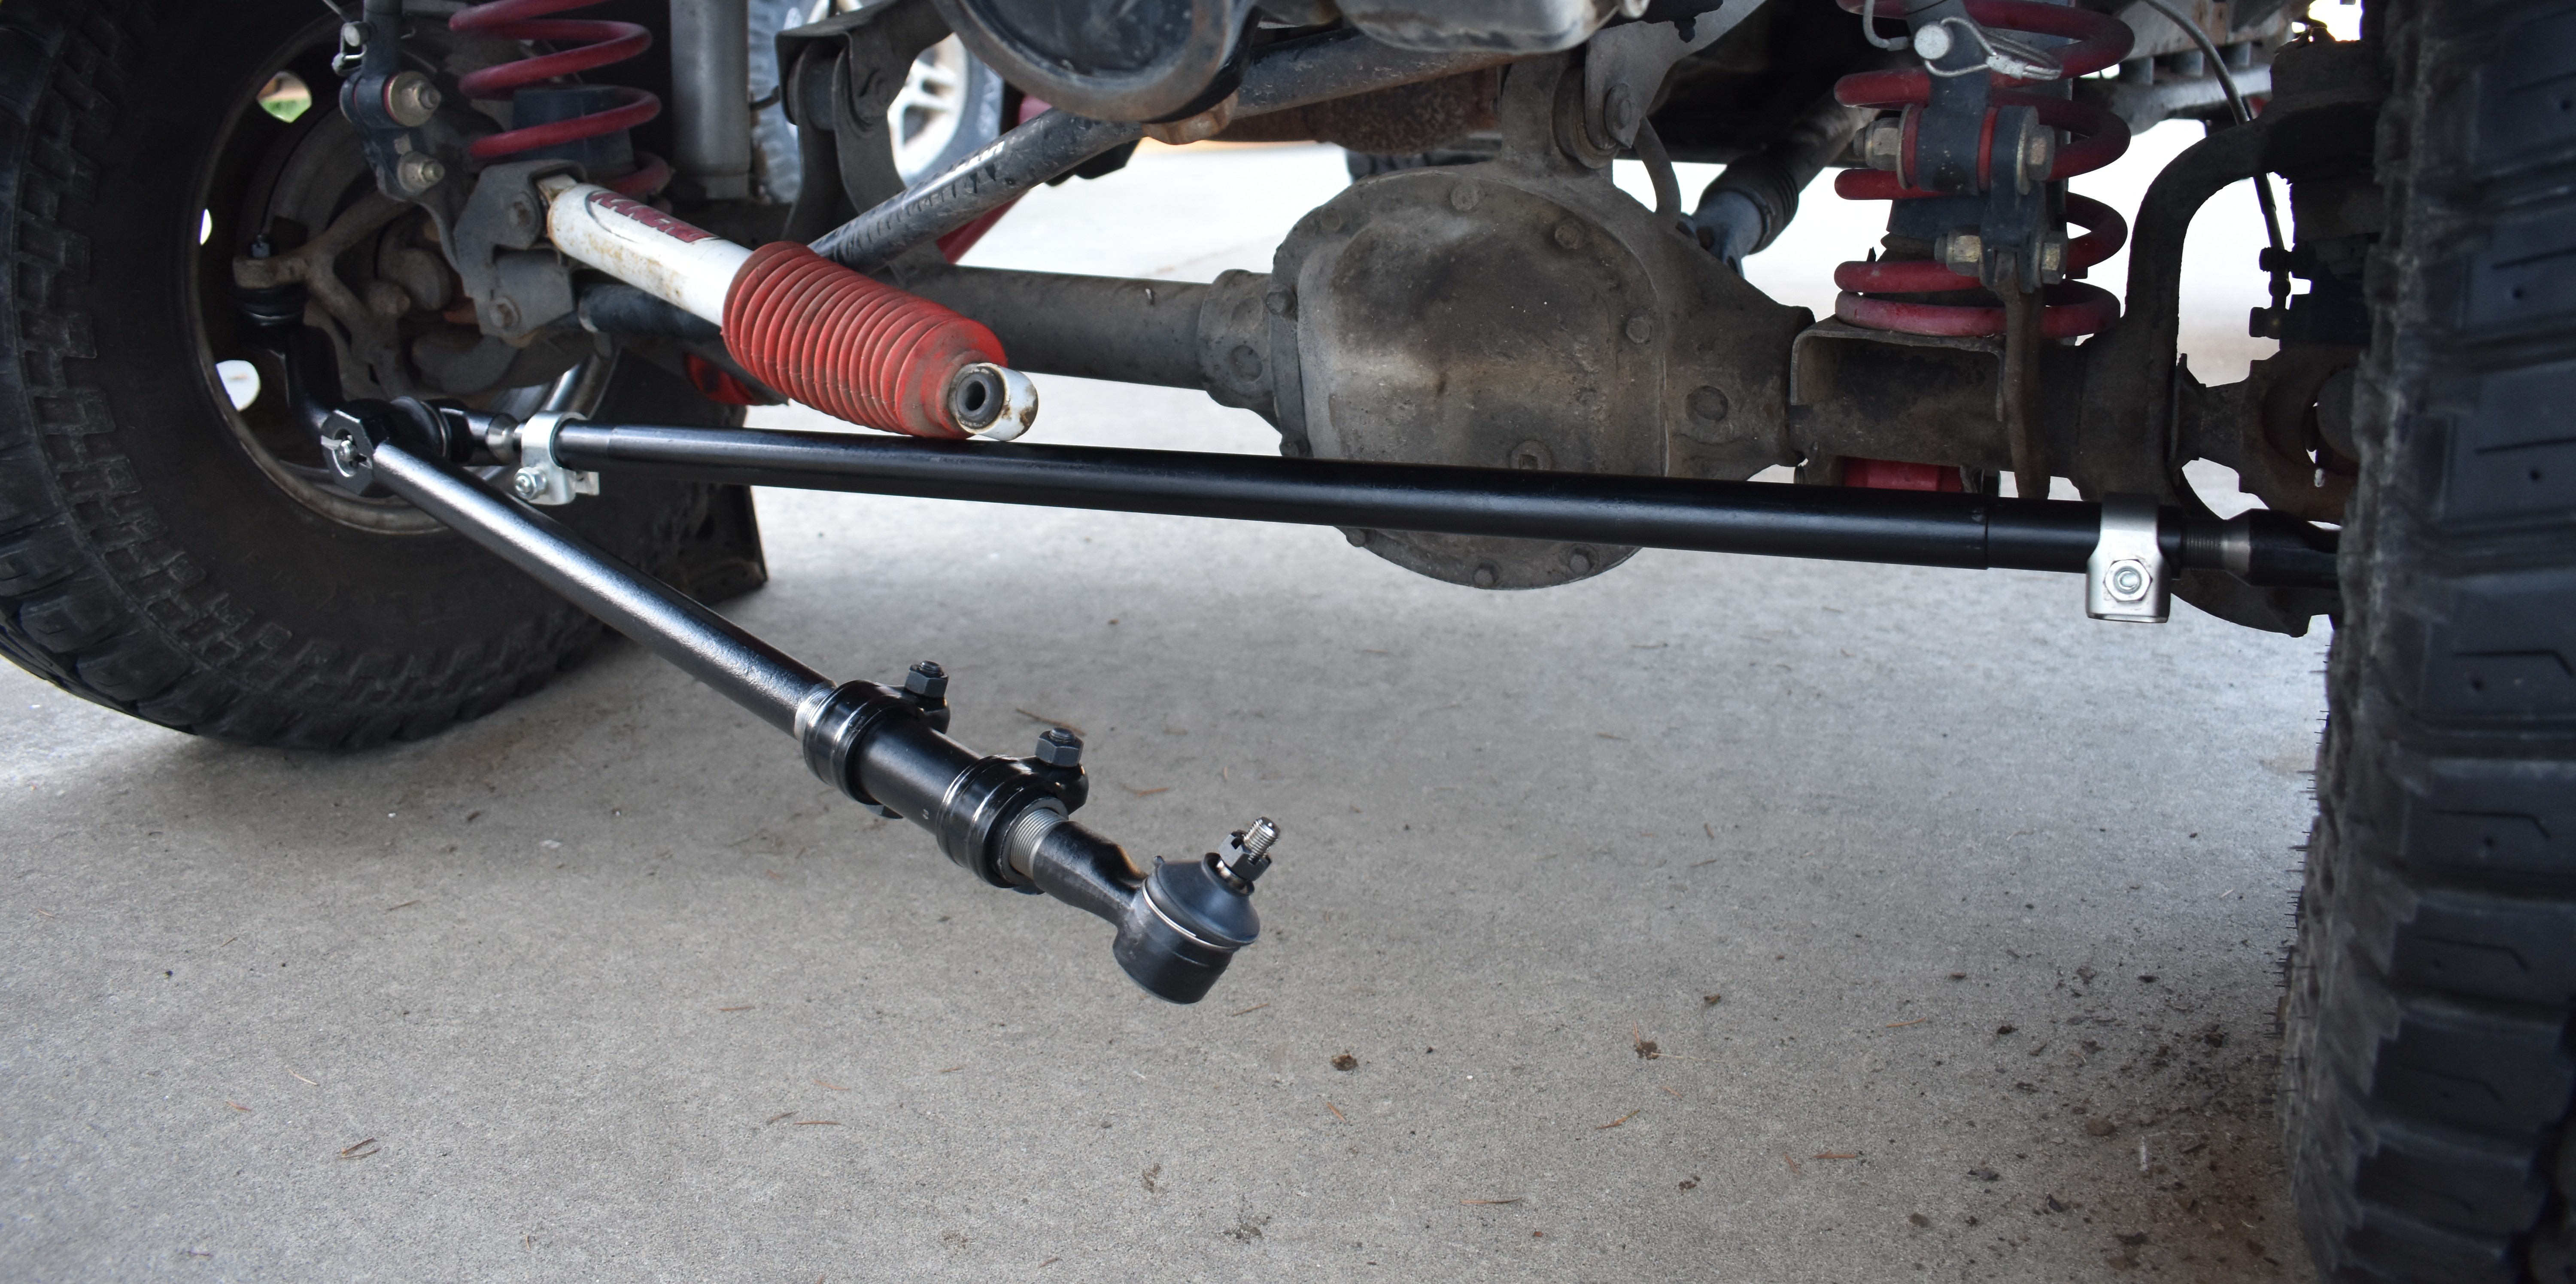
Now that’s a good looking before and after!
The review:
That was a good few hours of work, but now we can enjoy all the benefits this truly “bulletproof” upgrade offers.
How does it do on the road? It made quite the difference! During our “shakedown” test drive immediately after finishing the
install, the difference was very obvious, the steering had 0 play, and felt very smooth. We didn’t go far or fast, but we were
immediately impressed with this upgrade. Keep in mind though, we were coming from shot steering components, and we also changed
the pitman arm which may have made a difference, so your mileage may vary if you’re coming from good parts. Overall, we think we
won’t regret the upgrade, even if the steering felt the same, the strength of the upgraded rods is well worth it. That said, this
upgrade is hardly required, but it's still an excellent upgrade for those that need a bit of extra strength or just want a nice
solid steering upgrade.
As for the install, it was a piece of cake, even with old dirty parts and no power tools. It took a little time, there are a
lot of steps you have to follow, but none of it was difficult, though some of our castle nuts didn't seem to be cut straight
and we had to wrestle some cotter pins, and we couldn't get one of our grease boots to rotate away from the brakes, but that
was the worst of it. If you have a fairly complete set of tools, you could probably do this yourself, turning wrenches is half
the fun of owning a Jeep! Do take care to get the Jeep well aligned, tightened and situated before you take your first test
drive, driving without steering isn't a great time.
Cons: Honestly, if there are any cons to this upgrade over our previous setup, we haven't found them. It's a bit pricey compared
to stock, but the upgrade is well worth it if you're using your Jeep a lot.
Alright, today we took the Jeep to get its alignment, and got a bit of highway driving in on the new system. This upgrade does not disappoint,
and the steering feels very solid while driving now, there's very little wobble, vibration, or play in the steering wheel anymore. We couldn't be happier with our new steering.
We expect the upgrade will help the Jeep feel a bit more stable off road on rough terrain, and are looking forward to taking it out.
We'll make sure to include an update in our next article or review about how it holds up over the coming weeks, and how it does offroad when we can get out. We have no doubt the
upgrade will meet or exceed the performance we've come to expect from the stock equipment, and we're sure we'll be happy with the upgrade down the trail.
The Breakdown:
Now that you've seen the install and heard some of our thoughts, lets break down our rating:
We give this upgrade an overall score of 10/10. This product is tried and true in the off-road community, and we think it would make a great addition to any Jeep.
That said, there are some small things that we wish were better.
Price: The cost of the kit feels fair, you do get a lot, but at twice the price of stock parts, it's a pretty hefty price. 9.5/10
Sturdiness: Oh man, this is where that twice-the-pricetag comes into play, this kit is no joke, and is in our opinion the beefiest
upgrade kit on the market. It's as thick or thicker than any other stock-style upgrade we could find, and one of the few upgrades made from solid shaft instead of DOM tubing.
This kit really does earn its reputation, and explains its own price the first time you pick it up.
We really like how the stabilizer shock bracket leaves the drag link solid with no extra through holes. 10/10
Quality: We had a bit of funkyness in our kit, castle nuts that didn't quite align with the cotter pin holes, and we had a lock washer
snap on us during install, but all of the main parts are crazy well made, and seem very solid. 9.9/10
Installation: Very easy, 99% of the job was a one-person job, with just a little assistance at the end to help you set the stabilizer
and alignment properly. Other than a few tiny snafus, the install was great, and the instructions were quite detailed. 10/10
Warranty: This kit is backed by a 2 year limited warranty. Not too shabby for a car part, especially something so movement intensive as the
steering linkage, though we do love to see longer warranties. 9/10
Support: We haven't had to deal with RockJock support yet, their documentation covered more than everything we needed. The online support in
Jeep forums and sites for this kit is overwhelming, you will always be able to find answers and support with this kit. 10/10
This kit is crazy nice across the board, and earns a Golden Gear overall from us, we just can't find any serious cons to this upgrade!
If you need new steering components, or are looking at upgrading anyways, we think it's definitely worth considering.
Thanks for reading our first install and review in many years, we appreciate all our readers, and hope you enjoy this content and find it useful. -Dirt Road Magazine
The Update:
We took our TJ out to Evans Creek ORV Park and tried our new steering off-road. The difference is incredible, zero bumpsteer whatsoever, and our alignment finally stays aligned after hours of bumps and rocks. We are very happy with this upgrade, and are glad we put it on one of our vehicles. It will likely become a Dirt Road standard-issue item for our project vehicles as their steering goes out.
Currie®, RockJock® and Currectlync® are registered trademarks of RockJock 4x4 by John Currie. Dirt Road Magazine is in no way affiliated with RockJock 4x4 by John Currie. All other trademarks are the property of their respective owners.